Several people have asked how I get a copyright on my photos. I’m going to show you two easy ways. The first way involves uploading your photos to a free photo holding site such as Flickr. This way is best for those who don’t have photo editing software on their computer. The second way is using Adobe Photoshop (my personal favorite). To view any image in this tutorial better click on it to enlarge it.
How to copyright your photos using Flickr:
1. Upload your picture to your Flickr account. On the picture’s page click on “edit photo” which will be above the photo. The photo editing software called Picnik will load up.
2. On the tool bar above your photo choose the text option. (see the red arrow I inserted here)
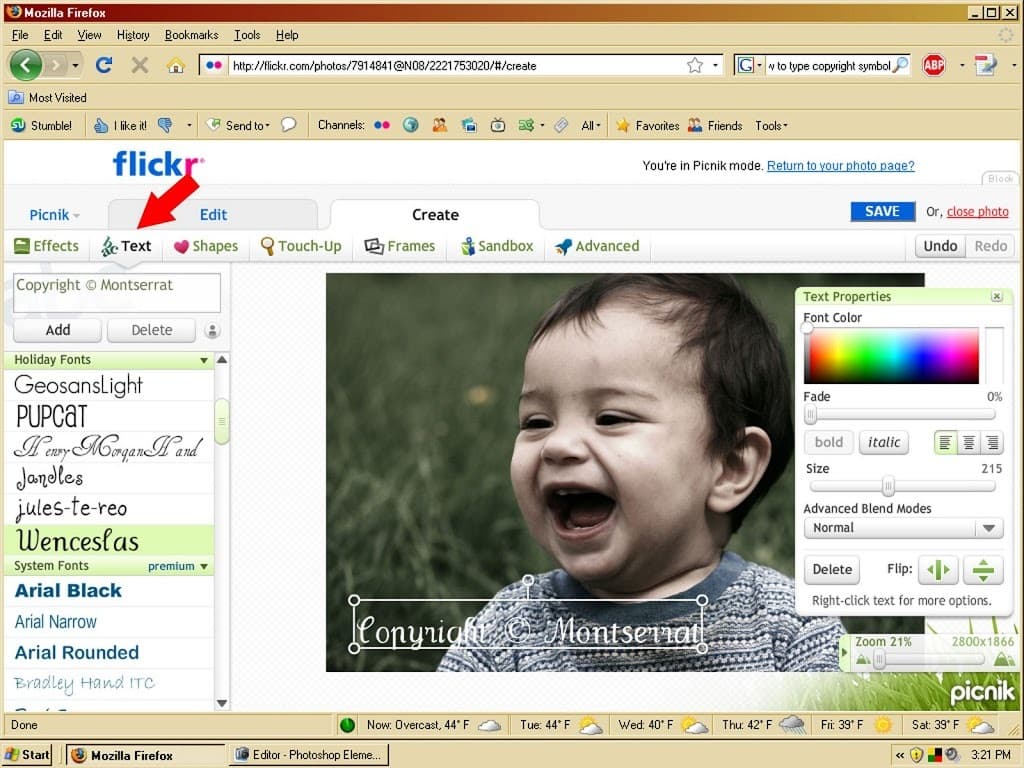 3. Type in the text you want. In this case I typed in Copyright © Montserrat. To get the copyright symbol you hold the alt button down while typing in the numbers 0169 using your number pad (for PC’s) or for Mac users hold down the option button while typing g. If that doesn’t work for you see step 5 below.
4. In the text properties box you can change the color of the text, the opacity (fade option), the blend mode (the red arrow is pointing to the overlay mode which made the text like a watermark), and even flip the text sideways if you prefer. You can move the text to any part of the photo by clicking on the text box itself and dragging it around. To adjust the size click on the circle at the corners and drag.

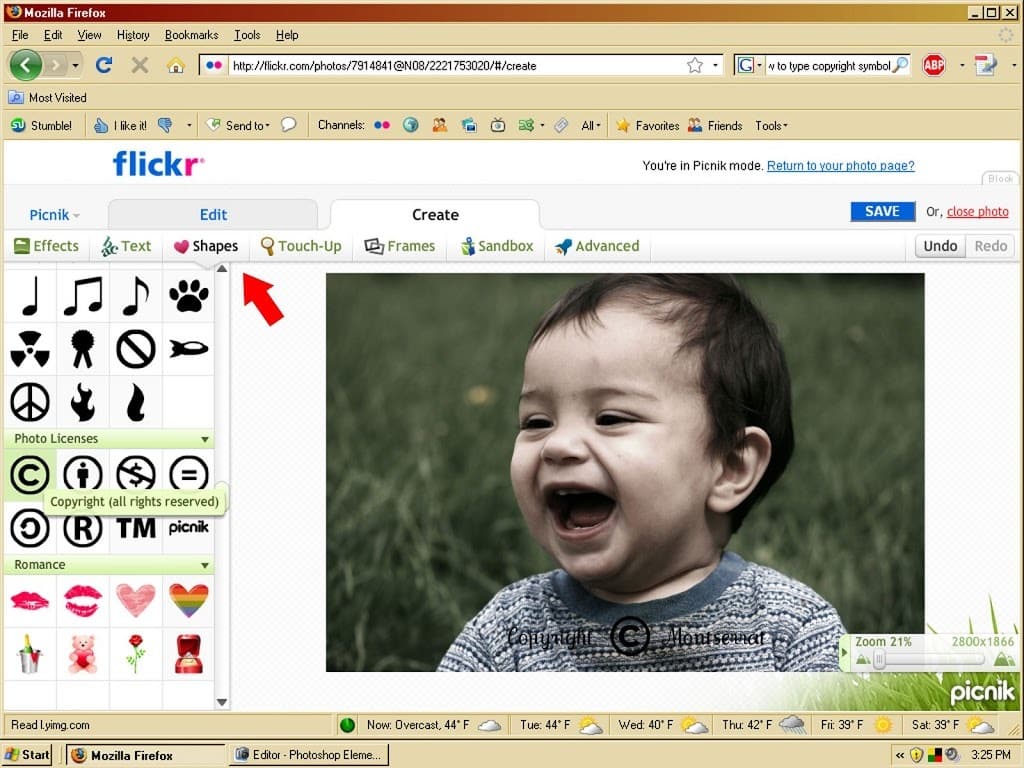
5. If you can’t seem to type the copyright symbols no worries! Click on the shapes tab in the toolbar above the photo. Scroll down until you get to the Photo Licenses section. Select the © and drag it where you want it in the photo. Then go back to the text box and adjust it to fit around the ©. Here I had to enlarge the text a little and add several spaces between the words.
6. When you are happy with the results save your photo. It is now ready to insert into your blog!
I hardly ever use Picnik but that’s because I have Adobe Photoshop Elements. I created a brush with my copyright that I add to the photo after I’m done editing it. Here’s how to create a brush.
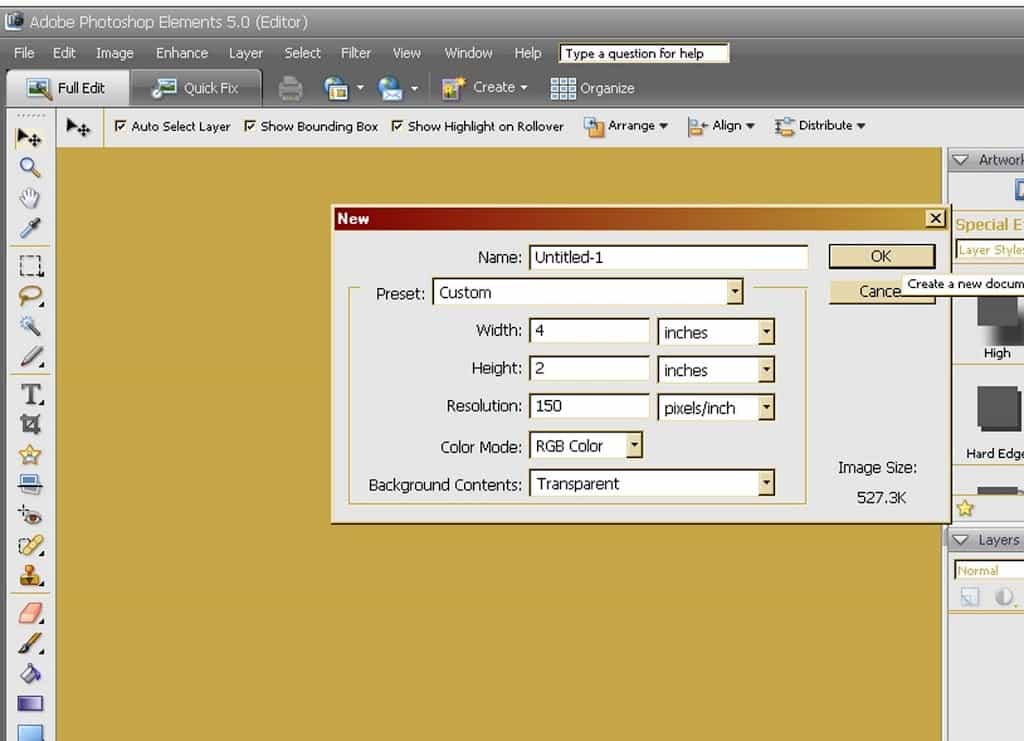
1. Create a new document making sure your background is transparent.
2. Choose the shape tool on the side bar and then click on the custom shape box at the top. (see the red arrows)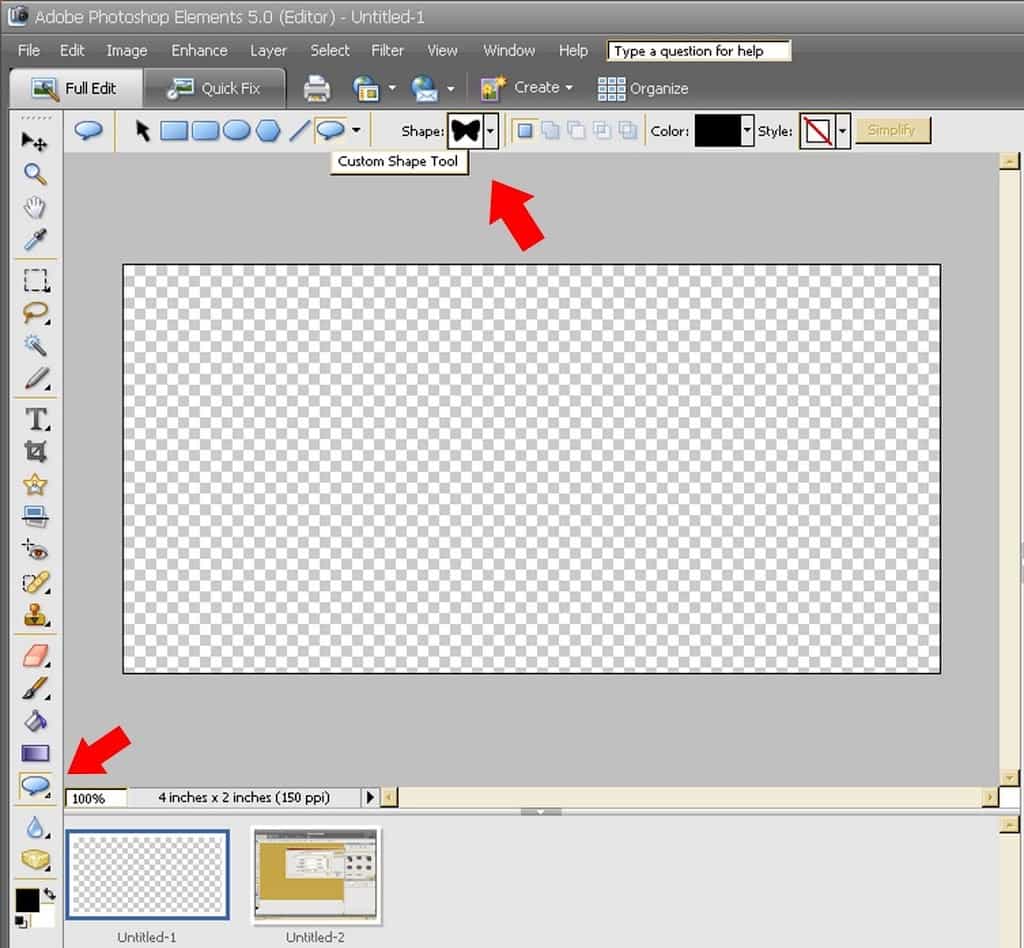
3. Scroll down through the shapes until you get to the © symbol. Click on it to select.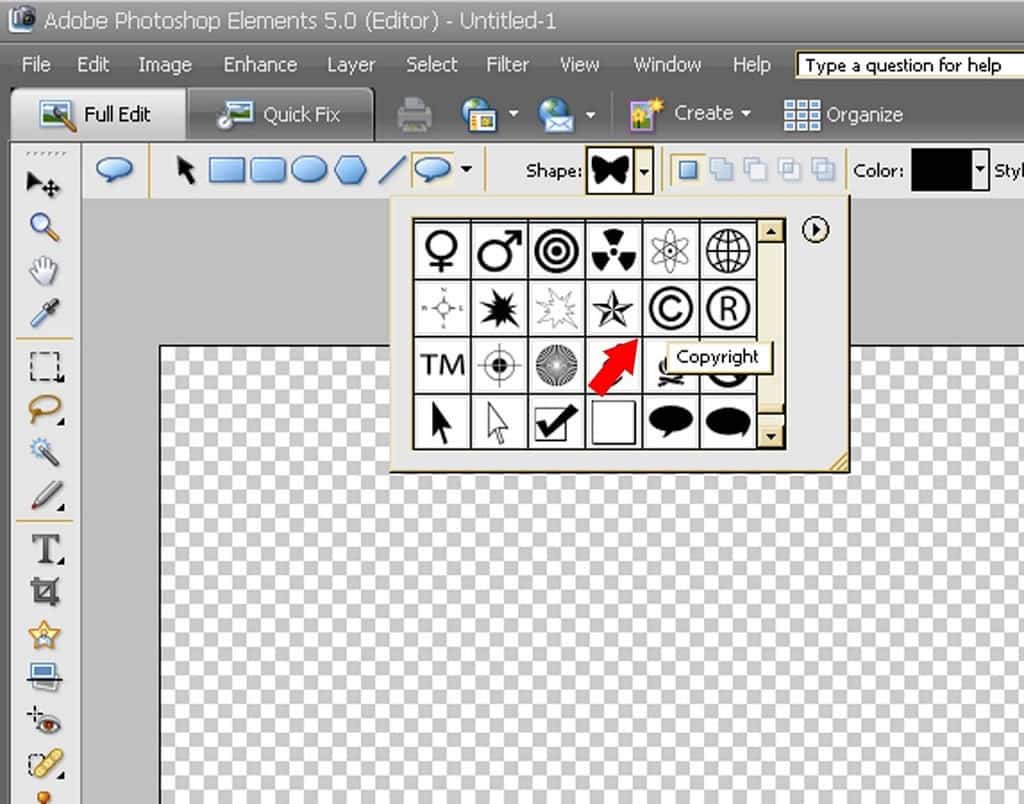
4. On your blank page click and drag your cursor creating the size of the © you want.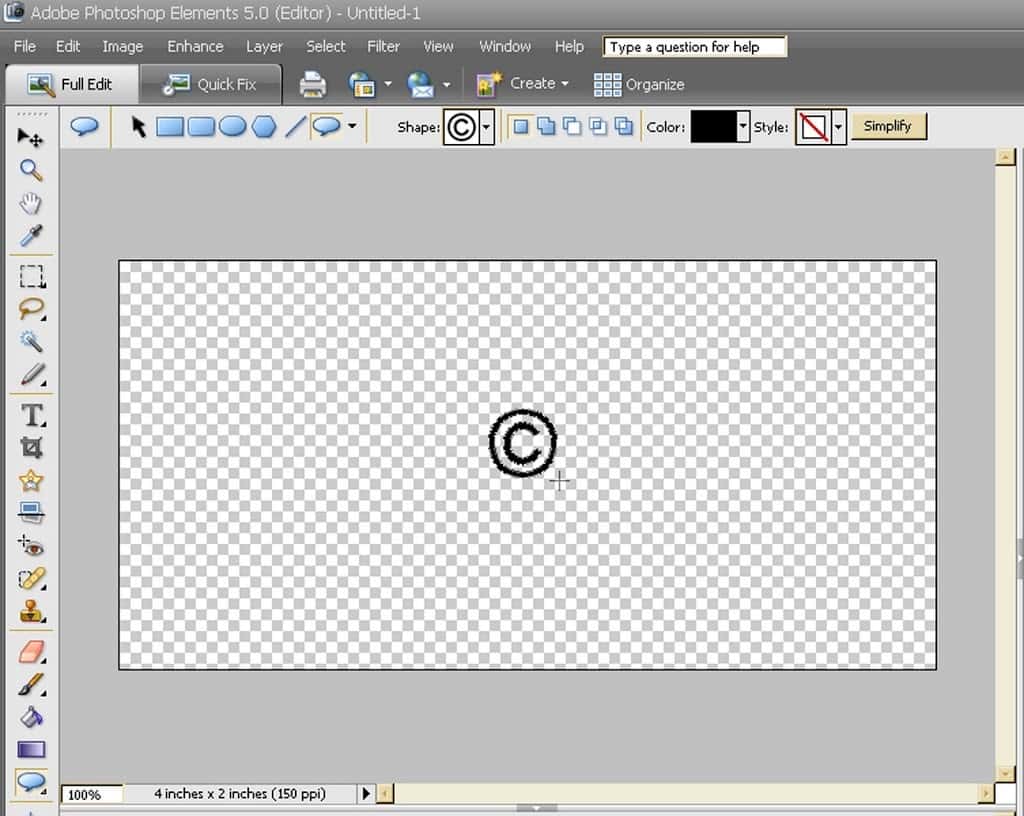
5. Next add your text adjusting the size and spacing so it fits around the © symbol.
6. Now select the rectangular marquee tool.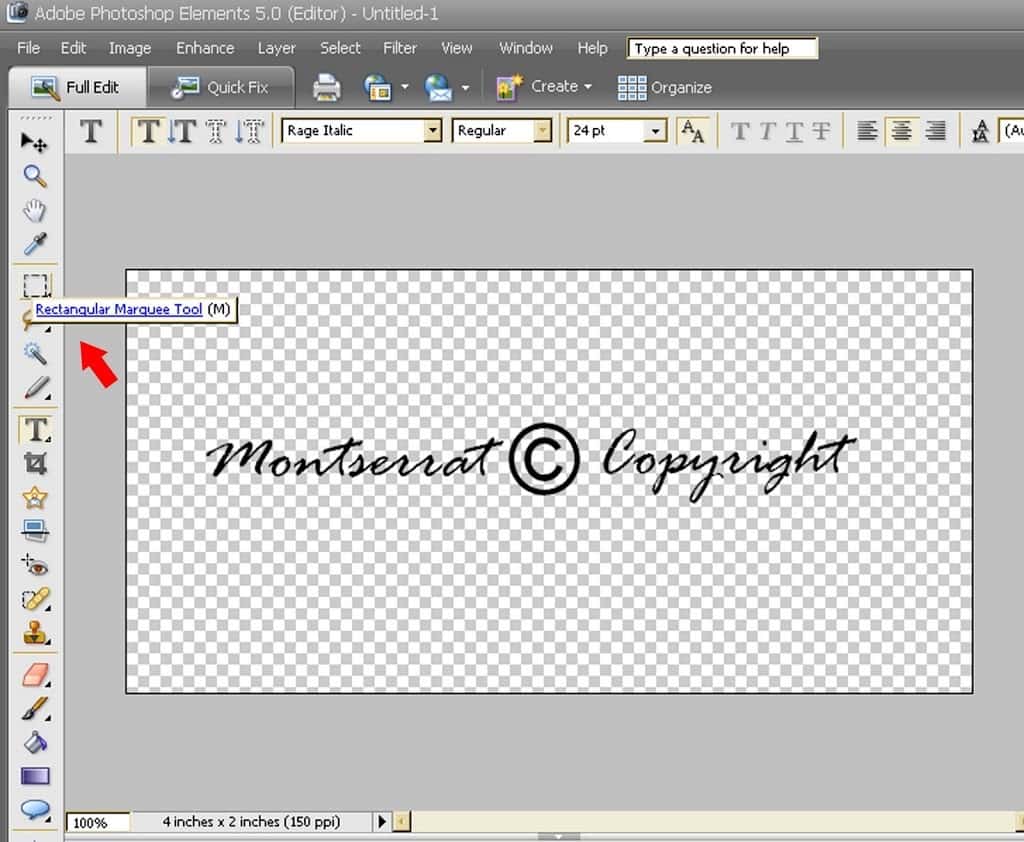
7. Drag a selection around your text.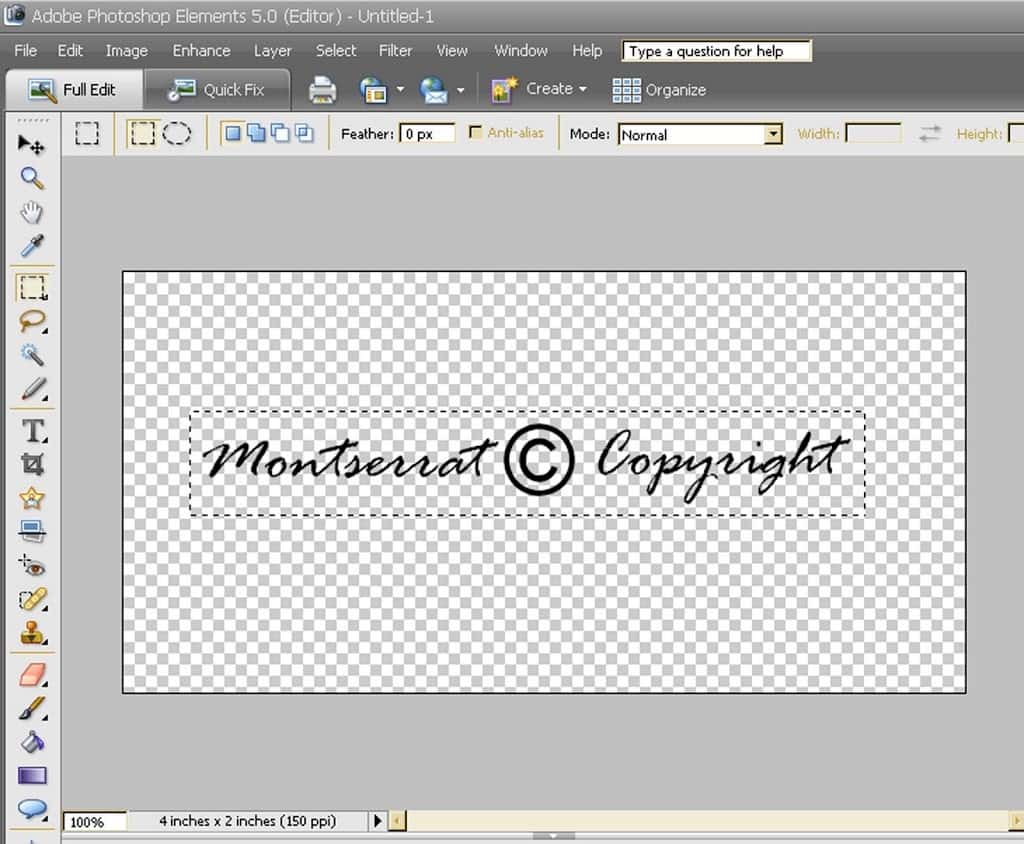
8. With the area selected click on the edit tab and click on the Define Brush from Selection option.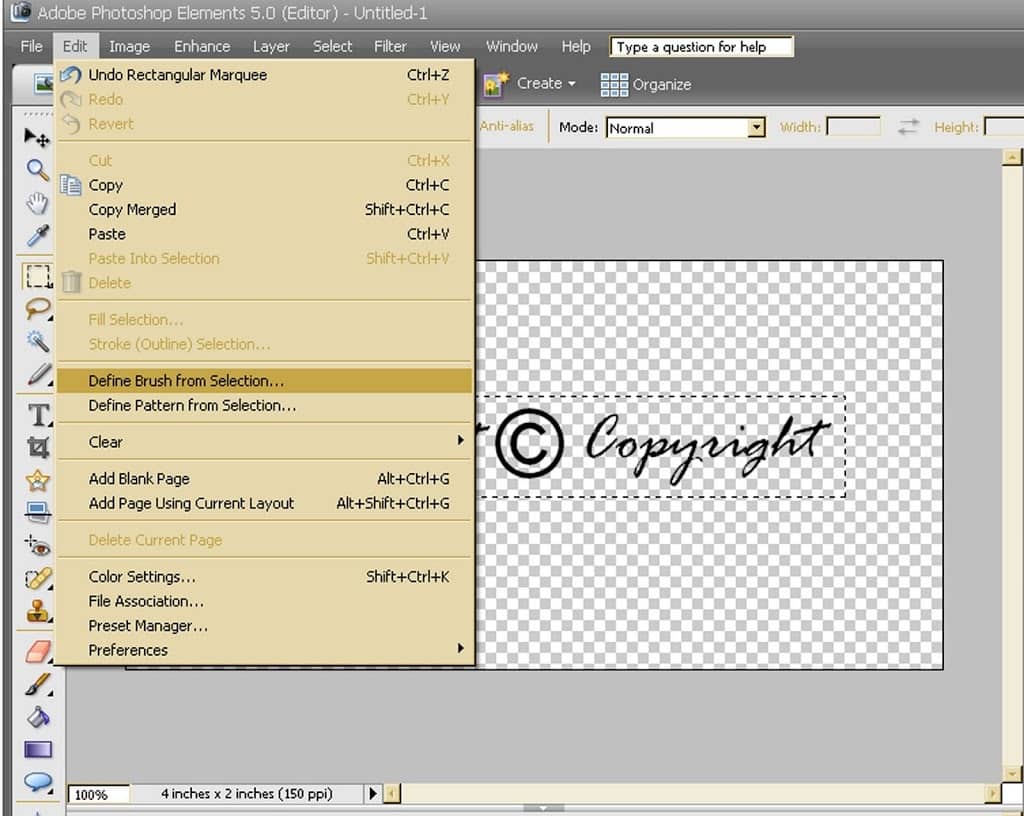
9. Name the brush whatever you want. The image on the side (where the red arrow is pointing) shows what your brush will look like. Don’t worry about it looking all squished and out of whack! Click Okay. The brush is now saved in your default brushes.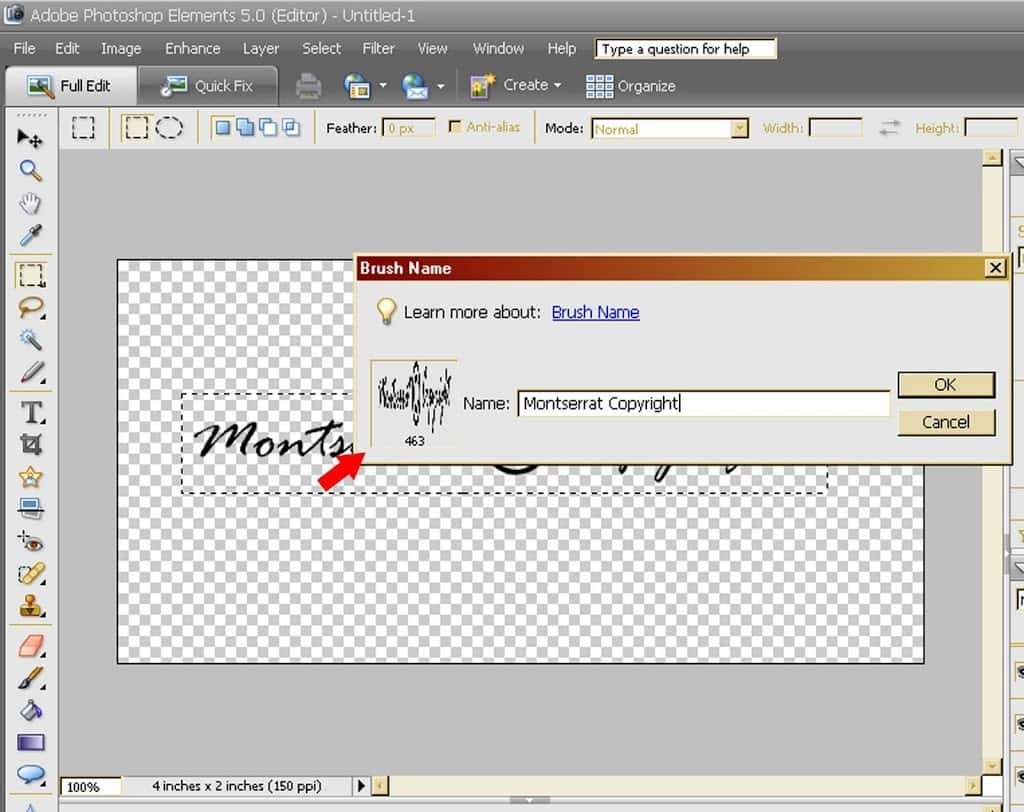
10. Open up the photo you want copyrighted. Create a new blank layer. Select the brush option. Scroll down until you get to the brush you added. It will usually be the very last one.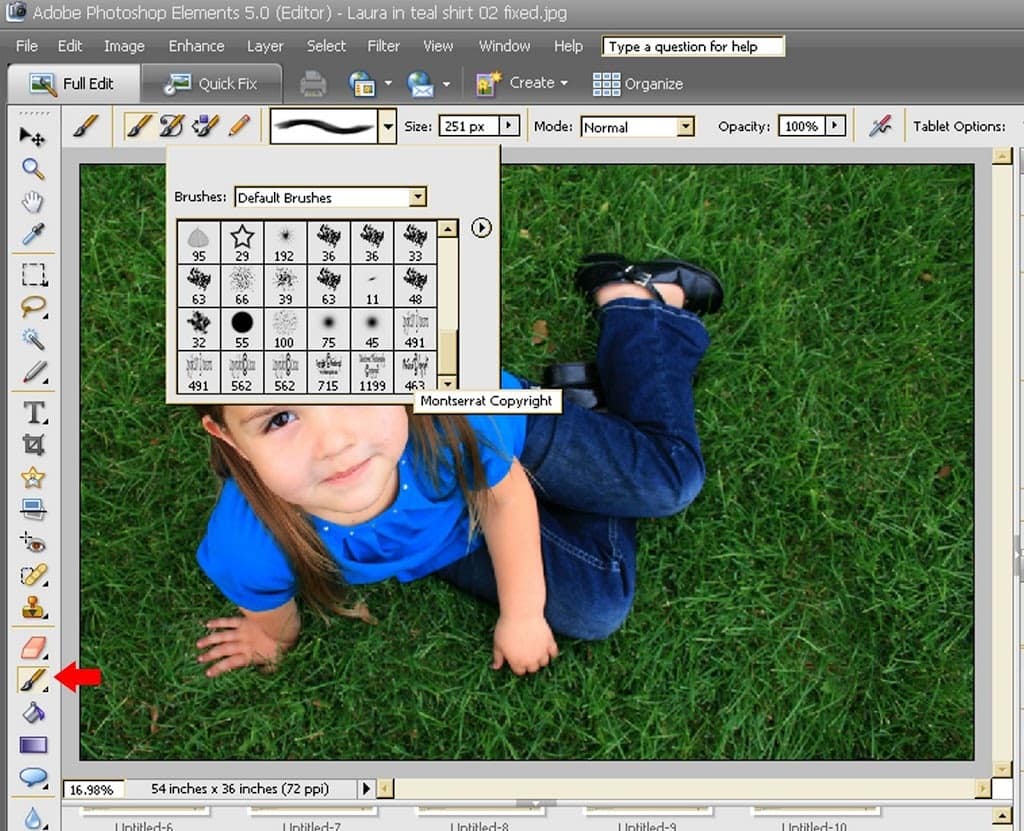
11. The brush will look like an outline (see red arrow). It moves as you move your mouse. If you find that it is too big or too small adjust the pixel size of the brush (see above the photo in the middle).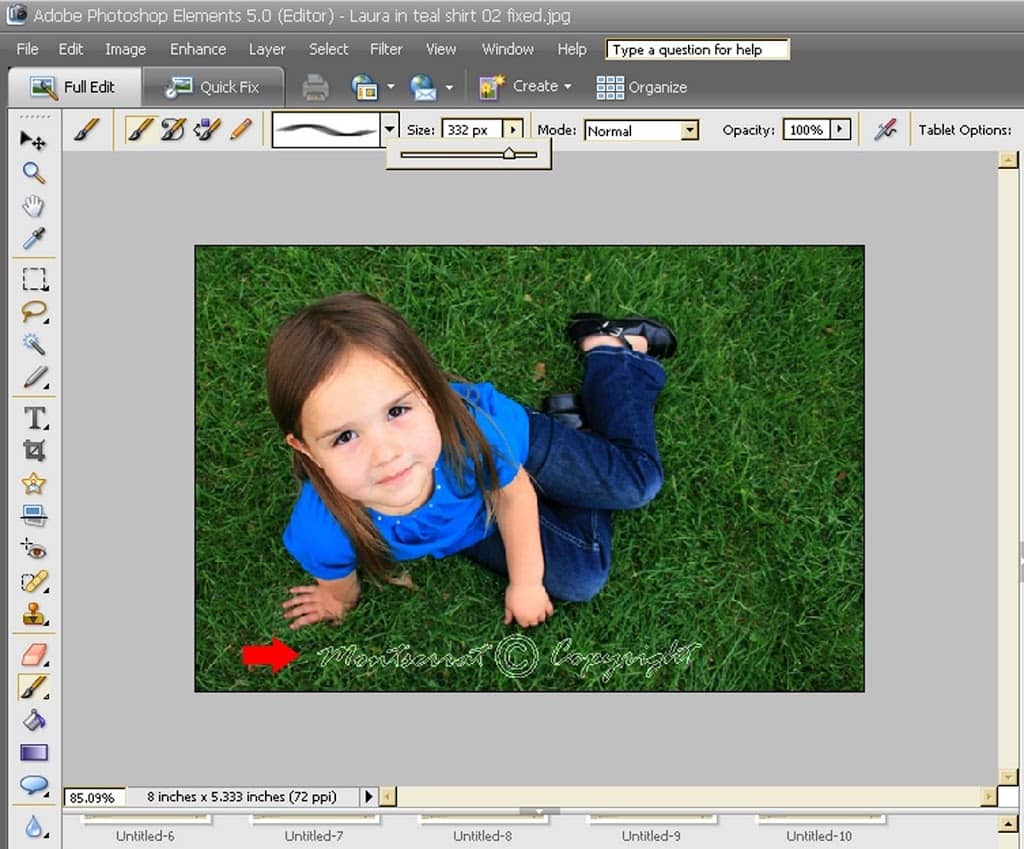
12. Click ONCE on the photo. This “stamps” the brush onto the photo. It will be whatever color you have chosen in the color box.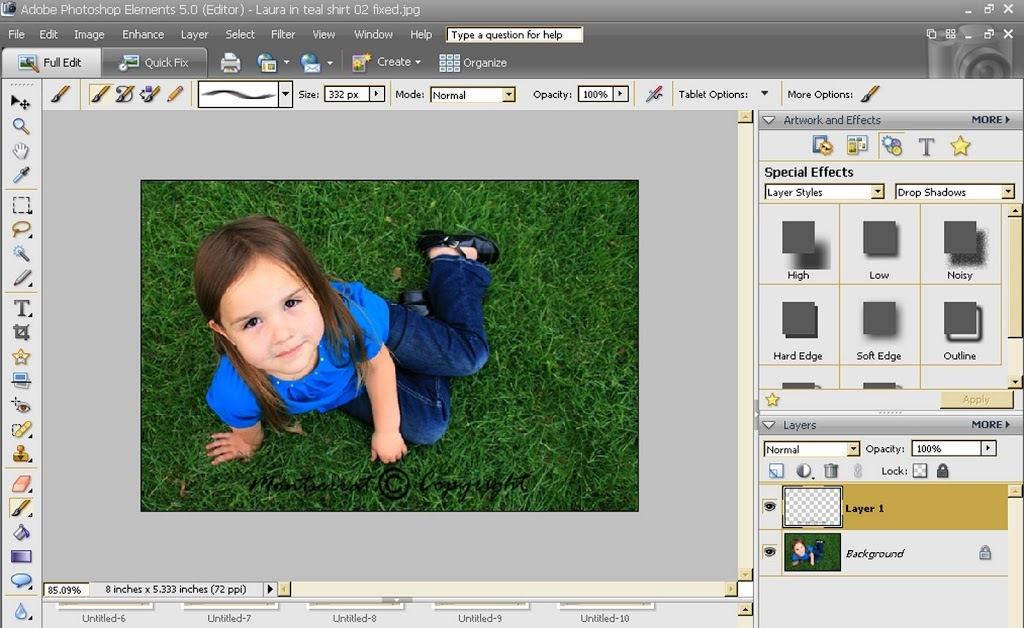
13. If you find that the copyright is too dark adjust the opacity until you get what you like.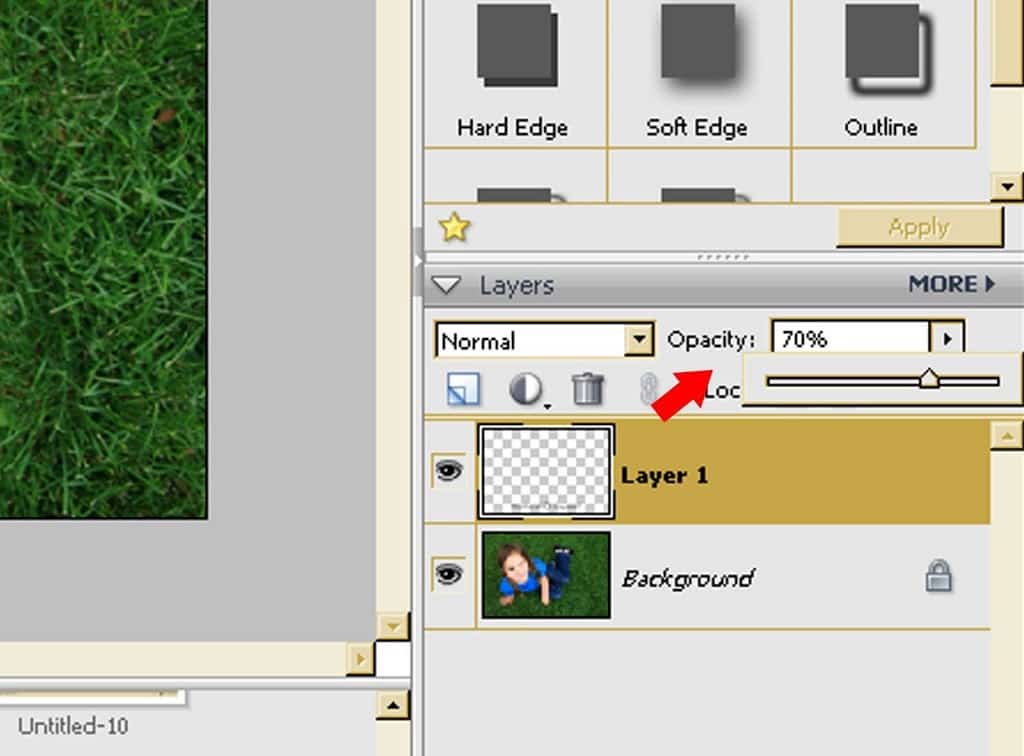
14. TADA! You have created a brush that you can use every time you want to copyright a photo. From here on out all you have to do is “stamp” it on. Easy.
 Copyright with 100% opacity
 Copyright with 70% opacity
Thanks for posting this tutorial. A friend of a friend had her daughter’s photo show up in a magazine without her consent…perhaps stamping it “copyright” would have helped deter them.
Dah…of course! Just write it on there. Hello, Meg. 🙂
Anything great bloggy tip! Thanks so much!
Thanks for helping me out with that~!
great tutorial!! I just got photoshop elements for Christmas and I barely know what to do on there!!
Thanks so much for posting this!
Great tutorial – I’m looking forward to more photoshop tips.
I have Adobe Photoshop … thanks for the tutorial.
Wow…I might have to get my hubby’s help with this! It seems like it’s a tad above me (as most computer things are 🙂 )!
I just use Paint Shop Pro. I’m a closet Paint Shop Pro junkie (used to have a badge for PSP Addicts when I was a member, and still had used blogger. Someone said they were a PSP addict too. I had to tell them—it’s not the game console, it’s Paint Shop Pro. But ya know, now that my hubby has a PSP–I have to tell ya, that thing’s fun!). It’s done much like the Photoshop one. But I think it’s more fun 😀
Thanks heaps..always wondered how I could add that feature. And it was great of you to provide 2 methods.
I love your tutorials. You do a really good job.
Thanks for posting this!
How’d you get so savvy anyways? Aren’t you suppose to be a red neck? ha ha ha
I guess if you can figure out college life at 15, you can figure out anything!
Keep the posts coming because they are of great use
Thanks!
Now can I ask how you got the cool tabs under your blog header?!? I have been trying to figure that out and I haven’t found a good tutorial yet!
Cool! I just got a copy of Photoshop for Christmas and I’ve tried doing the copyright thing a couple of times, but this is much much simpler! I knew there had to be an easy way! Thanks for the tip!
Thank You!
Your tutorials are always easy to follow and full of detail.
I hope to see many more photoshop tips or fun tutorials from you
Does this make them legally copyrighted? That would make it a lot simpler than I thought! Thank you in advance! 🙂
I just wrote it on my list to learn to do this. Thanks for being there for me when I need you!!!
Thank you! I finally made my copyright tonight. Now I just need to get it on all my photos. . .