WARNING – The following tutorial, if followed, can be very addicting. Proceed with caution!
Supplies:
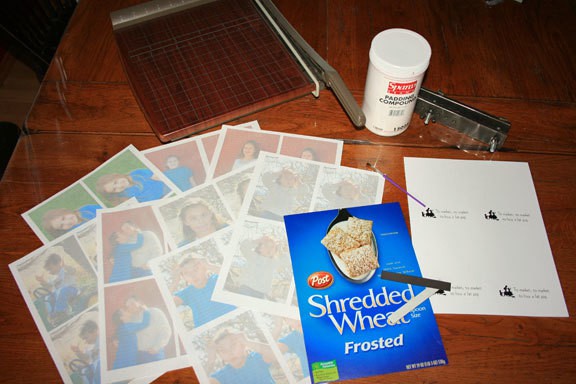
Paper – any kind, scrap, colored, personalized, etc. Here I’m using some family photos printed at 40% opacity and a fun design for my grocery lists.
Paper cutter
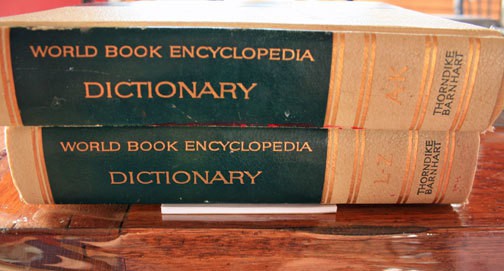
Heavy Books, binder clips, or specially made clamp
Paintbrush
Thin Cardboard – old cereal boxes work great
Adhesive magnetic strips (optional)
Padding Compound – I use Sparco Padding Compound in Red. They also have white. The 1 quart bottle I have will seriously last my lifetime.
** A note about the padding compound. This is the stuff you find on regular notepads from the store. It’s kind of rubbery when dry and allows you to easily tear off a sheet of paper. I have seen on other sites where people have used regular white glue instead of the padding compound but it makes the edge very stiff and the paper hard to tear off cleanly. I have also seen rubber cement used but that doesn’t seem to hold all the paper very well from my experience, plus it’s the color of boogers. Not very appealing if you ask me!
Step 1 – Cut all your paper and cardboard backing to the same size. Mine are about 5.5 x 4.25 inches – a sheet of paper cut into fourths. You can make the notepads whatever size you want. Cutting a paper lengthwise into thirds would make a nice long pad for grocery lists. My notepads range from 30 – 100 sheets.
Step 2 – Stack paper and cardboard backing, tamping the side you are applying the padding compound to down on the table so the edges all align evenly. Since you are using your own paper cutter and not a professional cutting machine don’t worry if the side edges don’t match up correctly. This is a handmade product!
If using heavy books, place the stack of paper on a flat surface and very carefully place heavy books on top making sure you are as close to the edge being painted as possible.
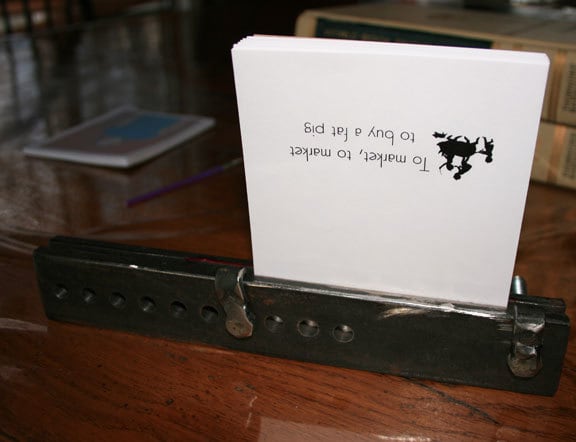
Mr. Ferrero Rocher made this special clamp for me. It is adjustable to accommodate various sizes. You can also use binder clips along the side edges to hold your paper stack together.

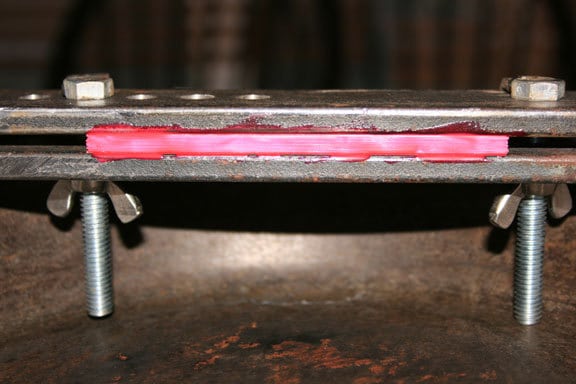
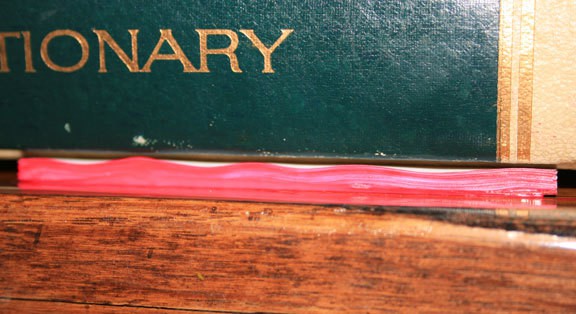
Step 3 – Paint the padding compound onto the edge of your paper stack. The thicker you make it the longer you have to wait for it to dry and the greater chance you take in having the compound run down. I apply two lighter coats, waiting for the first to dry before applying the second. The red padding compound is actually pink in the bottle but it does turn red when it dries.
The following two pictures show you what it looks like after 15 minutes of drying. The clamp does a much better job of keeping the paper from crinkling and separating.
 You can see I got padding compound on the edges of the clamp in the top photo and on the table in the bottom photo. That’s okay! It will peel right off. I have made several notepads at once stacking them right on top of each other. When the padding compound is dry you just peel the pads apart.
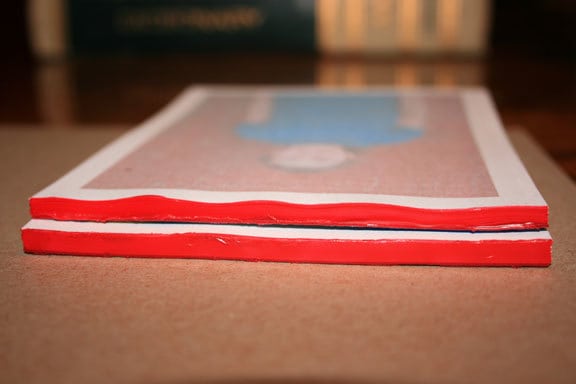
A comparison of both notepad edges.
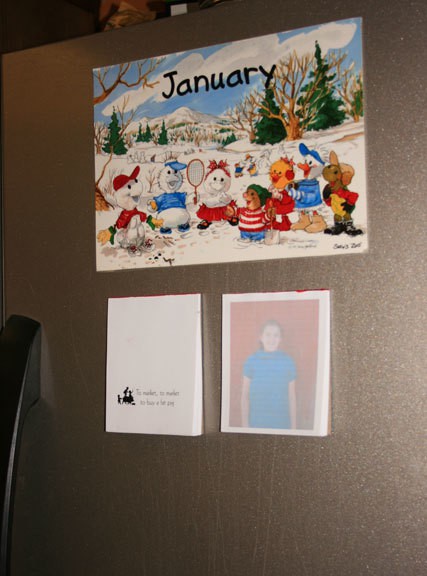
Step 4 – If you want your notepad to hang on the fridge, peel the protective paper off the adhesive magnet and stick the magnet onto the back of the notepad.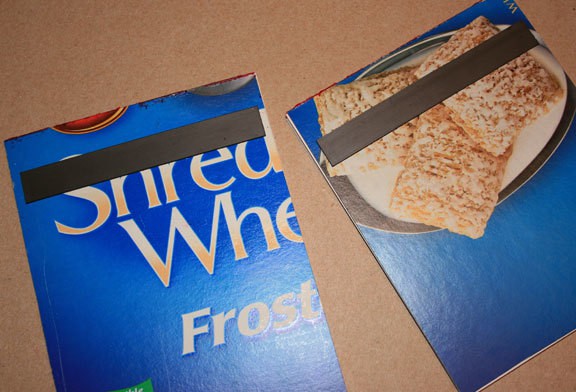
TADA! You are done.
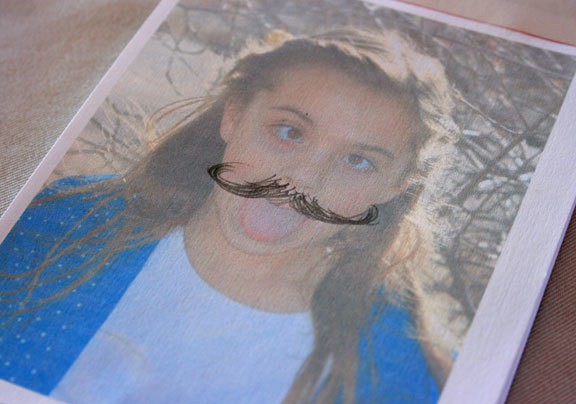
 Of course, when adding your family photos to personalize your notepad you run the risk of this happening…

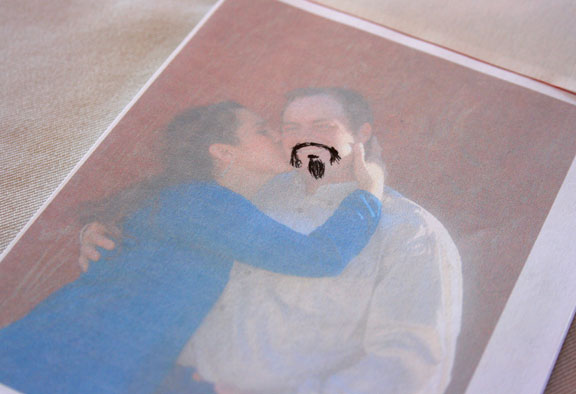
And this…
My brother-in-law did this…
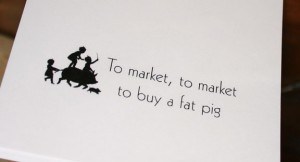
Here is the close up of one of my designs. If you click on the image below you can download the pdf file to make your own.
Any questions? Ask away!

What a fun idea.
These are great! They would make really great gifts. I didn’t realize that they made a padding compound. Now, I’m going to have to go look for some. lol!
🙂 Cool!
I love this!
Oh, man! One more thing for me to be addicted to. I know I’m going to be making tons of these. Good thing everyone in my family are all list makers. They’ll appreciate a cute notepad for their birthday!!!
Thanks for the tutorial!
So cute makes me want to be crafty.
I think this would be a super cute Christmas gift!!
I love this idea!! Thank you for sharing!
What a great project!! Now if I only had the time to try it! Ha…
Love the grocery list notepad……very original.
Definitely stumbling this–what a great idea!
I can’t wait to make these! Valentine’s Day, Mother’s Day, visiting teaching gift…how fun!
what a great idea!! thanks for sharing…have to try this one!
How freaking cool is this!?!?!
Thank you so much for sharing.
fabulous! The girls and I will be all over this!
I can’t wait to start this addiction
Those are wonderful!! What a great idea…I’m always in need of those handy note pads. Thanks for sharing.
Your shopping caption is adorable!
I had to laugh at the “color of boogers” comment. Thanks for posting this–its a great idea for handmade gifts.
Love love love the funny faces. I bet they would make great quite books for the kids to doodle on. Thanks for the fun idea.
Oh, this is wonderful! And I’m so glad that you showed the 40% opacity pictures. That just opens up a world of possibilities that I probably wouldn’t have considered for a while. My husband says I’m dangerous in the office supplies section, & we joke that I’m not allowed to go IN a whole office supplies store… I am SO looking forward to this!!
This is awesome! Where do you get the padding compound?
Best tutorial I’ve seen in ages! Absolutely love it!
Thank you for posting this!! Now I have Christmas gifts for EVERYONE next year 😉
You’re a good thing! I’m featuring this on my Sunday ‘Good Things Out There’ post! Come get your button on Sunday!
I’m totally doing this. Thanks for such a great tutorial!!
Rocks in my Dryer sent me.
I think this is a great idea, but also ask, where do you buy padding compound?
You get the padding compound here.
If you click on Sparco Padding Compound in the supplies listed in the tutorial it is also a link that will take you to the site to purchase the compound. 😀
That is a really cool idea!
I showed the cool vise thing to Andy & told him I want one too, but he’s not sure how to make it. Is Mr. FR willing to do a tutorial? Are your flat metal bars something that you found already drilled? Do tell, please!
Me again–I’m making these for my Mom & MIL’s birthdays this year. I ordered the padding compound from your source yesterday and its already here! I can’t believe it!
Off to have some fun…
Those would make great stocking stuffers too, although yeah I don’t think I could put a picture of a family member. Mine would have a field day and go way beyond the simple penned moustache…maybe the family dog woudl be a better idea lol
Help! Computer is not my first language. How does one obtain degrees of “opacity” for these nifty galifty scratch pads???? Is it somewhere in Windows? or is it a separate program altogether? Any clues you could give would be appreciated. Thank you.
Diane of the north
This is a wonderful tutorial. I have some really old compound, like 40 years old that is still good- weird, right?
I do use regular white glue when I make notepads out of old business cards. The pages just snap off when I bend them back. It is harder to rip them off using the compound because the pages are so stiff.
Thanks again.
I’ve seen these before and always wondered how they did it. Thanks!
Beautiful Tutorial! Thank You!
This is going on my list of Christmas gift ideas. It goes along with the art portfolio that I’m planning to make my daughters & nieces.
I really appreciate your work. This post is really handy and useful, I am sure people will get help from this. And thanks for sharing.