I’ve been asked a lot how I created the navigation menu bar below my header. This first post will show you how to create a simple one just using text. The next post in the series (next Friday) will show you how to create graphics or images to use like I have in mine.
Step 1. You need to make sure you are able to add an element to your header in your Blogger Layout. To check, open up the edit html screen in blogger. Scroll down the template until you find
<div id=’header-wrapper’>
<b:section class=’header’ id=’header’ maxwidgets=’1′ showaddelement=’no’>
The easiest way to do this is to actually press Ctrl F to open the find box, type in showaddelement (all one word), and it should be the first one that comes up.
Change the word no to yes. This will allow you add any elements, widgets, etc. to your header. Also change the maxwidgets number from 1 to 3. Click Save Template.
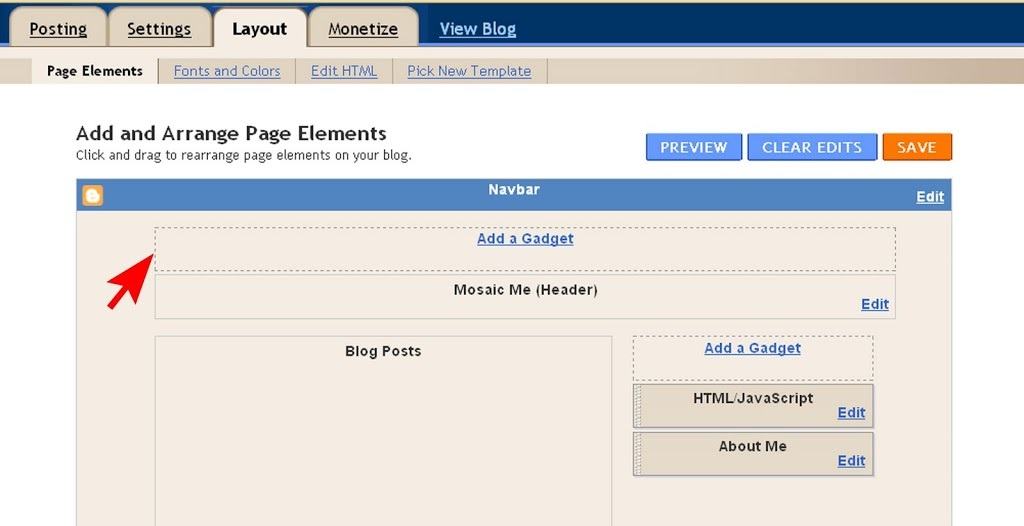
Go back to your Page Elements page. It should have an “Add Gadget option” above your header like this:
Step 2. Go back to your edit html template scroll from the top until you find
/* Header
———————————————–
*/
Right under that add the following code:
#newnavbar ul li{
font-size:100%;
list-style-type: none;
display:inline;
padding:0px;
margin:10px;
border:0px solid;
}
Click Save Template. You won’t see any change to your blog just yet. We just told blogger we want a navigation bar by the header. Later in the post I will explain what everything in this code means and how you can customize it to your blog. For now just leave it like this.
Step 3. Click on Page Elements in your Layout menu. We are going to give the template a list of pages we want displayed along with their links.
Click on add a gadget above your header and choose the html/javascript option.
In the screen paste the following code:
<div id=’newnavbar’>
<ul>
<li><a href=”URL of Home page“>Home</a></li>
<li><a href=”URL of About page“>About</a></li>
<li><a href=”URL of Cookbook page“>Cookbook</a></li>
<li><a href=”URL of Tutorials page“>Tutorials</a></li>
</ul></div>
The purple words are the names that will appear in your menu bar. Change those words to the name of the page you want your readers to see. Here I have Home, About, Cookbook, and Tutorials. Yours will be different, customized to your blog. The green is where you will copy and paste the url of each page. Here’s what mine looks like with the urls inserted.
<div id=”newnavbar”>
<ul>
<li><a href=”https://www.cranialhiccups.com/“>Home</a></li>
<li><a href=”http://www.blogger.com/profile/13056974831892116493“>About</a></li>
<li><a href=”https://www.cranialhiccups.com/2007/11/whatcha-got-cookin.html“>Cookbook</a></li>
<li><a href=”https://www.cranialhiccups.com/2007/10/tutorials.html“>Tutorials</a></li>
</ul></div>
If you have more links than just four, copy and paste the following adding it before </ul></div> and changing the links and words to what you want.
<li><a href=”URL of Home page“>Home</a></li>
Click Save.
Step 4. Here’s where we adjust it all. Open your blog in a new window to see what you have.
To move the navigation bar to the bottom of the header go back to Page Elements in blogger and drag the html/javascript box below the header box. Click Save.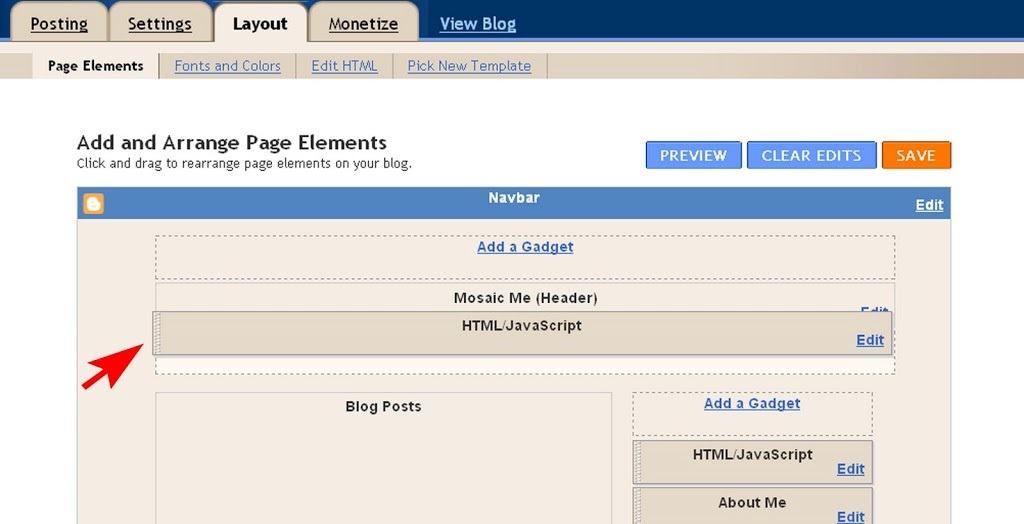
To adjust the border, font size, margin, and padding of the menu go to the edit html page of your template. Scroll down to where you inserted the code in step 2. Here it is again to refresh your memory.
#newnavbar ul li{
font-size:100%;
list-style-type: none;
display:inline;
padding:0px;
margin:10px;
border:0px solid;
}
Everything in the code can be adjusted to your liking except for the display:inline code. You can adjust the font size by changing the percentage number. Add a border around each word by changing the px number. Change the border type (where it says solid) to dotted, dashed, groove, etc. The padding will give you space between your border and your word. If you choose to have a border I would change the 0px in padding to at least a 3 for a nice clean mat around your word link. The margin spaces the links out from each other.
Play around with each item separately. First find the font size you want, clicking preview to see what you have. Once you have the size you like click save template. Then go on to the borders adjusting the padding around the word links. Finally adjust the margins, previewing then saving between each one.
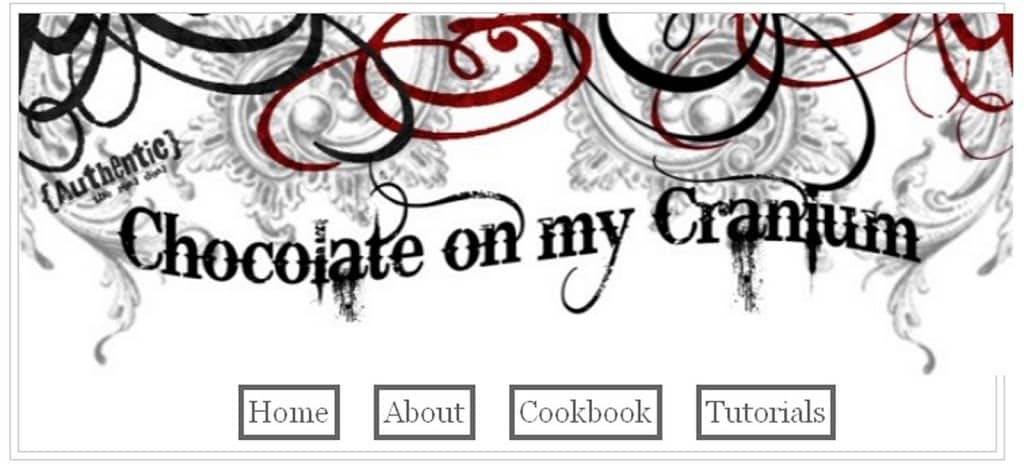
Here’s what my navigation bar looks like in my “play blog” using the following settings.
#newnavbar ul li{
font-size:150%;
list-style-type: none;
display:inline;
padding:3px;
margin:10px;
border:4px solid;
}
That’s it. A simple navigation bar that helps visitors easily find certain pages of your blog. Next week I’ll show you how to create fancier “buttons” or graphics to use instead of the text.
Other options:
Here’s a great tutorial for creating links as part of your header image.
GIMPing up your blog by Keri from The Home Teacher.
It utitlizes free GIMP software you can download for your computer. Awesome.

thank you so much!!!
thanks!!!
This is definitely the best tutorial I’ve seen on this subject!
Thanks!!
Thank you so much for this tutorial. It must have taken along time to write it and I really apperciate it because it worked perfectly!
Hey, Cocoa. Thank you so much for this. Did you ever do the post to show us how to do it with graphics. I can’t find it if you did and I sure need it. Help, please.
I looked through my archives…and I guess I never did a post! I did find the post on tipjunkie that I used to create image links when I had them in my navigation bar though. Here’s the posts:
http://www.tipjunkie.com/blogging-101-navigation-bar-with-images/