• Home
  • Create
    • Cookbook
      • Recipes
    • Crafts
    • Grateful Hearts Giving Hands
    • Holidays
      • Christmas
      • Easter
      • Independence Day
      • Thanksgiving
      • Valentine’s Day
    • Ingenious Ideas
    • Printables
    • Sewing
  • Family Life
    • Farming
    • Genealogy
  • Homeschool
    • Art
    • History
    • Homeschool Encouragement
    • Language Arts
    • Learning Styles
    • Library
    • Math
    • Science
    • Unit Studies
  • Motherhood
    • Home Making
      • Establish a House
    • Me
  • My Faith
    • Celebrate the Family Proclamation
      • Family Proclamation Articles
    • Family Home Evening Lessons
    • Flannel Board Stories
    • General Conference
    • Memorize the Family Proclamation
    • The Living Christ: An Easter Countdown
      • Living Christ Lessons
    • Young Women
  • Contact
  • About Me

Cranial Hiccups

Every once in a while and totally unintentionally my brain spews out a good idea.

You are here: Home / Create / Crafts / Homemade Paper

Homemade Paper

August 30, 2009 by Montserrat {Cranial Hiccups} Leave a Comment

Last week while I was watching some nieces and nephews we decided to make some homemade paper. It was fun, easy, and the kids loved the mess!

Supplies Needed:
* Window Screening
* Old Wooden Photo Frame
* Staple Gun
* Plastic Tub (large enough to immerse the frame)
* Felt or Flannel Pieces
* Blender
* Old paper: newspaper, discarded printer paper, old telephone book, etc.
* Water
* Flower petals, grass, leaves (optional)

Step 1: Cut a piece of window screening (we bought a roll for $5 at the hardware store) to cover the opening of the frame. Staple around the edges with a staple gun. (see photo above)

Step 2: Tear up the old paper into small pieces. This is fun for children to do, just something about destroying things. =) Fill the blender about half full of paper. Add water to the blender until the water line is half way up. Let sit for a minute to soften the paper. Blend on high until all the paper fibers are separated and you’ve created a grayish pulp.

Step 3: Pour the pulp into the plastic tub. Add water until the tub is about half full. You don’t want it to be thick. Add any extras you might want on your paper – petals, leaves, grass, etc. to the water and stir around.


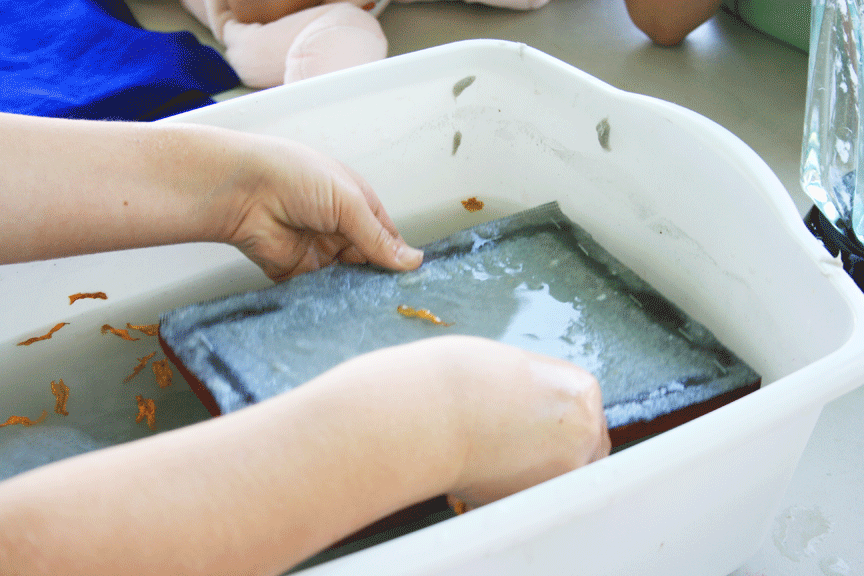
Step 4: Carefully slip the frame, screen side up, into the water. You want to enter the water from the side, sliding it down to the bottom. Stir the water a little then slowly lift the frame, catching the bits of paper fiber on your screen. (see above photo) Let the water drain.

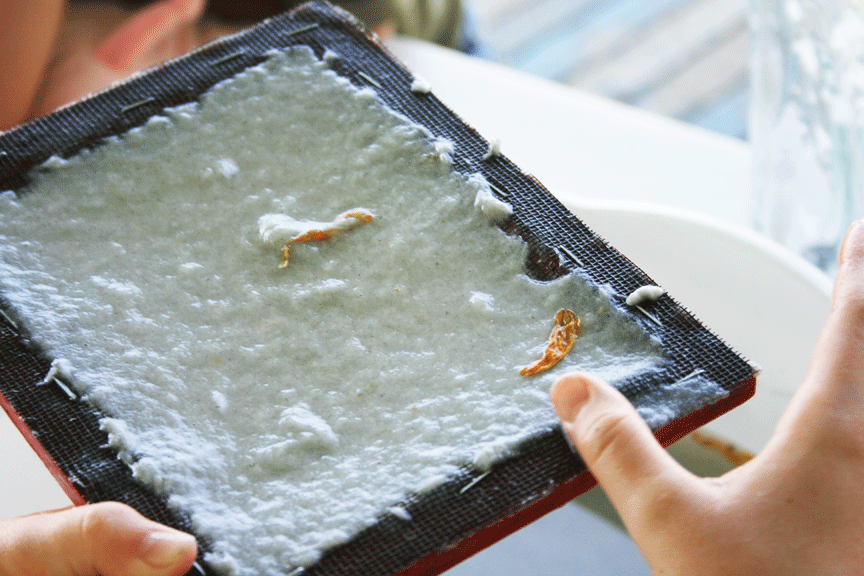
Step 5: Carefully wipe off the excess pulp from the edges of the frame. Make sure not to touch the pulp in the middle or it will mess it up. If that happens no worries. Dump the pulp back into the water, stir it around, and try again. (see photo above)

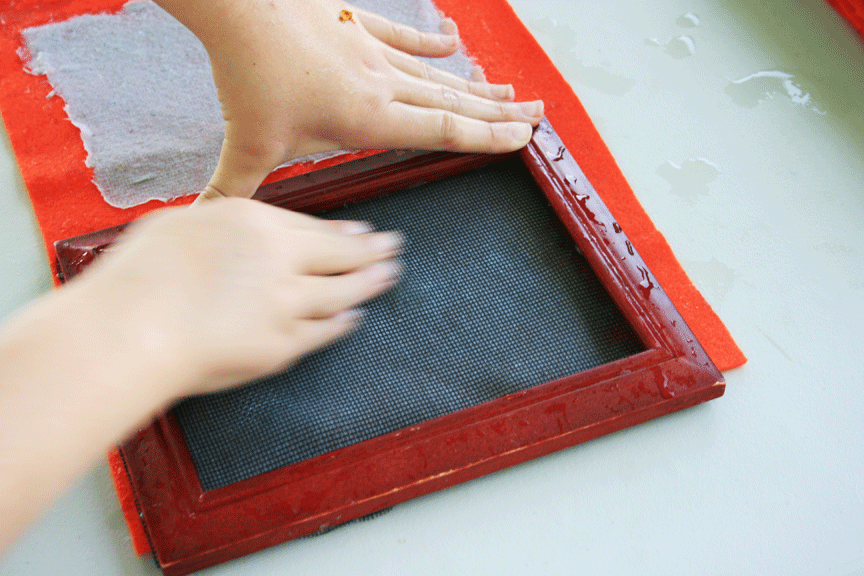
Step 6: Turn the frame over onto a piece of felt or flannel. Press all around the screen with your fingers or a sponge. (see photo above) Carefully lift the frame away leaving the paper on the felt. Place the felt in a sunny spot to dry for a couple of hours. When dry, peel the paper off the felt and . . .

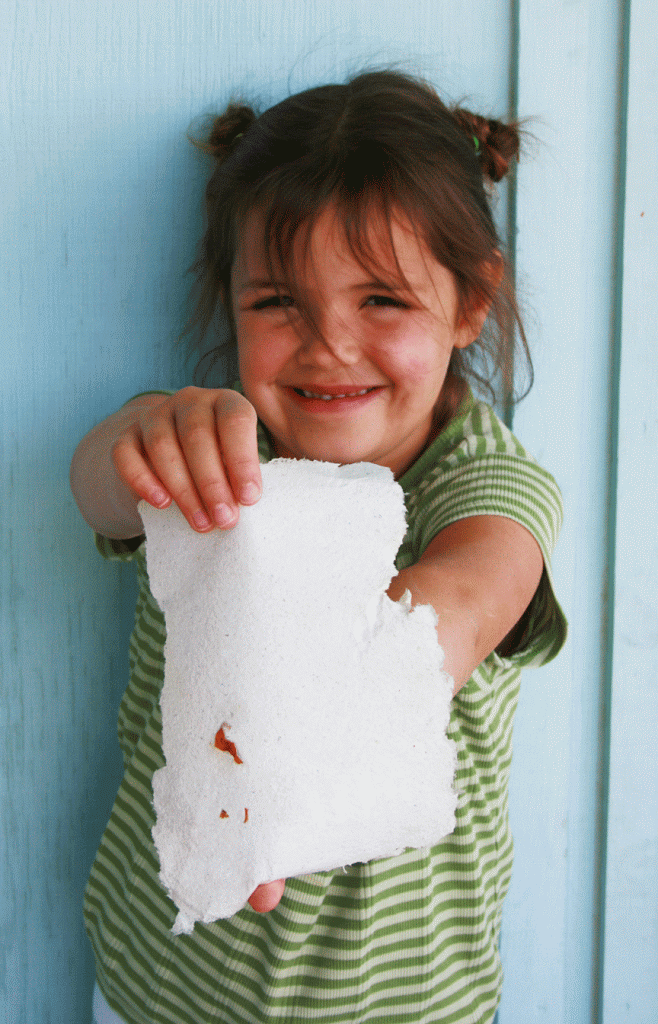
. . .voila! Your own homemade paper to use for cards, doodling, or letter writing.

Extra hints:

* After making several sheets of paper (5 or 6) you’ll need to add more pulp to the water. See step 2.

* Using old newspaper or telephone books will result in a gray colored paper.

* Try using old construction paper or colored cardstock for variety in paper colors.

* Do this outside. =) We did it on our deck. After showing the kids all the steps I let them have free reign. I went in and made cookies while they spent at least an hour taking turns making their sheets of paper.

Cocoa Signature with Candy 2
© 2007-2009 Chocolate on my Cranium, LLC all rights reserved

© 2007-2013 Chocolate on my Cranium, LLC all rights reserved

Share this:

  • Click to email a link to a friend (Opens in new window) Email
  • Click to print (Opens in new window) Print
  • Click to share on Facebook (Opens in new window) Facebook
  • Click to share on X (Opens in new window) X
  • Click to share on Pinterest (Opens in new window) Pinterest
  • More
  • Click to share on LinkedIn (Opens in new window) LinkedIn
  • Click to share on Reddit (Opens in new window) Reddit
  • Click to share on Tumblr (Opens in new window) Tumblr
  • Click to share on Pocket (Opens in new window) Pocket

Related

Filed Under: Crafts

Leave a ReplyCancel reply

This site uses Akismet to reduce spam. Learn how your comment data is processed.

Hello, I'm Montserrat. I'm a farmer's wife, mother of eleven, homeschooler, chocoholic, music lover, and like to play a good game of Scrabble. You can read more about me here. . .

You'll find a little bit of everything on this blog. It's my place to share all the ideas, activities, crafts, and resources that I have gathered and tried over a number of years. Feel free to browse around using the menu up top or doing a search in the box below.

Enter your email address to subscribe to this blog and receive notifications of new posts by email.

Archives

August 2009
S M T W T F S
 1
2345678
9101112131415
16171819202122
23242526272829
3031  
« Jul   Sep »

Return to top of page

COPYRIGHT © 2025 Montserrat Wadsworth at Cranial Hiccups • Lifestyle Pro Theme on Genesis Framework

[ Placeholder content for popup link ] WordPress Download Manager - Best Download Management Plugin