Always on the lookout for modest clothes, we started making our own because it was easier and provides more options, especially in skirts. This wrap skirt drapes nicely. You can adjust the length to your liking. And best of all it really is SO EASY to sew! Using this tutorial you can make skirts for anyone – little girls on up to women.
Supplies needed:
1 1/2 – 4 yards of fabric 45 inches wide for girls or 60 inches wide for women, cotton or cotton blends work best. You can also sew two 45 inch widths together to get fabric wide enough to use.
2 – 5 yards of 1 1/2 to 2 inch wide grosgrain ribbon
thread
scissors
measuring tape
marking pencil
sewing machine
Step 1: Measure your waist or where you want the top of the skirt to rest. Times this by 1.5. Divide that number by 3. This is the waist measurement. Example: We are making this skirt for Brownie who likes her skirt to sit below the natural waistline. The measurement we took was 24 inches. Using the formula above: 24 in. x 1.5 = 36. 36 / 3 = 12 inches (waist measurement). If you are in between whole numbers round up.
You also need to get the length measurement by measuring down from where the top of your skirt will rest to where you want the bottom of the skirt to be. Ours was 21 inches. Add this measurement to your waist number from above. Then add 1 inche for the hem. This is your length measurement. Example: 21 inches (length) + 12 inches (waist number)+ 1 inch (hem) = 34 inches (length measurement)
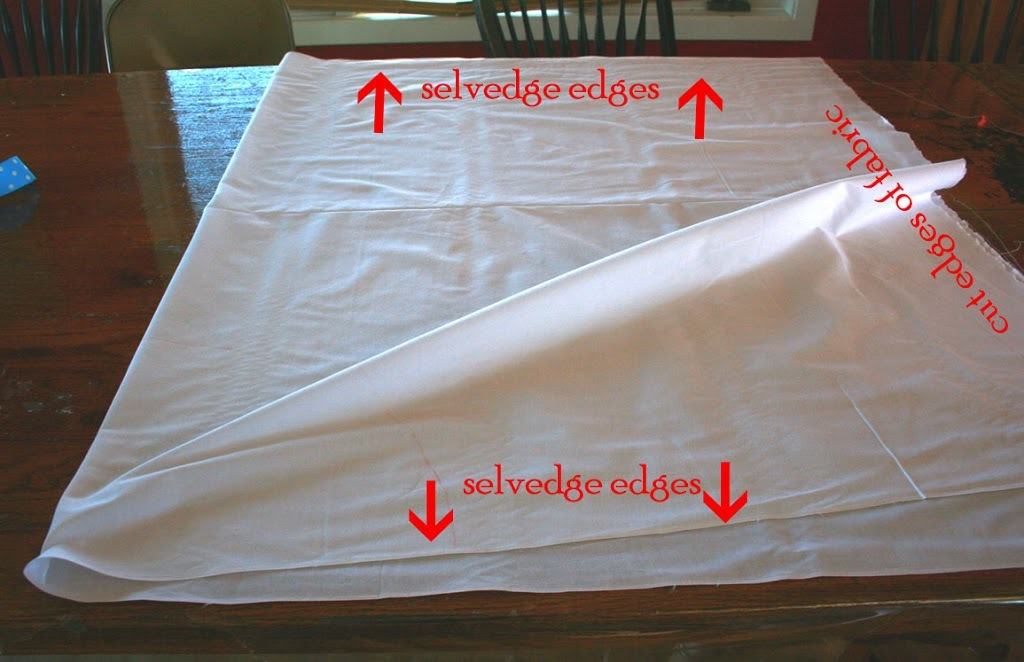
Step 2: Fold your fabric in half with the selvedges at the top and bottom. See photo below.
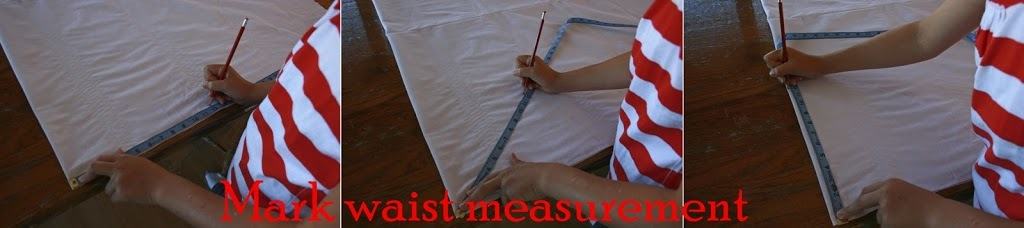
Step 3: Place the top of the measuring tape at the corner of the fold. Mark the waist number along the bottom selvedge. Holding the measuring tape at the corner move the tape a few inches, make a mark at the waist measurement. Keep going until to you get to the fold. See photo below.
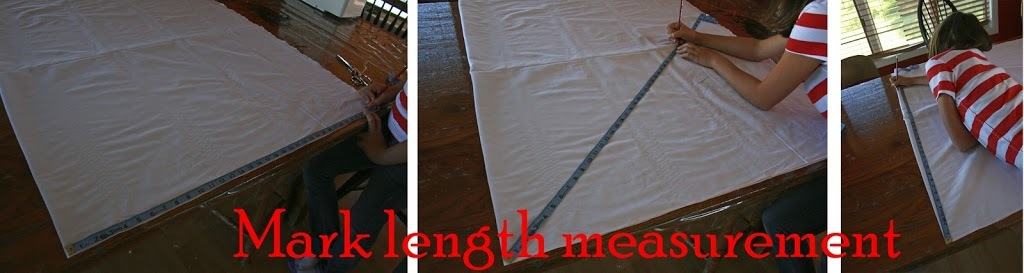
Step 4: Mark the length measurement following the same instructions for marking the waist measurement. See photo below.
Step 5: Connect the marks for the waist measurement creating an arc from the selvedge edge to the fold. Do the same for the length measurement marks. See photo below.
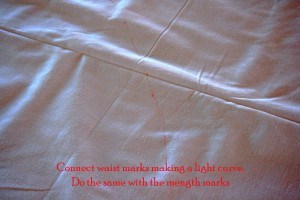 |
| (oops, that’s supposed to say Length marks) |
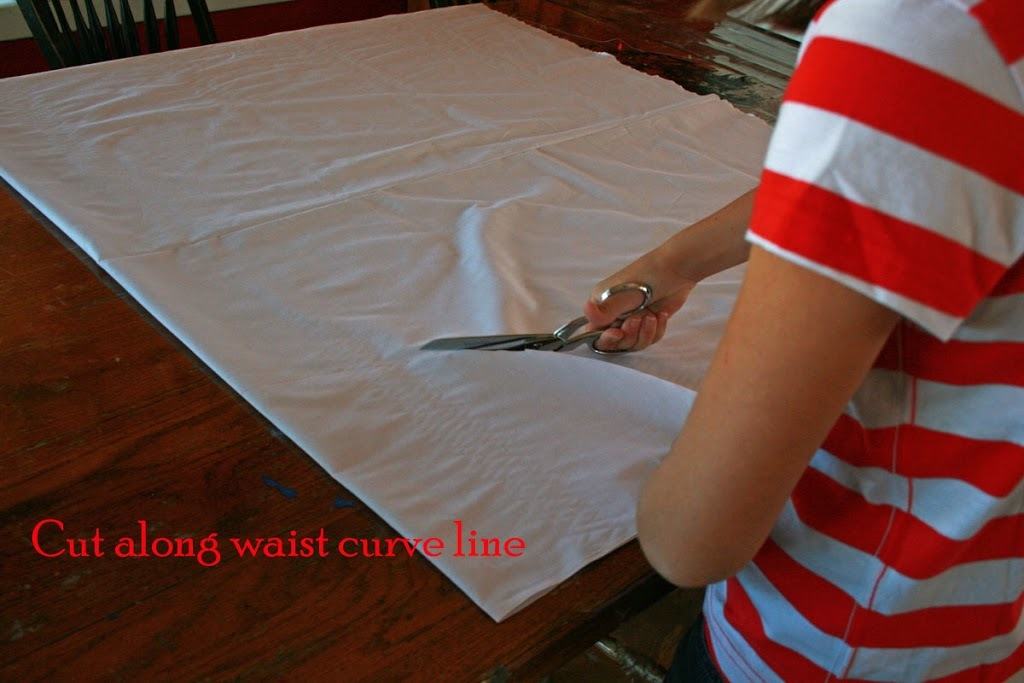
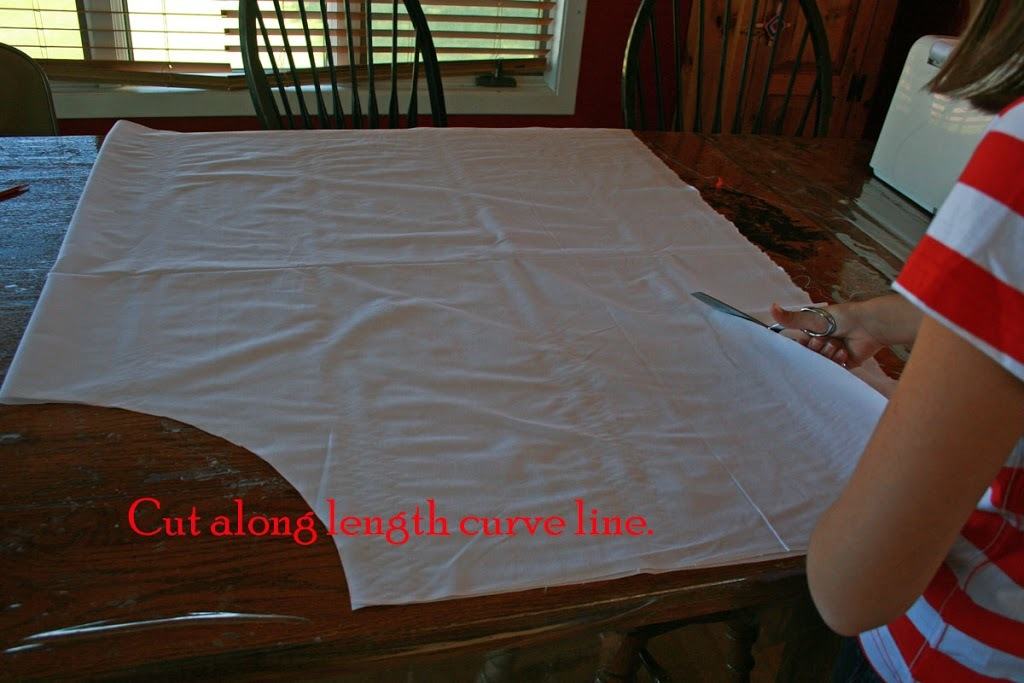
Step 6: Cut along the waist and length curve lines. See photos below.
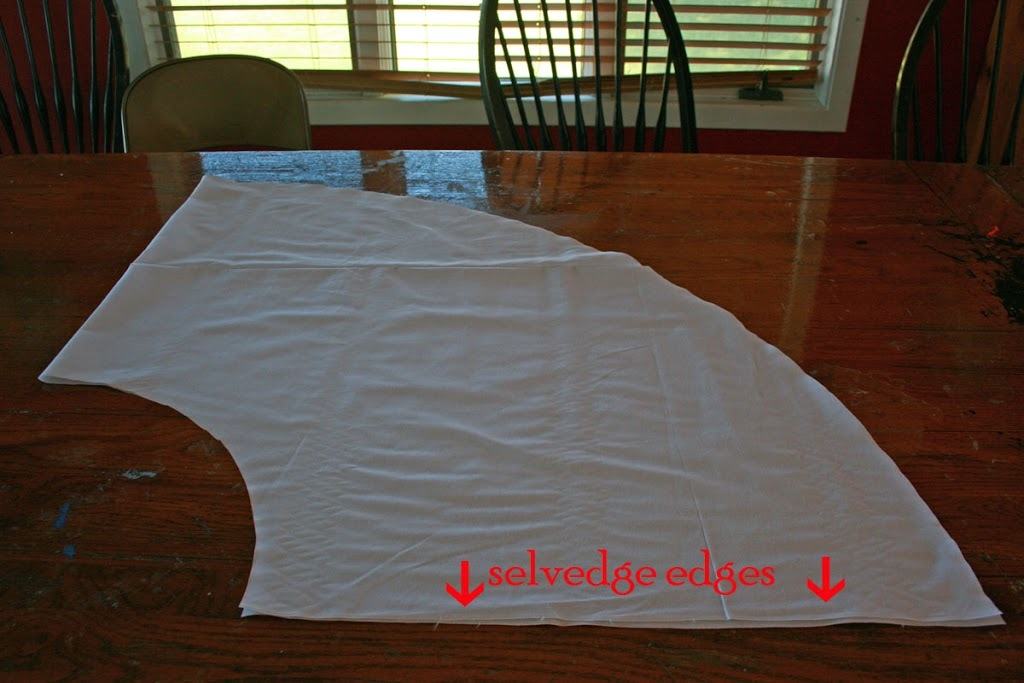
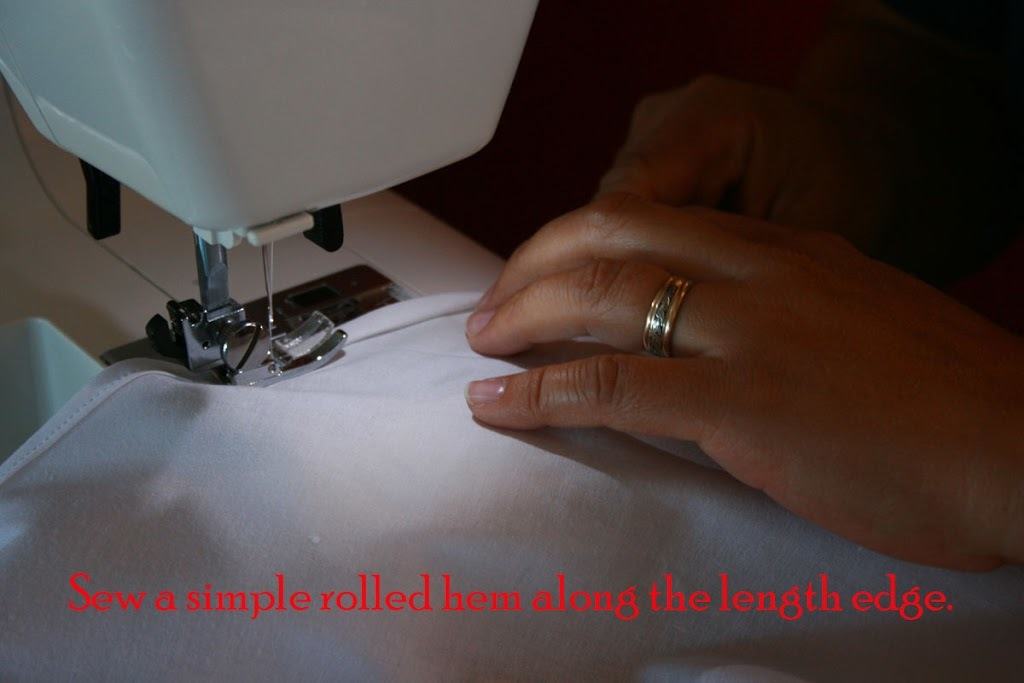
Step 7: Finish sides and hem. Because this material is white and there is no writing or different colored selvedge edges we didn’t need to hem the sides. (See easy!) Depending on your fabric you might have to turn the selvedge edges in 1/2 inch and sew to finish. Hem the bottom with a narrow hem. Narrow hem: Turn fabric under 1/4 inch, then turn under 1/4 inch again. Once you are done with this step the waist should be the only part that is unfinished.
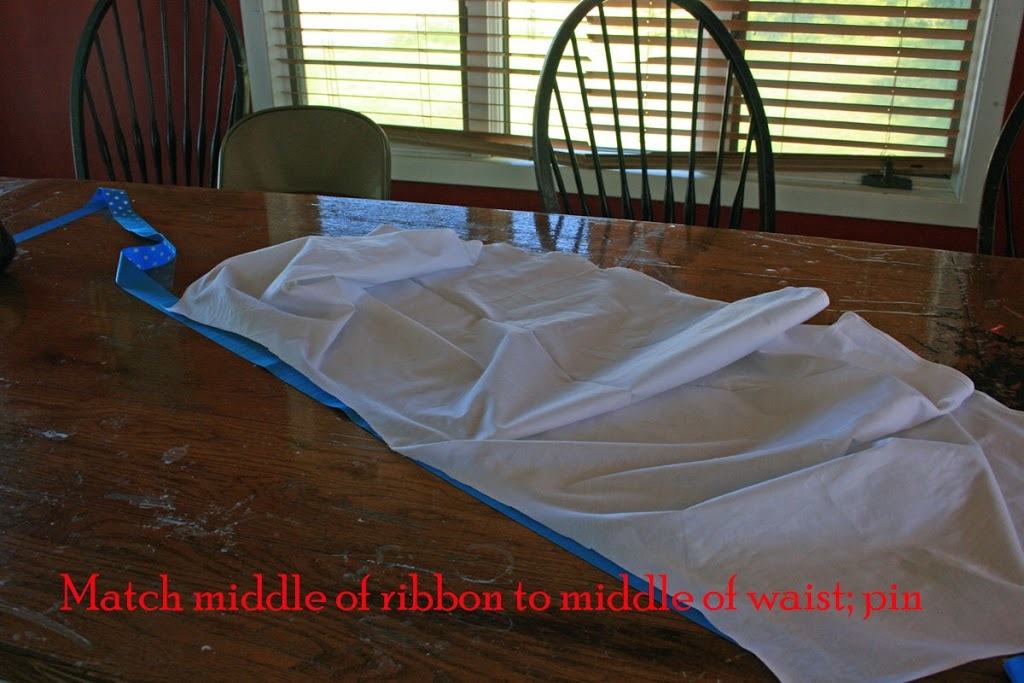
Step 8: Cut ribbon so it measures 3 times your original waist measurement. Example: Our original waist measurement was 24 inches. We cut our ribbon at 72 inches (2 yards). Mark the middle of the ribbon. Match the middle of the ribbon to the fold at the waist. Pin the wrong side of the ribbon to the right side of the fabric. See photo below. This doesn’t have to be exactly precise as you will be taking the pins out to fold the waist edge as you sew.
Step 9: Fold back the waist edge 1/4 inch and align the fold to the top of the ribbon. Sew along the folded edge. See photo below.
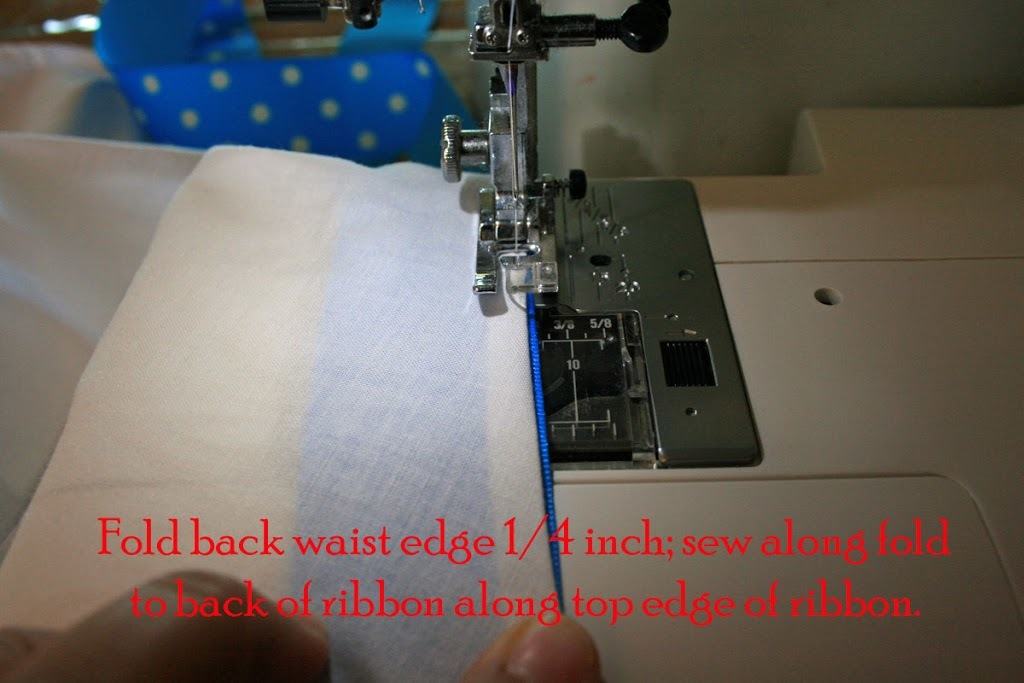
This is what the right side of your skirt will look like after sewing the waist to the top of the ribbon.

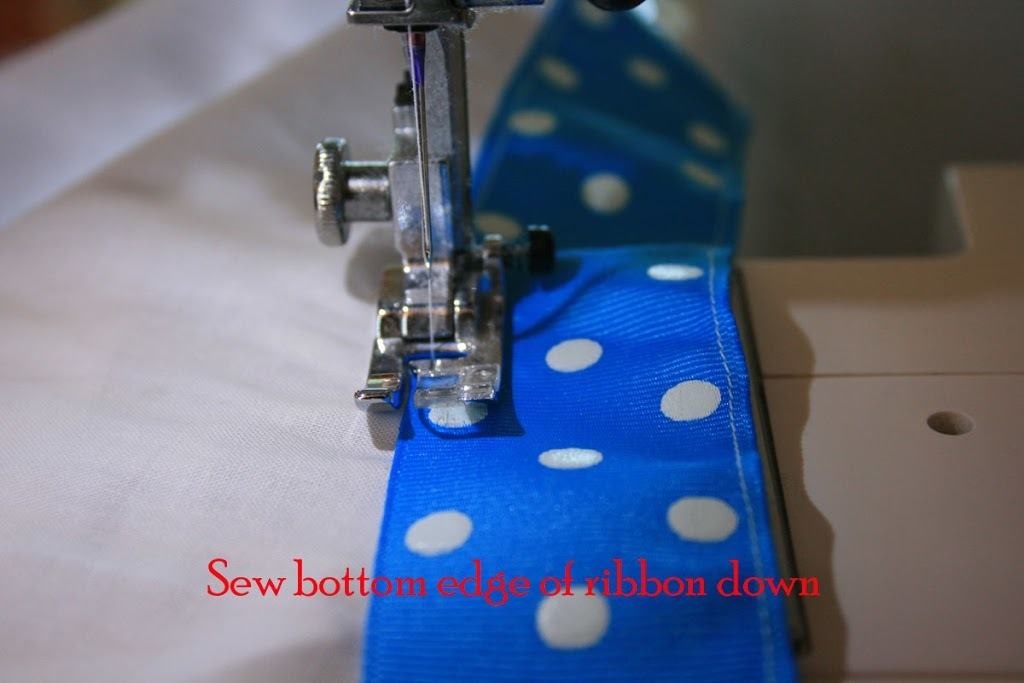
Step 10: Now on the front of your skirt sew down along the other edge of your ribbon.
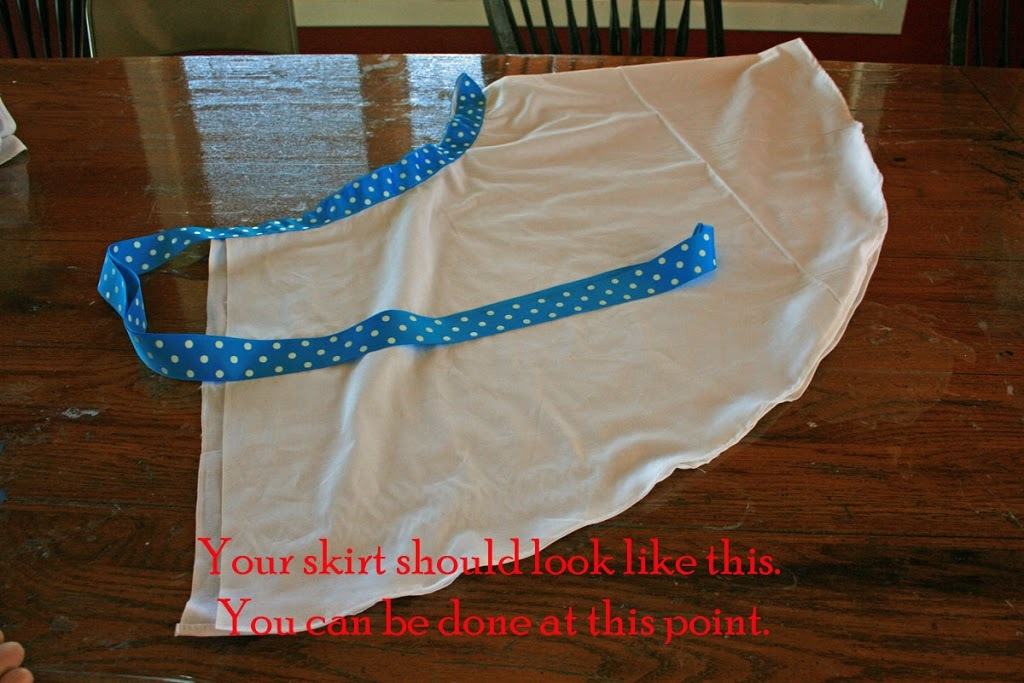
That’s it! You can be completely done at this point. We like to add a buttonhole though so the ribbon lies flat after wrapping the skirt around the waist.
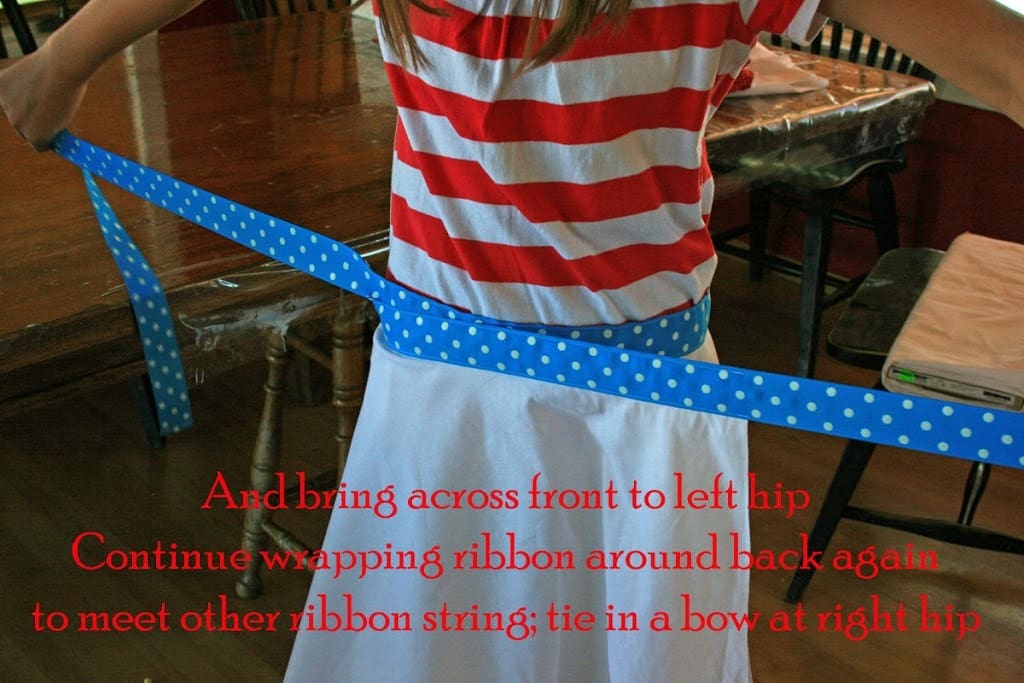
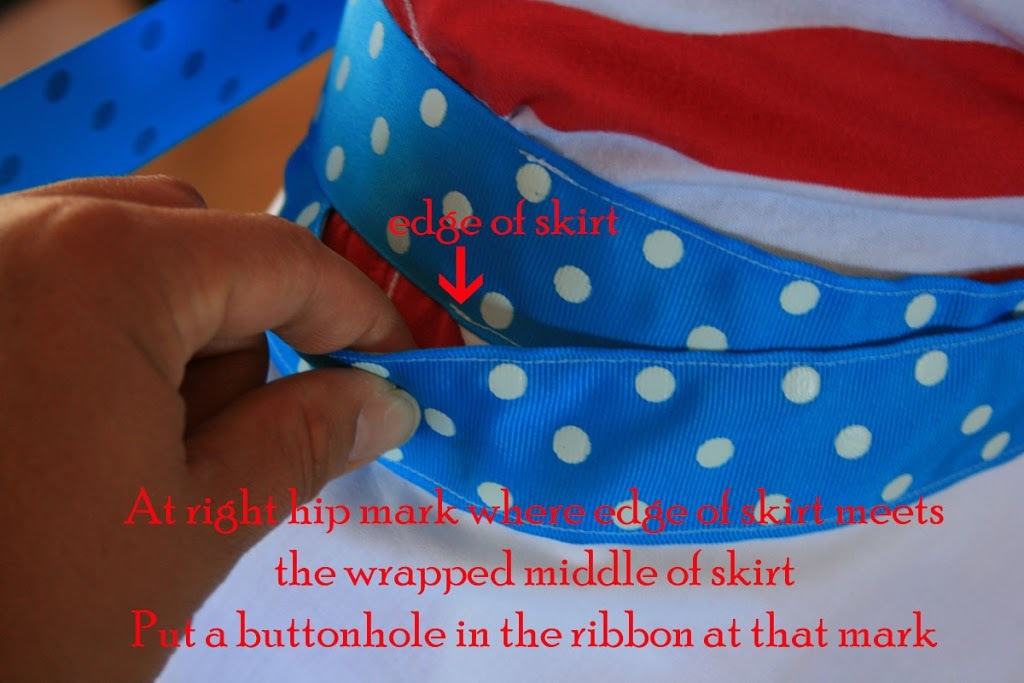
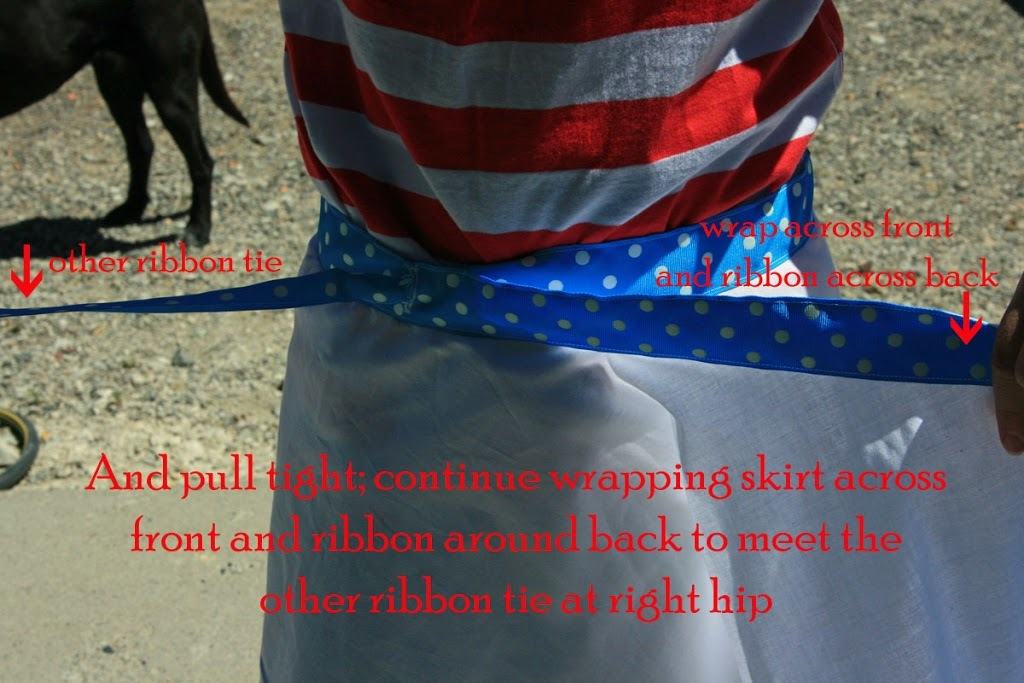
Step 11: To find where to put the buttonhole, wrap skirt around by placing one edge at right hip, wrapping the skirt across the front, and around the back. See photos below following instructions written on photos.

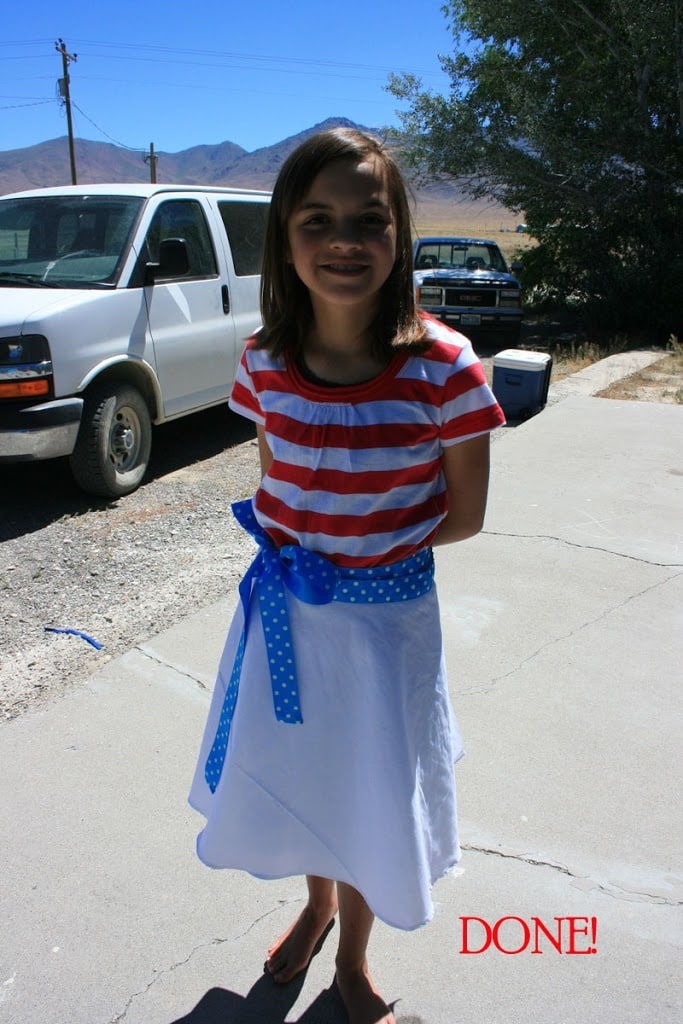
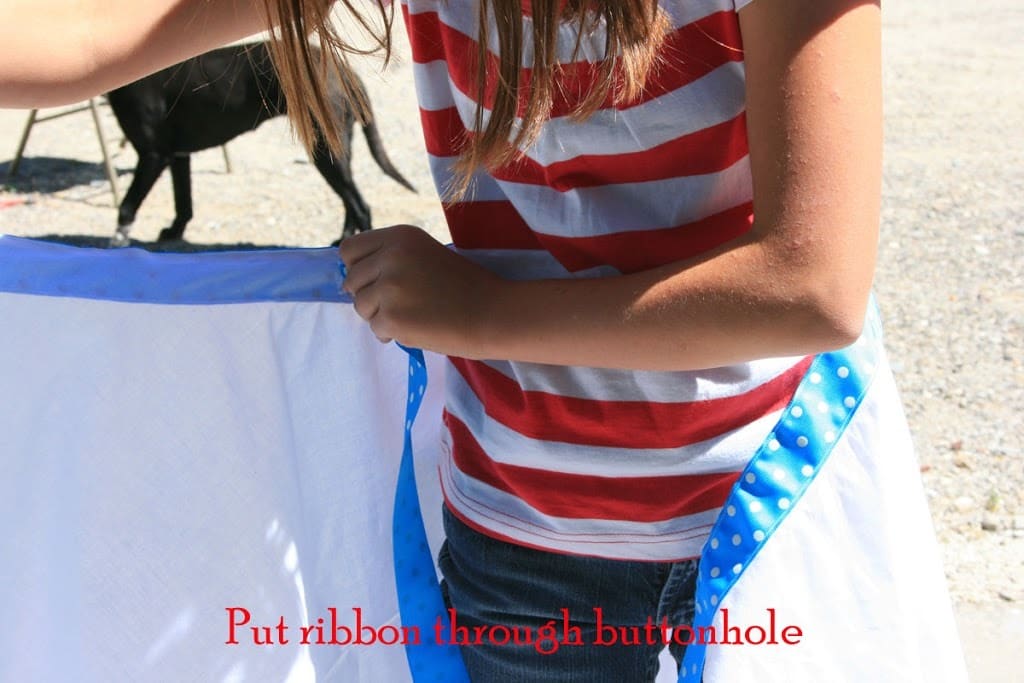
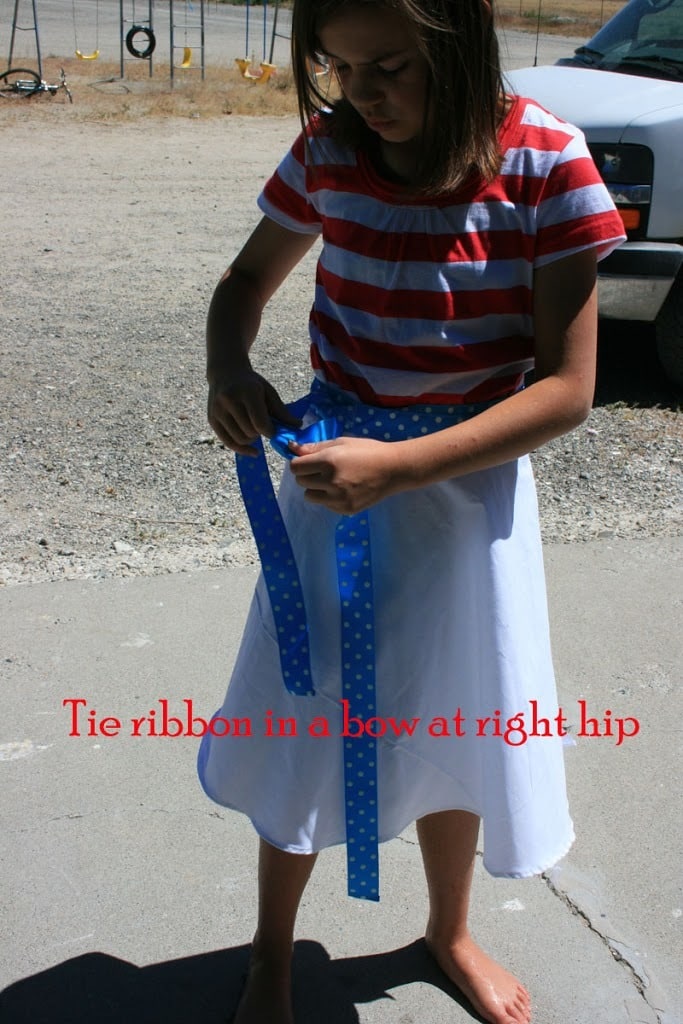
Finished! Here’s how to wrap the skirt using the buttonhole you just made.
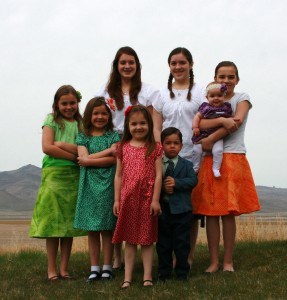
This is such an easy, beautiful skirt we have made over half a dozen so far! Here’s another photo taken at Easter. The four oldest have wrap skirts, but of course you can’t see the two in the back. Look how much everyone has changed in such a short amount of time! (see the previous post)
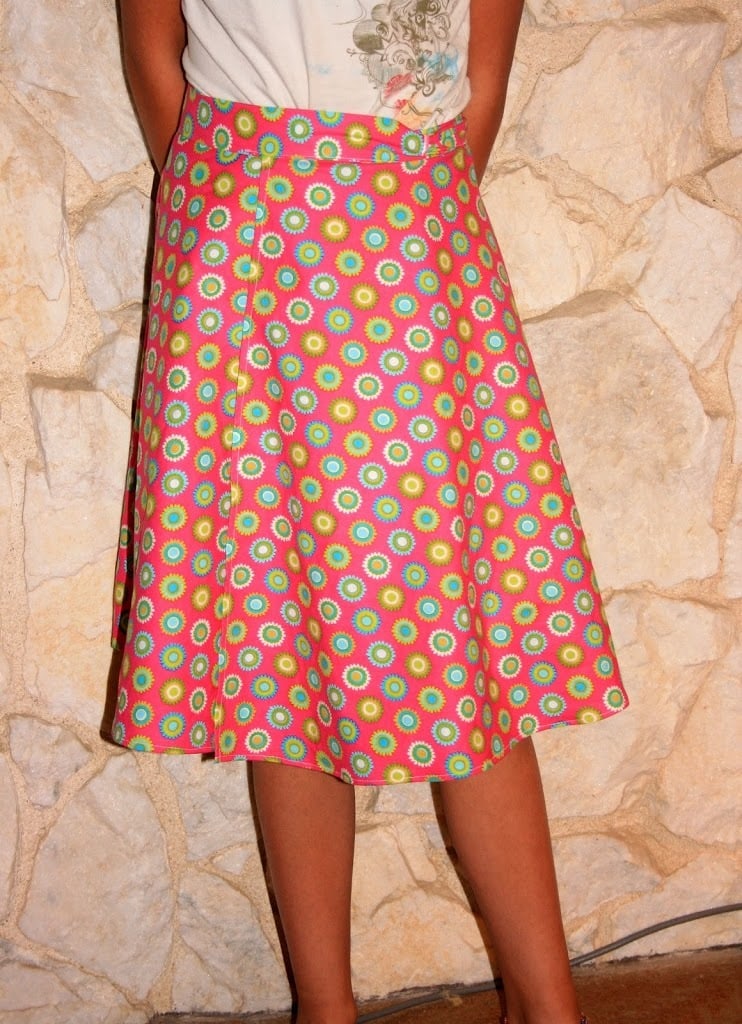
On this skirt we used fabric instead of ribbon to create the waistband.
 © 2007-2010 Chocolate on my Cranium, LLC all rights reserved
Thank you so much! Tamara has been looking for some more-simple patterns that she can use to make herself some much-needed Sunday clothes. We may very well give this one a go!
SO cute, I am excited to try it!! Thanks!
So pretty! I can’t wait to try it. Thanks!
Oh dear. You have just created a monster! Guess what everyone (including me) are getting for CHRISTMAS!!
On the bottom skirt where you used fabric instead of ribbon…does it also tie? I can’t see the bow so I’m not sure if you made the waistband smaller or what. I like the smooth look of the waist on this, and I love the dots. I want that skirt – only bigger!
crazy4boys,
Yes, the bottom skirt has ties also. She just tied them in a big bow in the back instead of on the side.
Cocoa, you’re a lifesaver. My 3 girls are in dire need of new Sunday clothing. I love that this skirt is so simple, I will be making at least 4. Thanks so much for the great tutorial.
YAY! This is awesome! I can’t wait to try it — I’m thinking one for Rosebud and one for me. 🙂
I will be using this idea for my 6 year old. I love that I can control the length! What’s in the stores is so racy for their age. Yikes.
Thanks!
I love how cute and EASY this is! My girls can even make them on their own– how cool is that?! Love it!!! 🙂
This is very cute and almost easy enough that I could do it. Almost?
love this pattern!
Love, love, love it! With 4 girls I can see us doing this. Thanks! Feel free to visit us over at our blog too: http://www.shampoobythegallon.blogspot.com
I’ve been reading your blog for some time. Love it!
Oh this is so useful! thanks!
Thank you! I have been trying to make a wrap skirt, but none of my books had pictures, it makes sooo much more sense this way! More than anything i couldnt understand why it wanted me to add a button hole i am so grateful you explained it, none of the other sites have. THANK YOU!
Thank you so much for this tutorial!!! I have made one for my two girls and now one for me! I love them all!
thank you! this was exactly what i needed to finish a mermaid wrap skirt for my daughter’s birthday! So helpful and easy for a novice like myself!
Thank you so much! The Activity Day girls in our ward are all making skirts for the town memorial day parade that we are marching in. AND we found that the amount you cut out for the waist is about enough to make a matchy matchy skirt for an 18″ dolly – using the same method as the girls. 🙂 Thank you!!!
Glad this tutorial was useful! We do the same thing making matching skirts for our American Girl dolls. So much fun!