If there’s one thing we eat a lot of around here it is cookies. We like chocolate chip, snickerdoodles, Mexican Double Chocolate, oatmeal, no-bake, you-name-it we eat it!
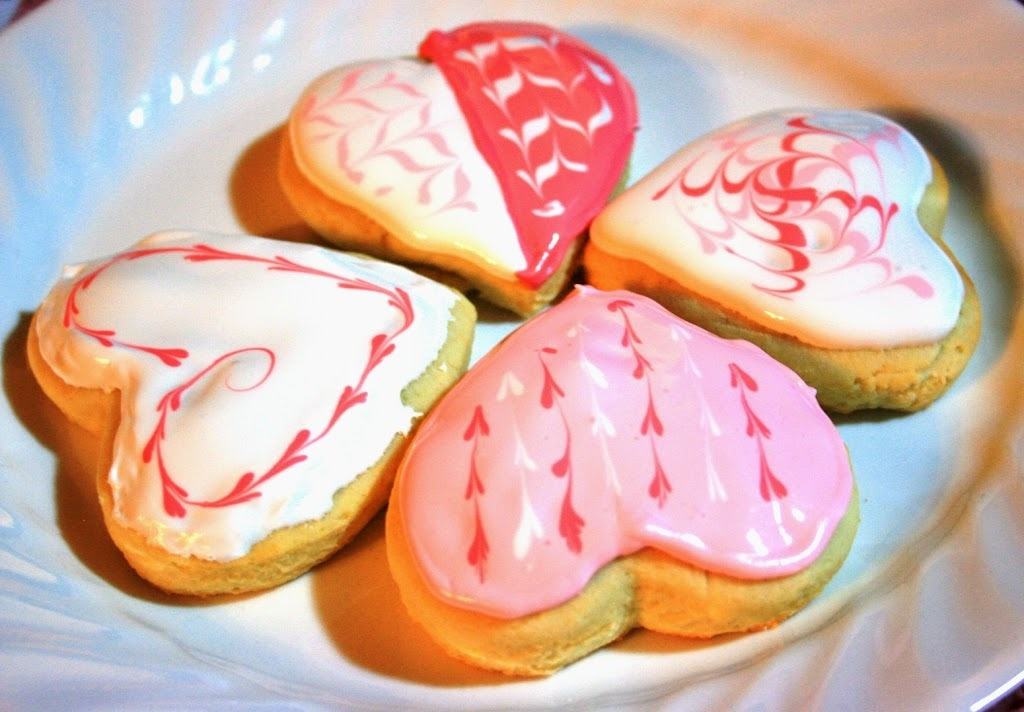
Sugar cookies are a favorite to decorate for various holidays. Most of the time we make these for Valentine’s Day, Easter, and Christmas. We like our sugar cookies big and soft. Years and years ago I decided to try icing them with royal icing. The colors are vibrant, the icing gets hard so the designs don’t get mussed up, and it is really very easy to work with.
1 c. butter
1 c. shortening
2 c. sugar
4 beaten eggs
1 c. buttermilk or sour cream
1 tbsp. vanilla
7 c. flour
1 tsp. salt
1 tbsp. baking powder
1 tsp. baking soda
1 tsp. nutmeg
Cream shortening, butter, and sugar together for 4 minutes. Add eggs; beat for another 4 minutes or until very fluffy. Scrape down sides of the bowl. Add the vanilla. Add 3 cups flour and buttermilk. Mix until incorporated. Add remaining flour, baking powder, baking soda, salt and nutmeg. Mix until well combined. Refrigerate dough for one hour. Roll out on well floured surface until 1/4 inch thick. Cut out with cookie cutters. Bake on ungreased baking sheet at 350 for 7-10 minutes. Let cool before frosting.
2 cups powdered sugar
1 1/2 Tbsp. meringue powder (or two raw egg whites)
6 Tbsp. water (if using meringue powder)
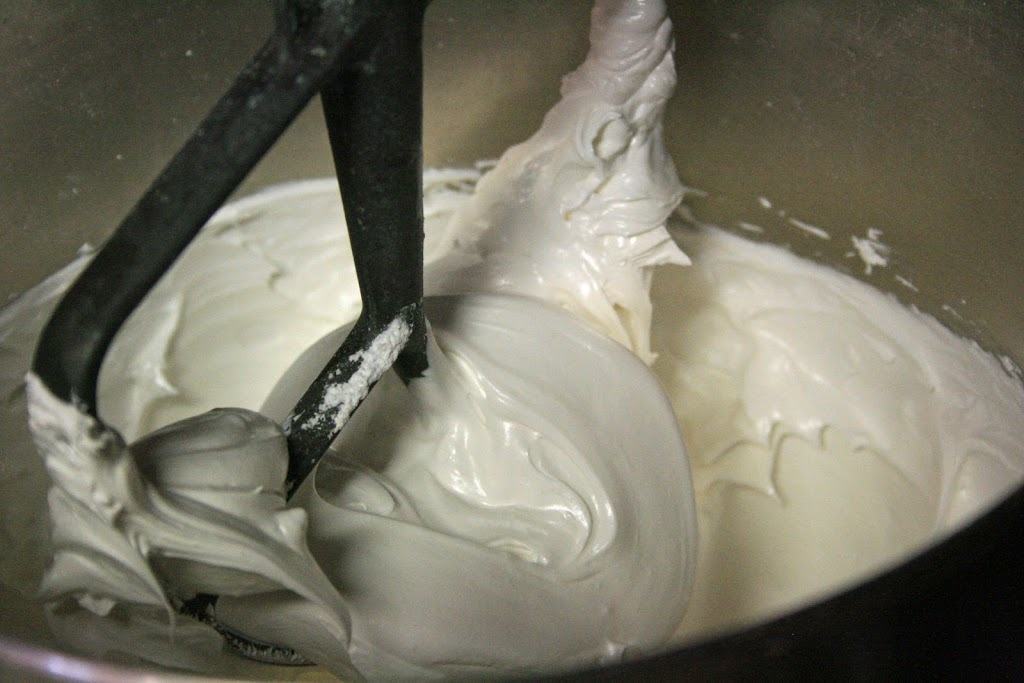
Beat on high for 7 minutes until very light, fluffy, and shiny. See photo below. At this stage we use the royal icing for making gingerbread houses. But for icing cookies it needs to be much thinner.
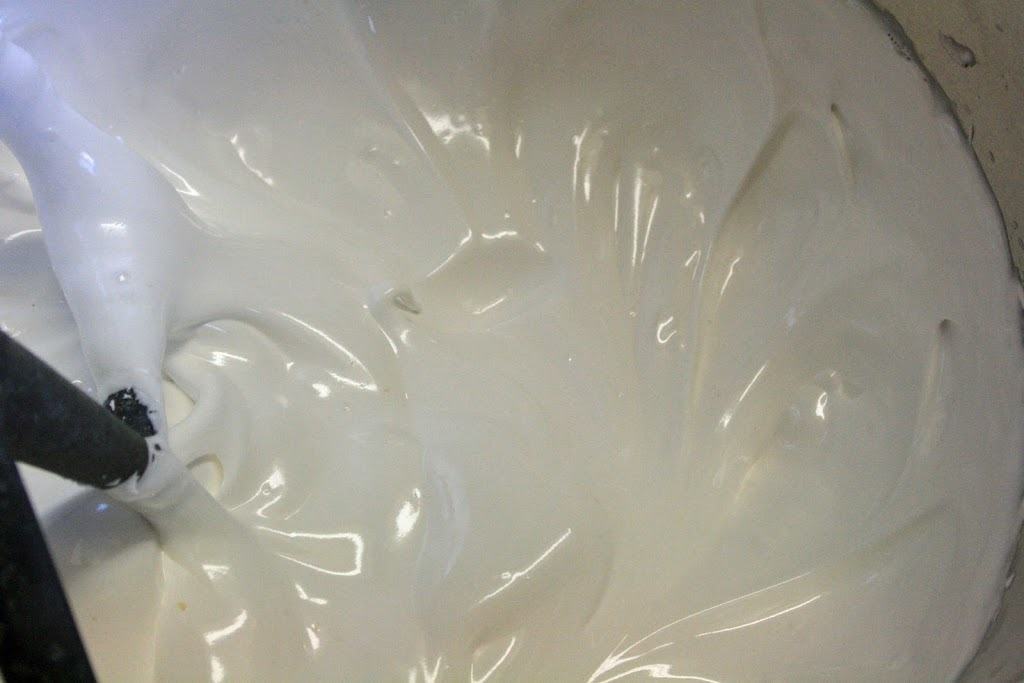
Add an additional 6-8 Tbsp. water. Beat well for another minute. Now our icing should look like this.
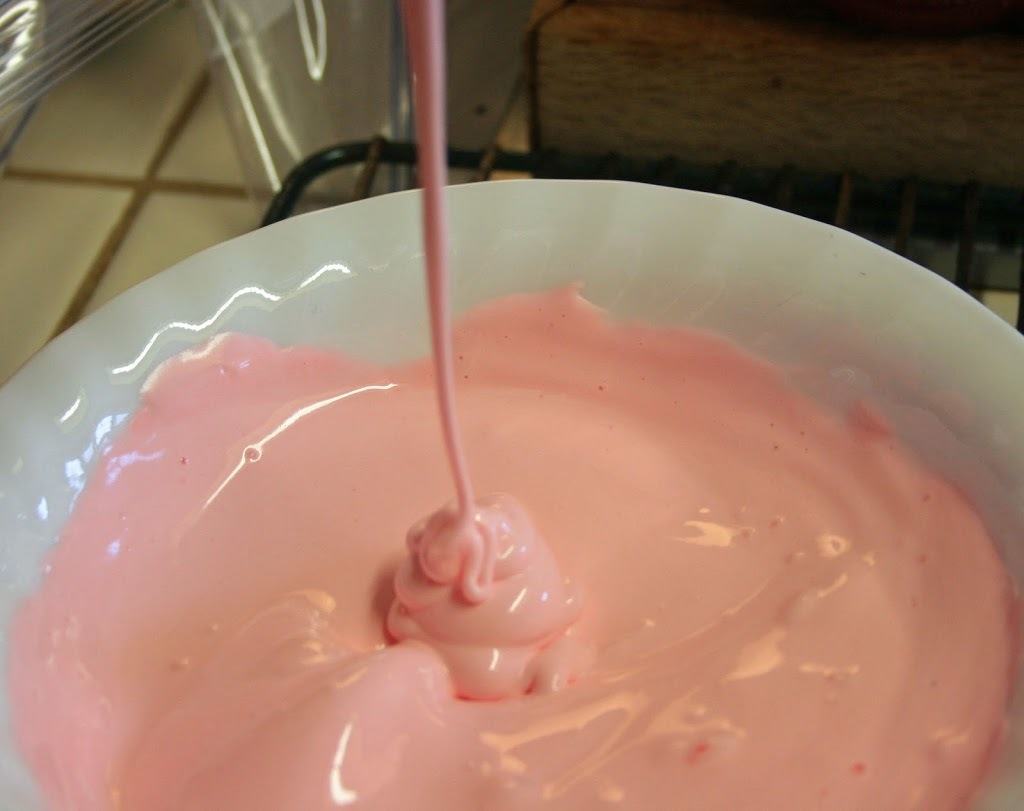
Divide icing into bowls and add food coloring. You’ll find your icing will thicken a little. See how it doesn’t even drip off the spoon?
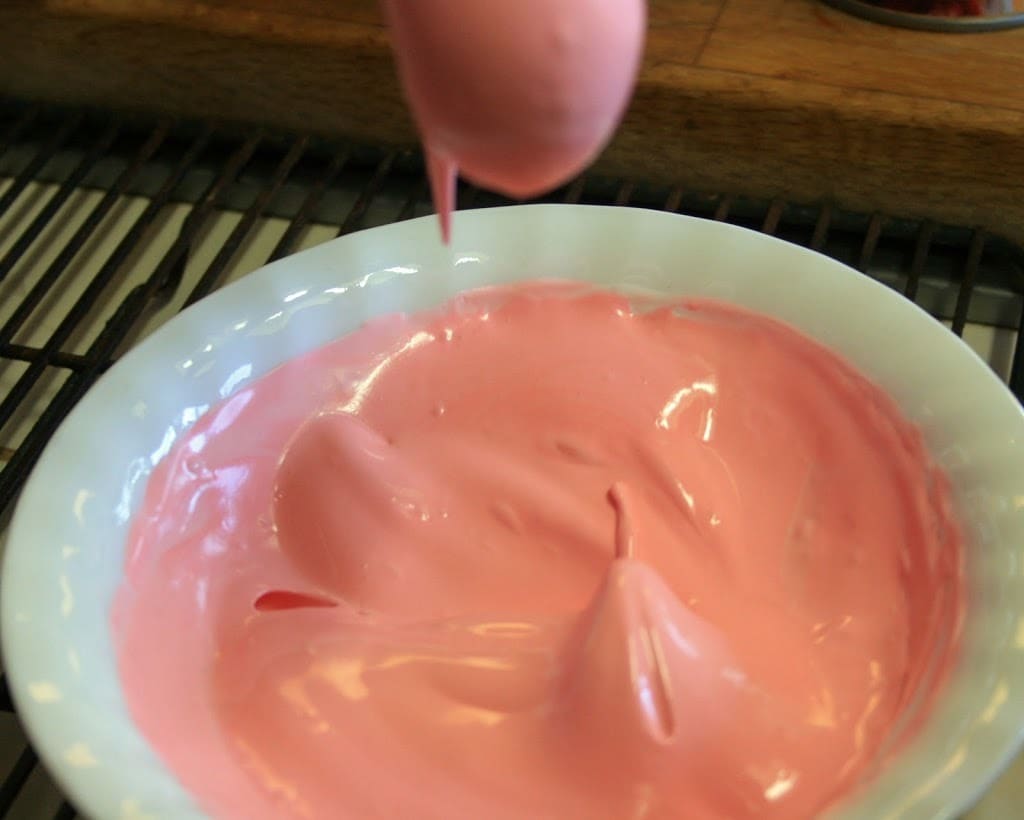
You’ll need to add more water, a teaspoon at a time, stirring very well until you get icing that falls right off the spoon but is still thick enough to keep its shape a little. In the photo below the icing is drizzling off the spoon but still keeps a shape when it hits the icing in the bowl.
Now for the fun part!
For each of these cookies just use a spoon to spread your background color into your cookie.
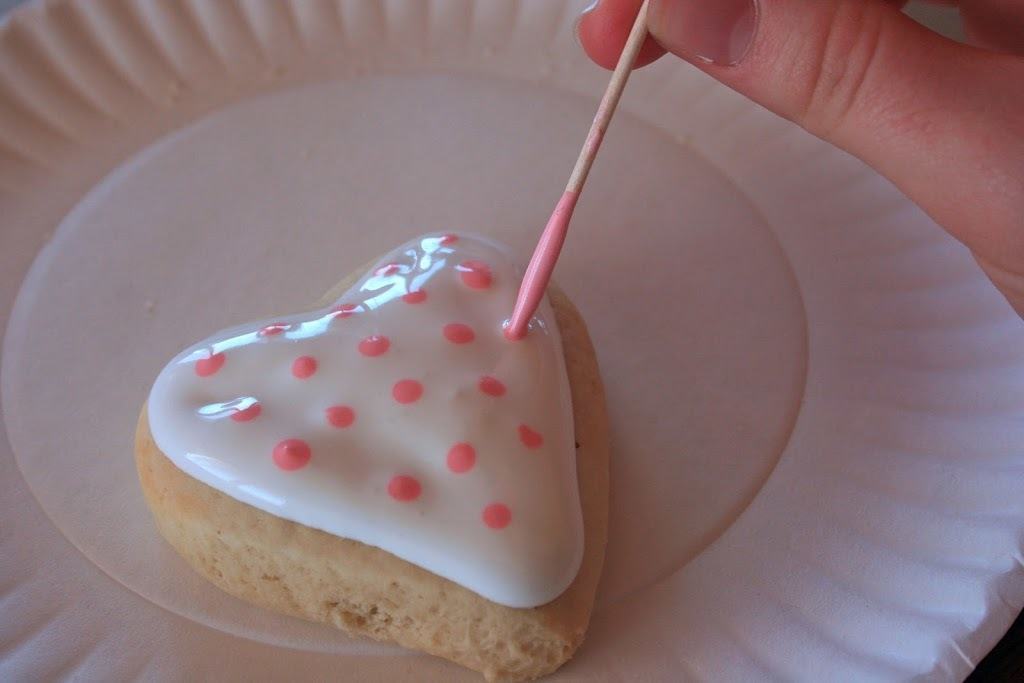
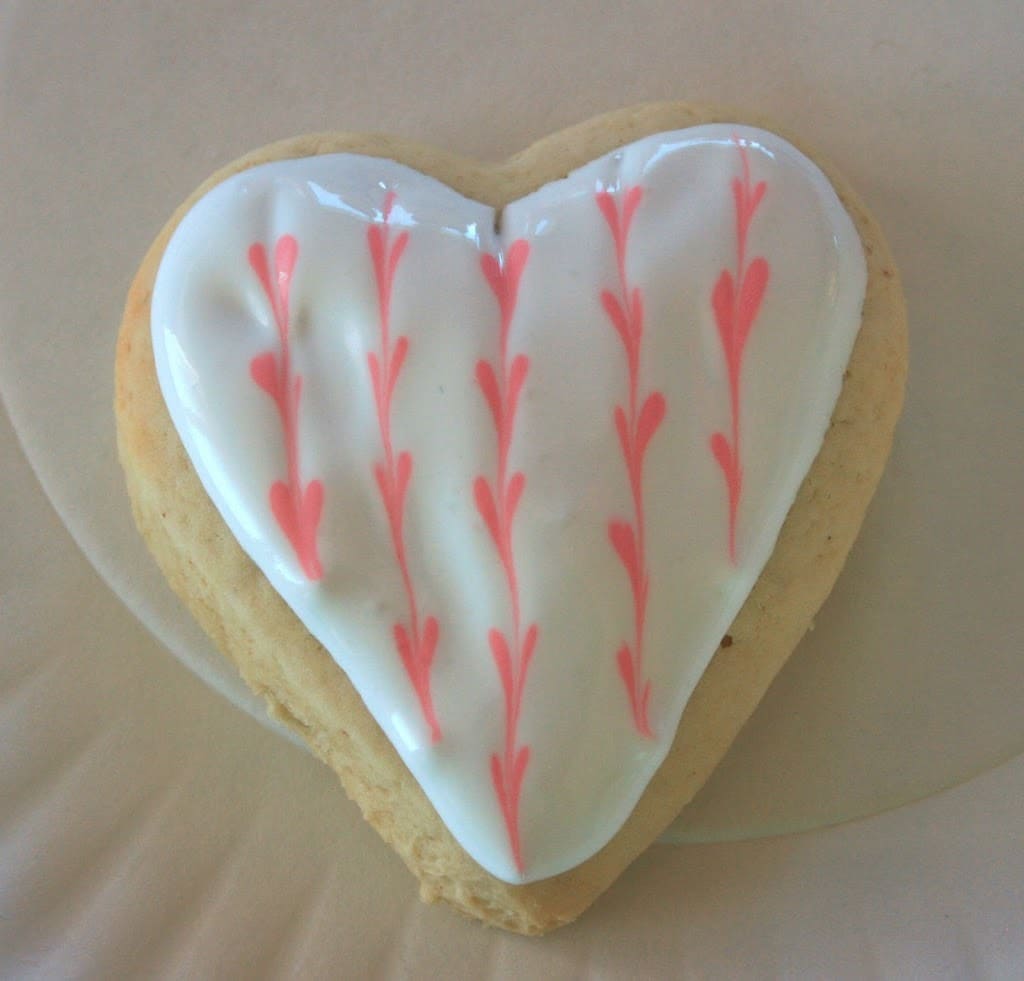
For rows of hearts, place dots on your background color in columns (rows going down) with a toothpick.
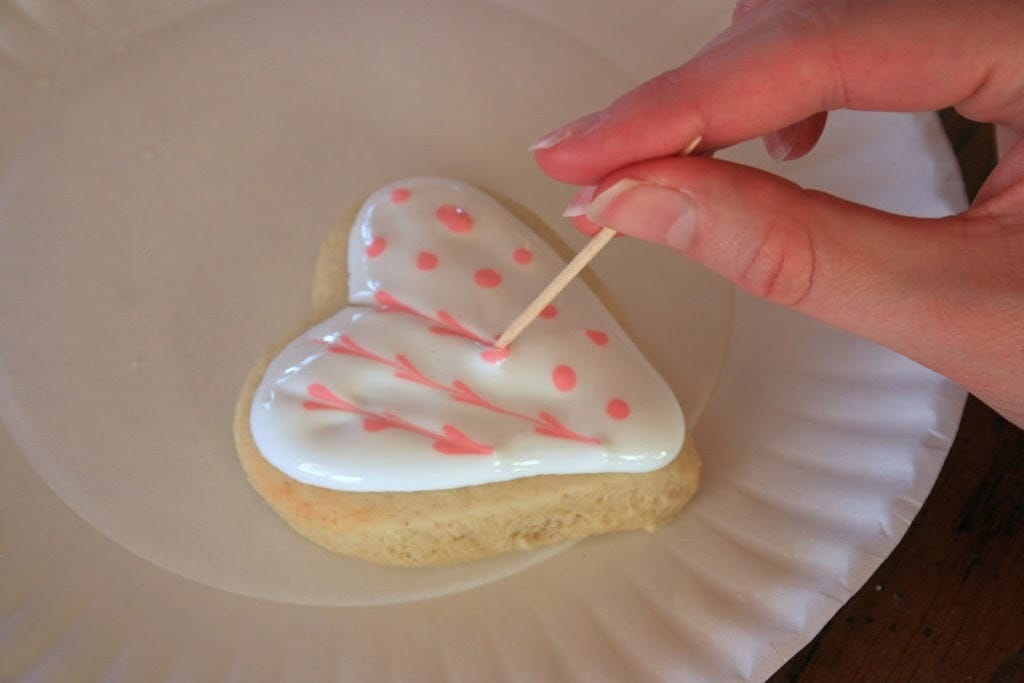
With a clean toothpick start above the top dot and drag the tip all the way down the column of dots. The dragging creates the heart shapes. Isn’t that neat?
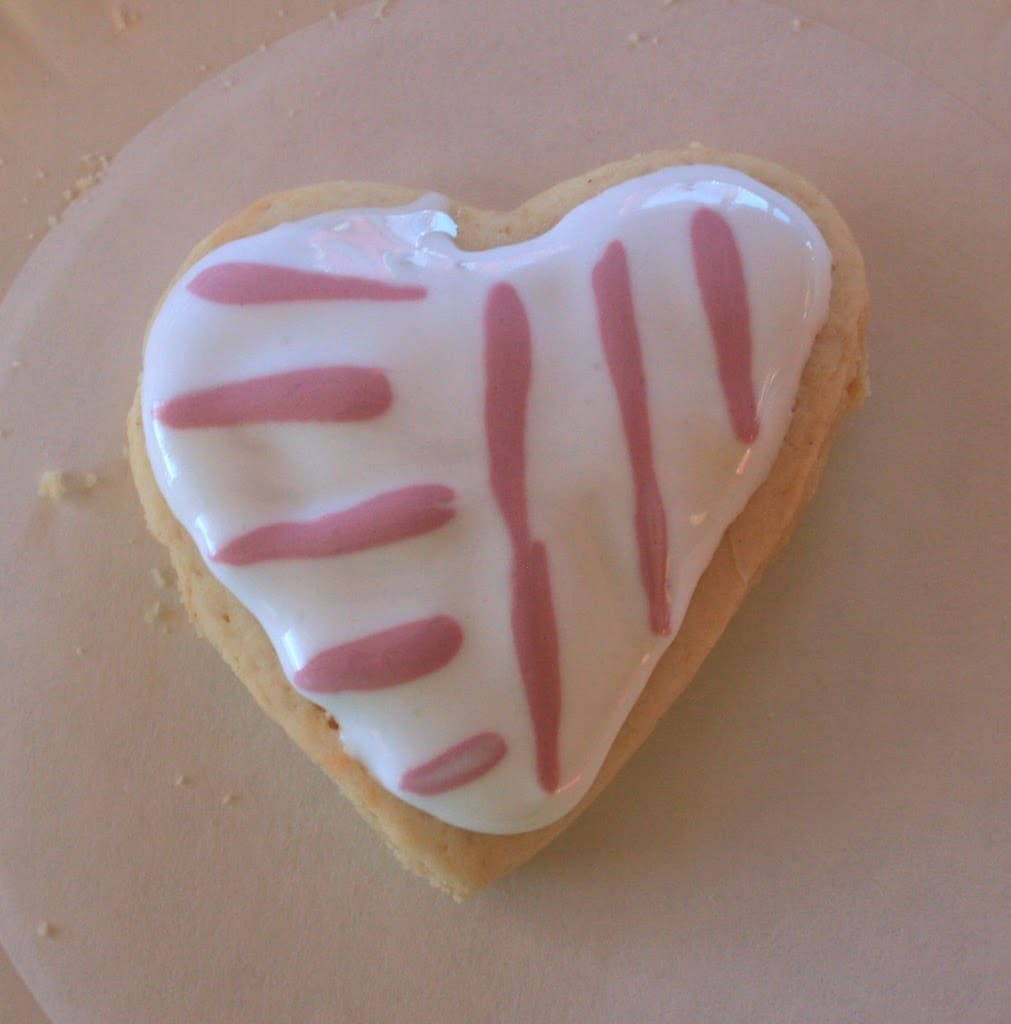
For hearts that go around the cookie place dots all along the edge.
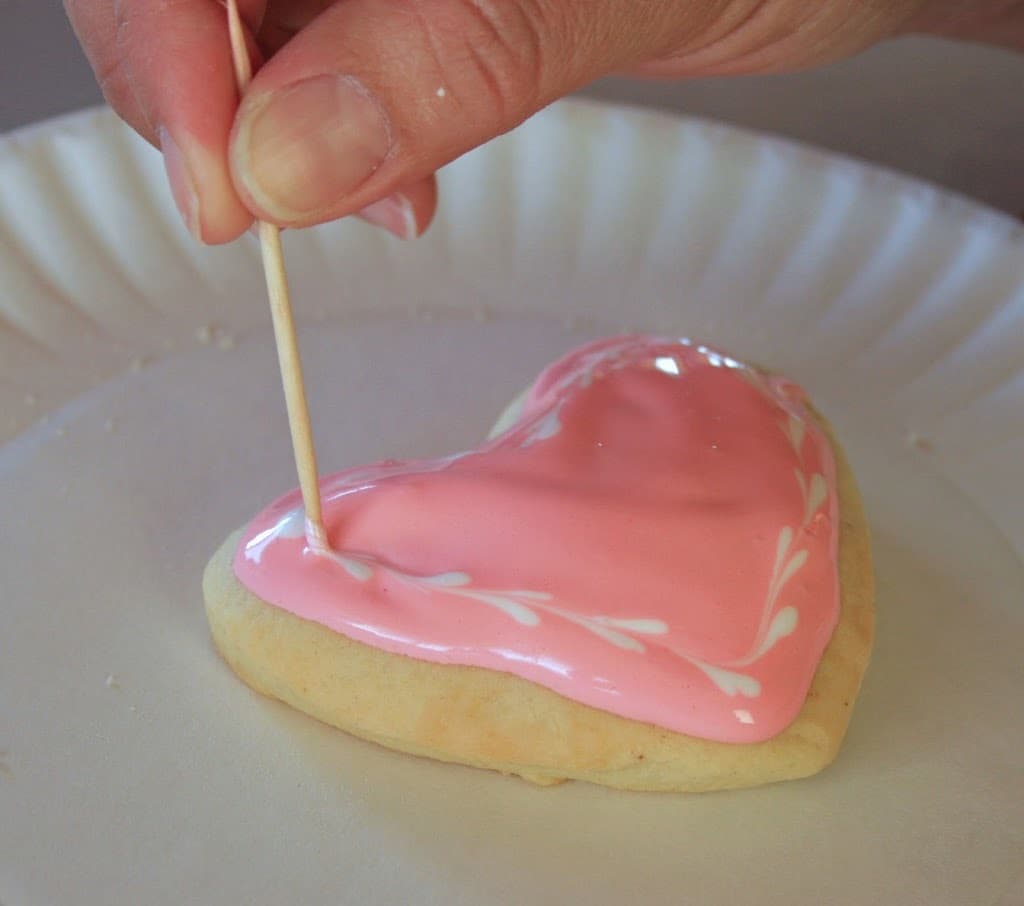
Start at the top in the middle of the heart. Drag your toothpick through the dots going clockwise around the edge.

For this next cookie you’ll make swirl designs. I’m showing on the same cookie how to do it two different directions.
With your toothpick draw lines going either across or up-and-down on your cookie. You’ll have to dip your toothpick into your contrasting icing many times to get the lines drawn.
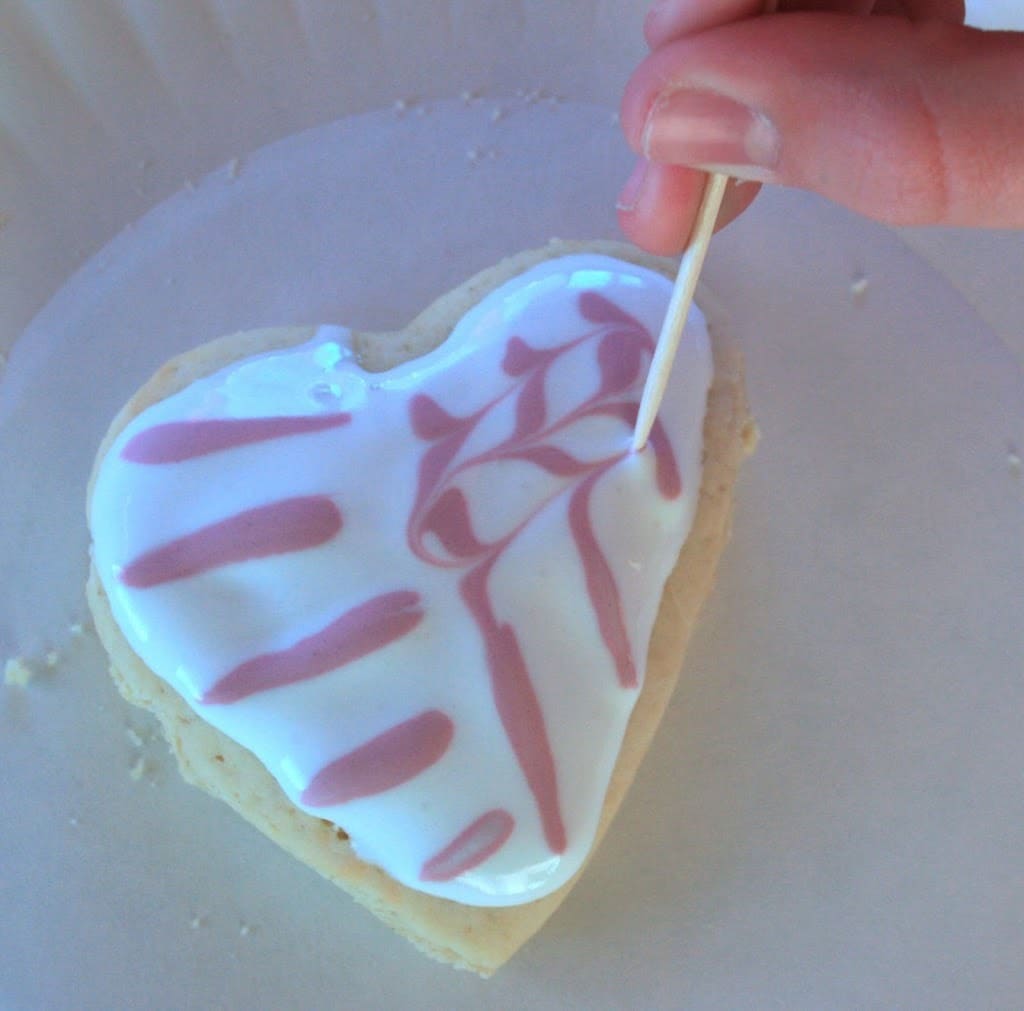
Now for the lines that went up-and-down draw the tip of your toothpick back and forth across the lines.
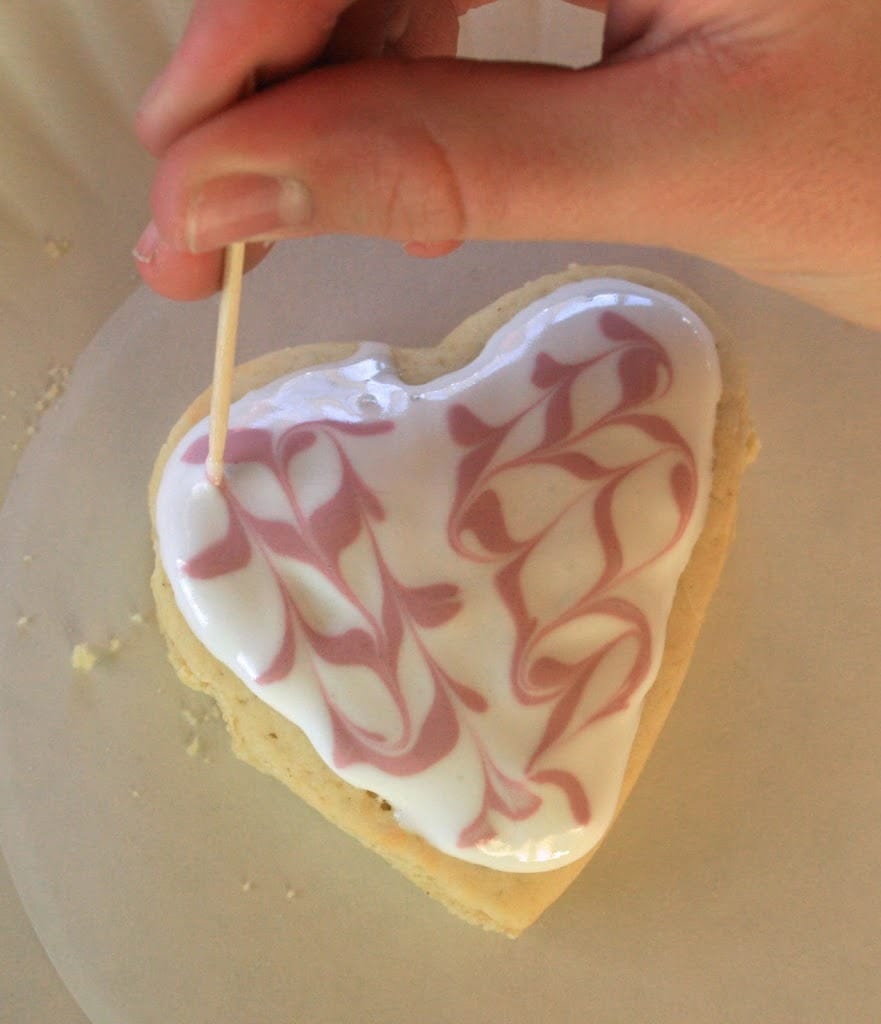
For the lines that went across drag the tip of your toothpick up-and-down through the lines.
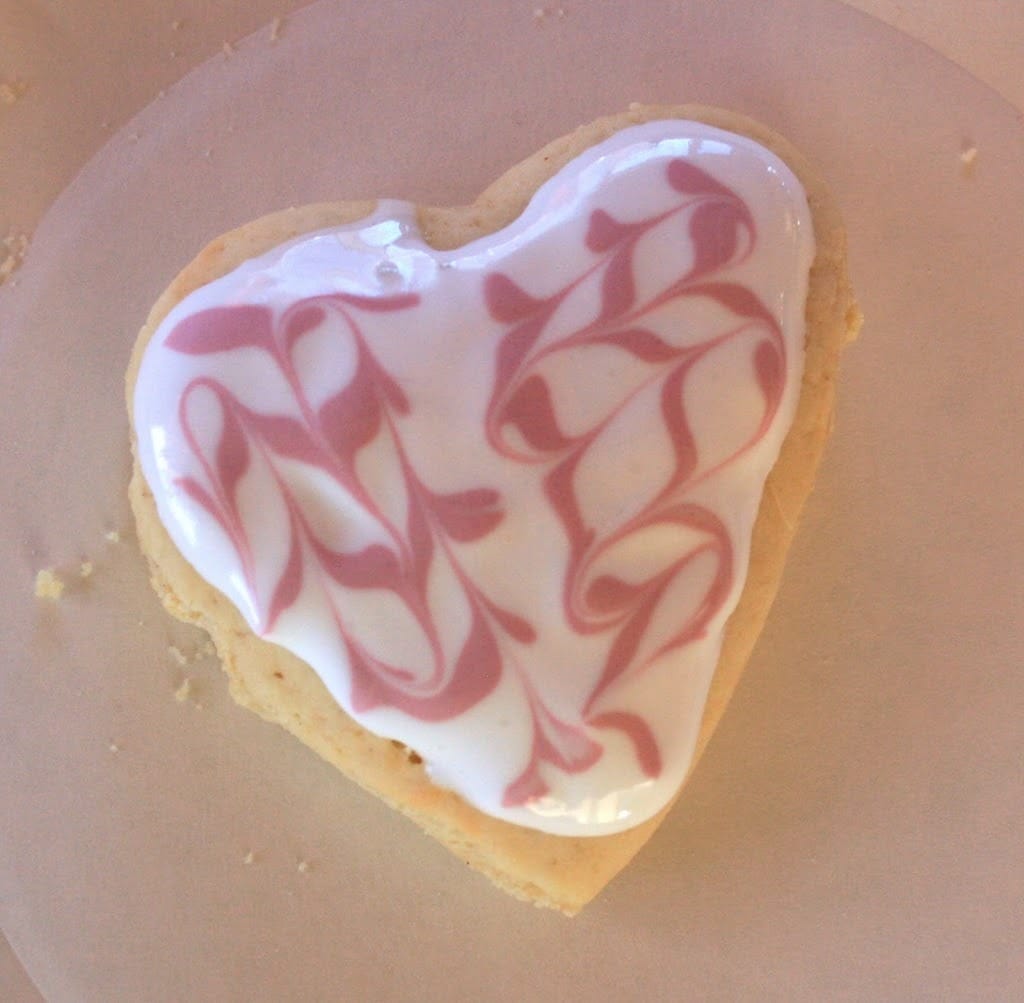
Swirlies!
The last design is a big spiral. With your contrasting colors make several X’s in the background color.
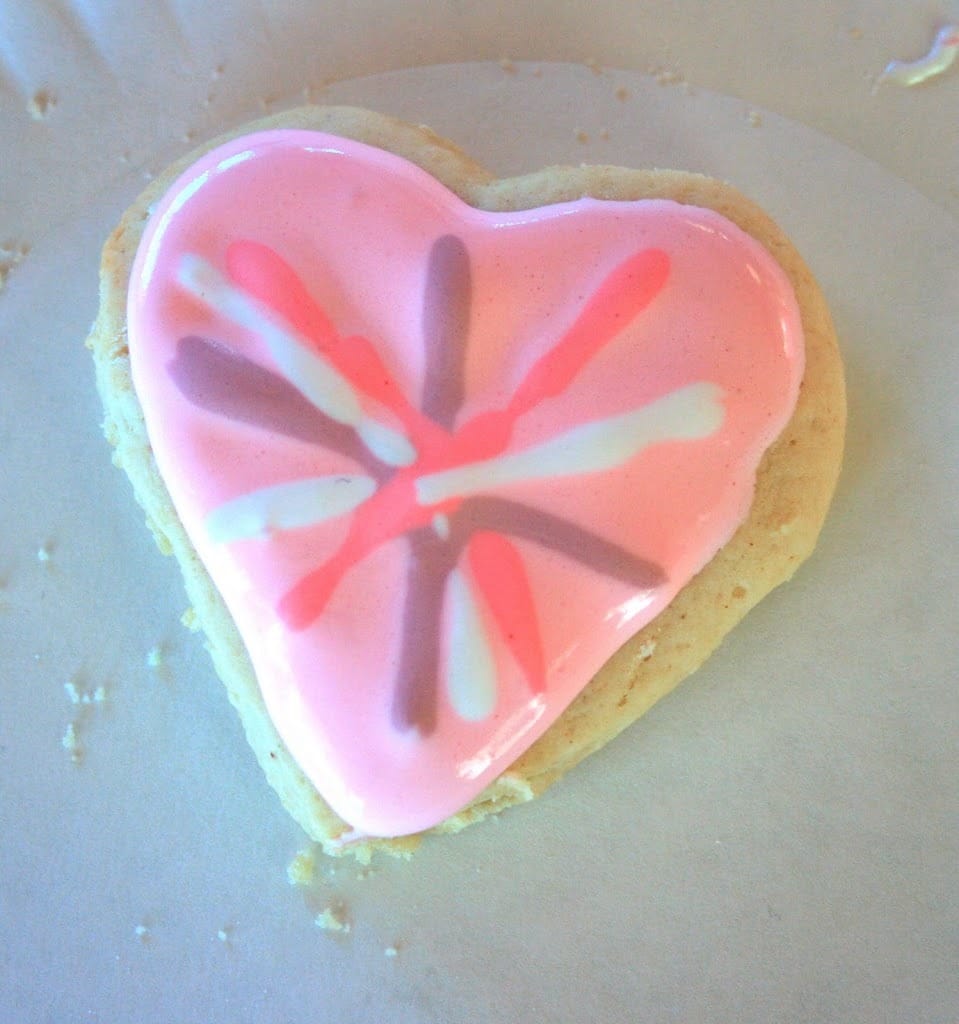
Starting in the center of the heart drag the tip of your toothpick around and around in a spiral pattern going outward.
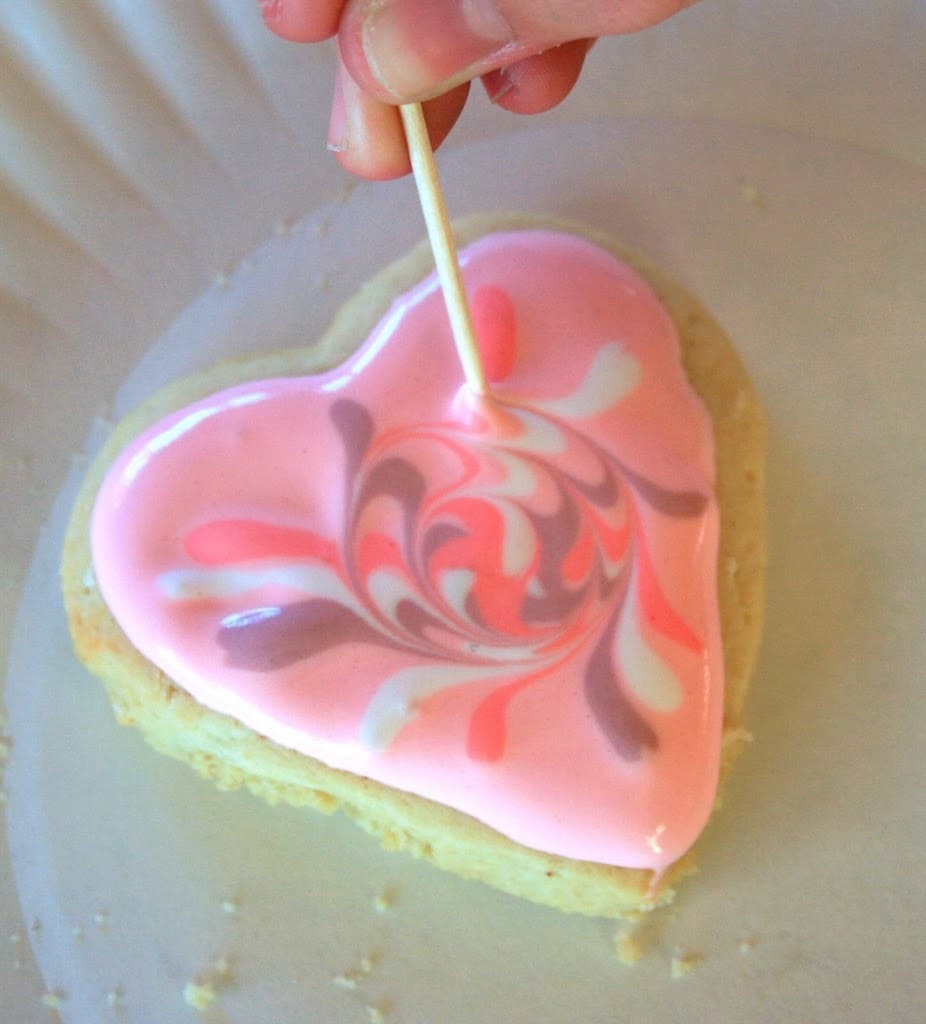
Isn’t that pretty?

Now using these simple techniques try making your own Valentine cookies and see if you can create new patterns and designs.
 © 2007-2011 Chocolate on my Cranium, LLC all rights reserved
Thanks for the recipe and tips-we are so trying that for FHE!! Have I mentioned I LOVE your blog? I am going to be just like you when I grow up. Even though I may be older than you already…
Fun… This is a great Valentine Cookie Recipe. I love that you showed how to achieve the awesome cookie designs. I am looking forward to baking and decorating. Great Blog by the way!!
Sure Fit Slipcovers
very neat! Thanks for sharing; I’ll have to try this!
That looks like so much fun! We love to make/decorate sugar cookies for all occasions!!
Lady, these look PHENOMENAL. Can I come over to your house?? I made sugar cookies last week and they turned out awful. I swore I would never make them again. Now… I might just have to try this recipe. Oh man, just looking at those pictures makes me drool.
Yeah and as a side note, the other day when you posted the cookie pictures and said “recipe forthcoming!” I almost mutinied. Cookies are my favorite food group. Yum yum yum.
Seriously, these look AWESOME!! We may very well have to try those sometime next week. Thanks for sharing!
Those are so pretty. Wow. I’m impressed.
Very pretty! I usually ice mine with butter cream and just leave them without any decoration, but next time I think I’ll try royal icing and some of your ideas.
These are SO pretty. I’m very skeptical of liking to eat royal icing, but this might persuade me to try it.
I’ve been blog stalking ever since you visited mine! I love all of your ideas and you have inspired me to be a better mother and teacher. Thank you so much for being who you are and sharing your example! We made the valentine cookies today and are drooling with anticipation. Thanks again!
The gingerbread house icing instructions at the beginning of this post DO NOT WORK! I followed instructions exactly, beat for 7 minutes with my Kitchenaid stand mixer, and it looked perfect. By the time I quickly scooped it into a bag and began to pipe onto my pieces, it had completely turned into liquid. A runny mess. SO disappointed!
Hi Nancy, did you use fresh egg whites or meringue powder?
Trying to help troubleshoot why the icing didn’t work for you.
Recently I made the icing for a girls get- together where we made gingerbread homes out of gram crackers. I made the icing with egg whites since I didn’t have meringue powder. I whipped it on High for the 7min and it turned out great. Two batches was enough and extra for seven of us. We were excited that it held so well. We didn’t mind the taste but we were hoping for more flavoring. A huge plus for the hold:)
My kids and I are going to have so much fun with this today! Thanks for sharing!