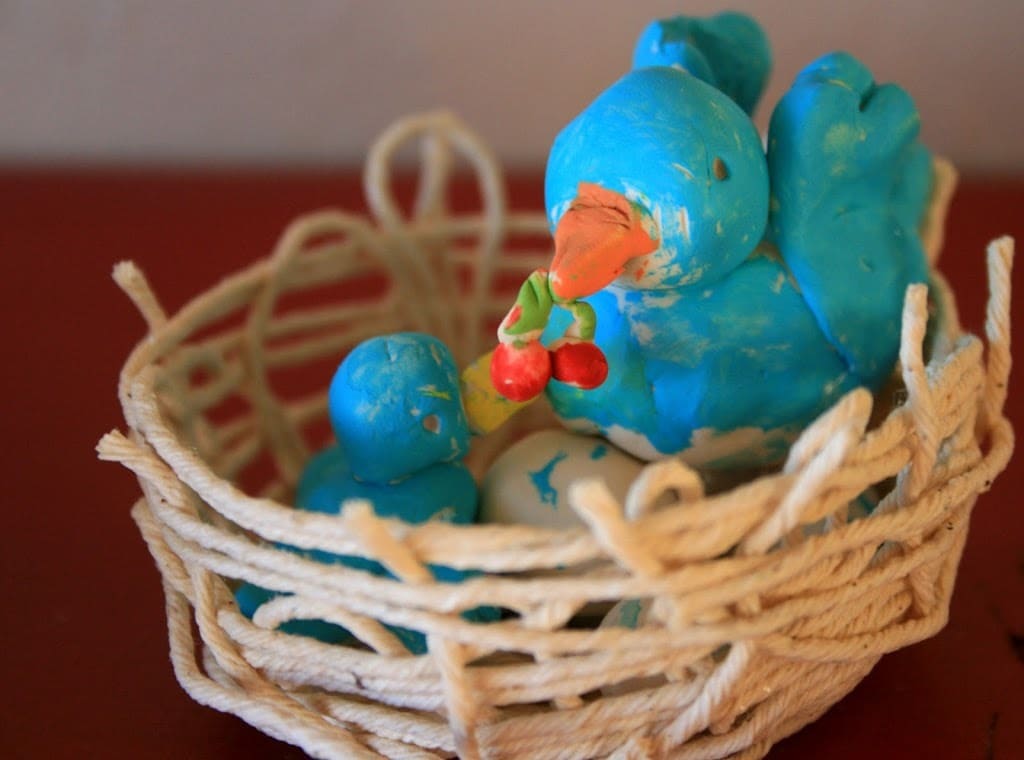
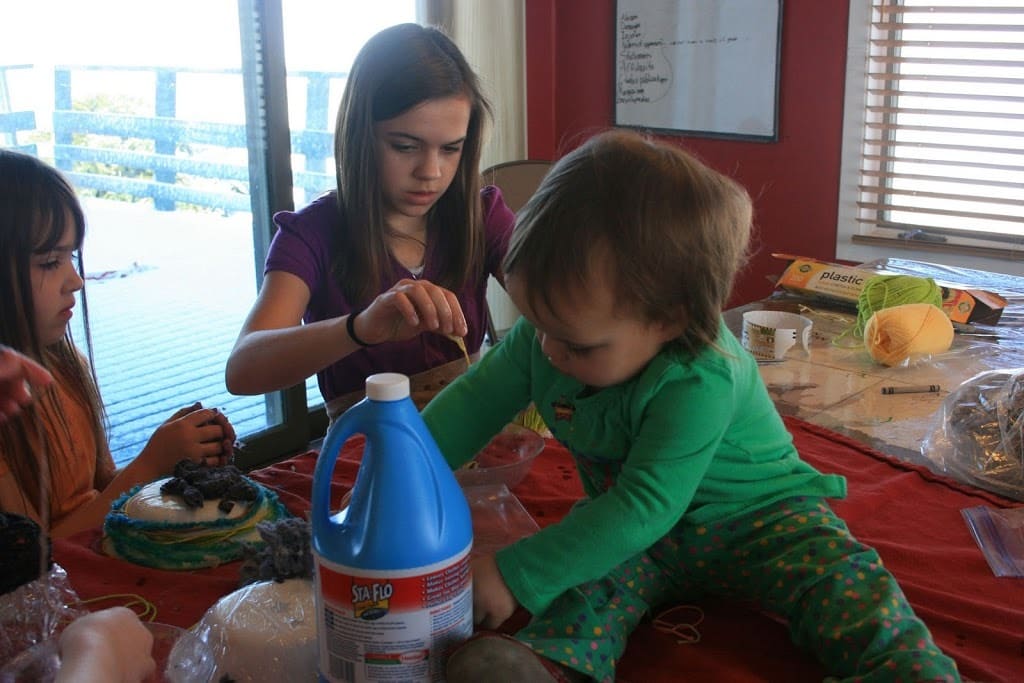
Friday we had a bit of fun making both edible and non-edible birds’ nests. The kids really got into it and let their little personalities shine through on their creations.
String/Yarn Birds’ Nests
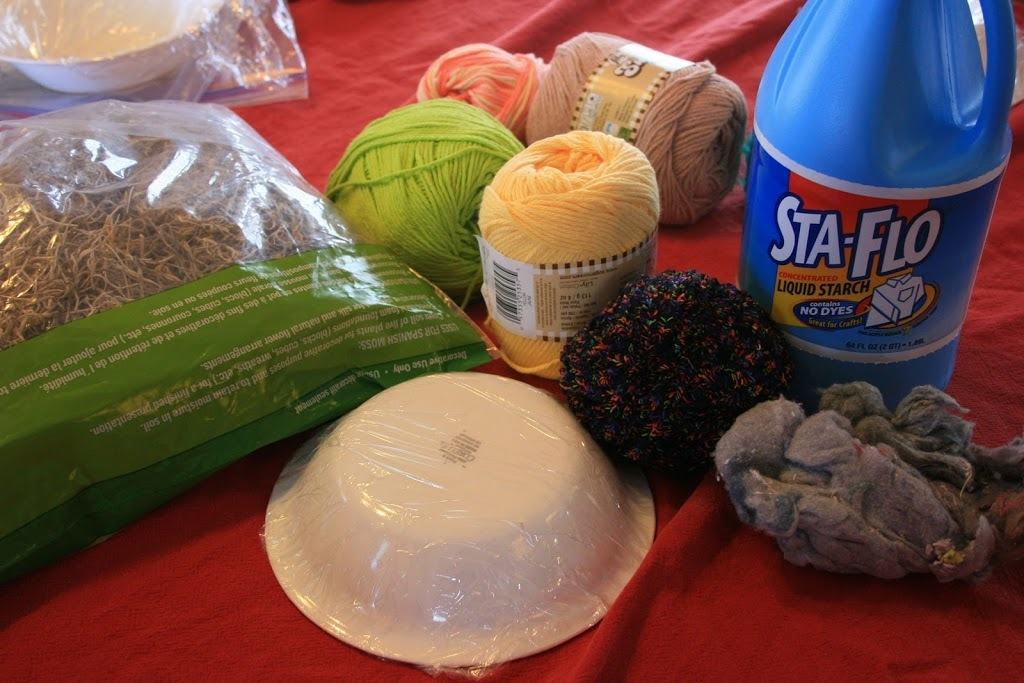
Materials Needed:
Liquid Starch
Various Yarn and String Bits(fabric strips would work well too)
Bowls or jars
Plastic wrap
Oven Bake Clay (sculpey)
Step 1: Cover the outside of the bowls or jars you will use with plastic wrap to protect them. This also makes it easier to remove the nests once they are dry.
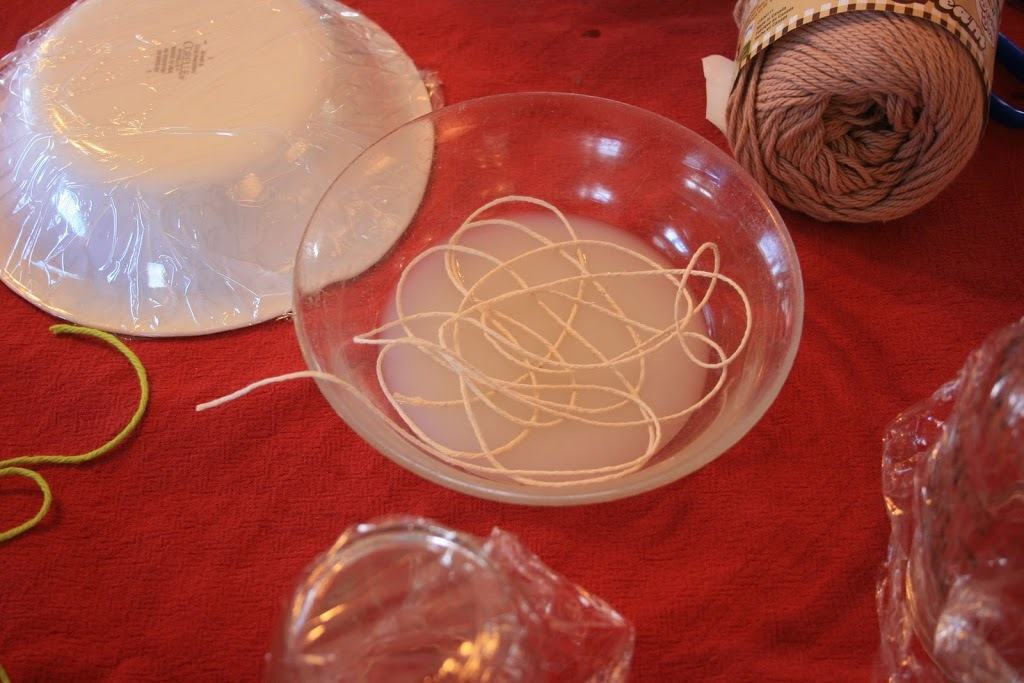
Step 2: Dip pieces of string or yarn into liquid starch. Squeeze out the excess as you take the string out.
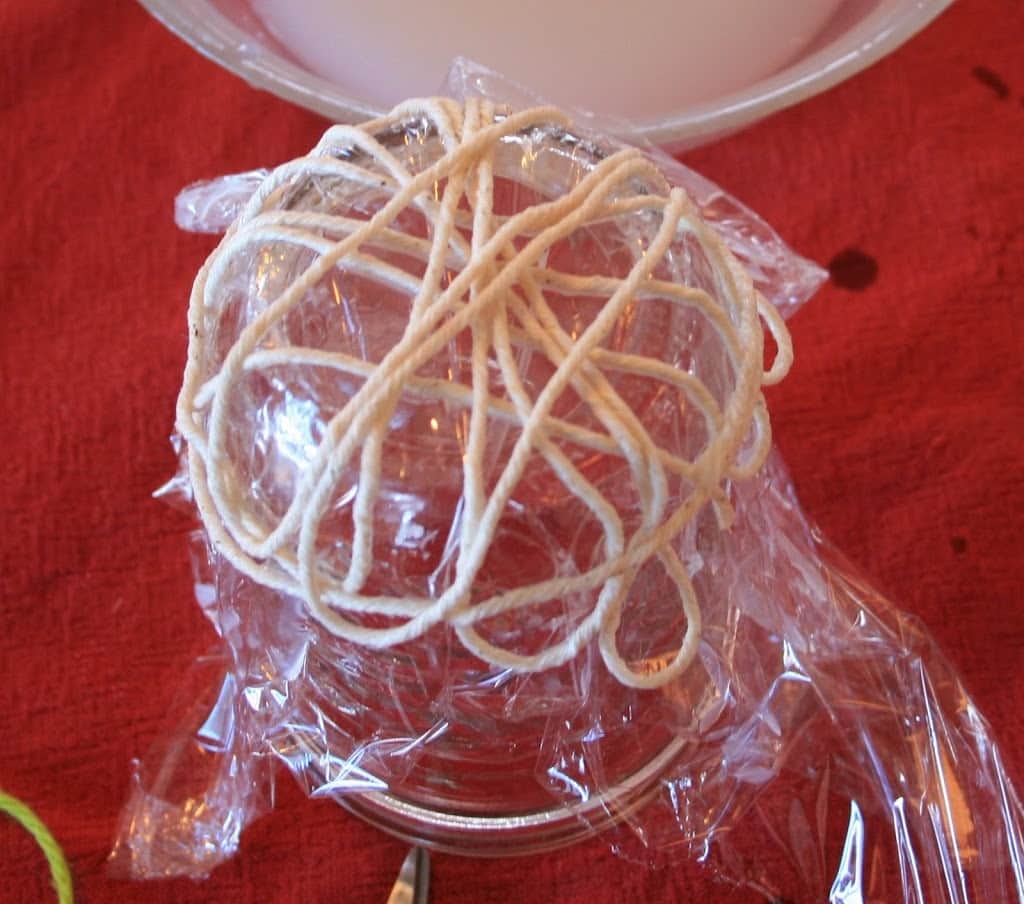
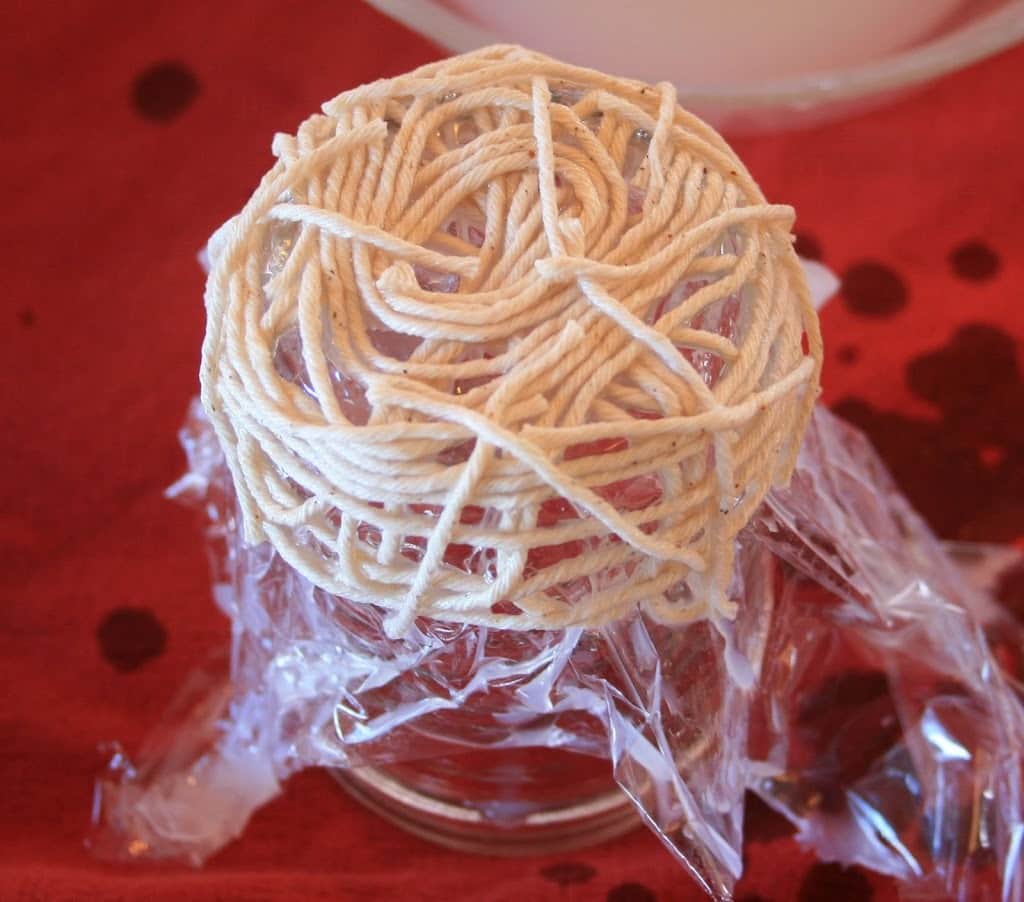
Step 3: Wrap your strings around the bowls or jars. Going back and forth in a criss-cross pattern works better than just wrapping it around and around the bowl.
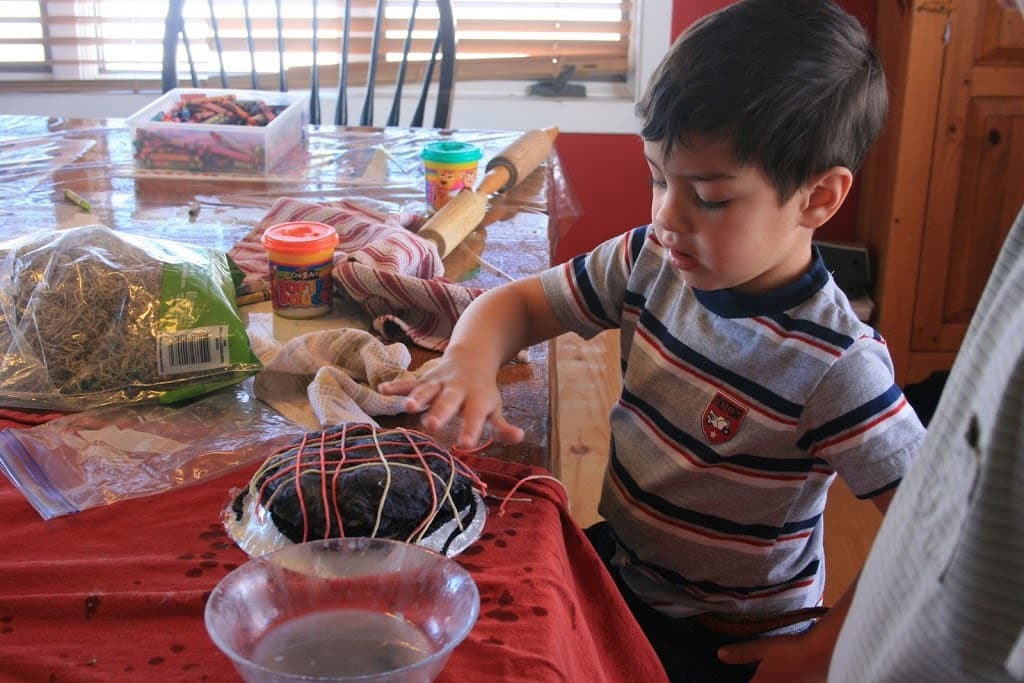
Step 4: Let them dry overnight. Some of the kids also put dryer lint in their nests. That took a VERY long time to dry!
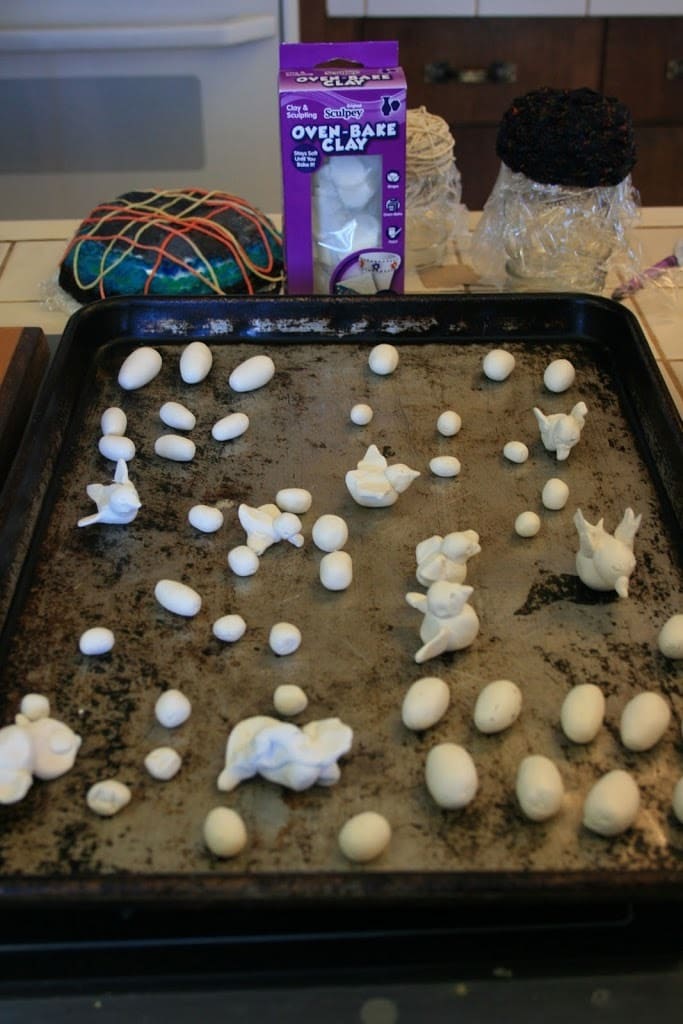
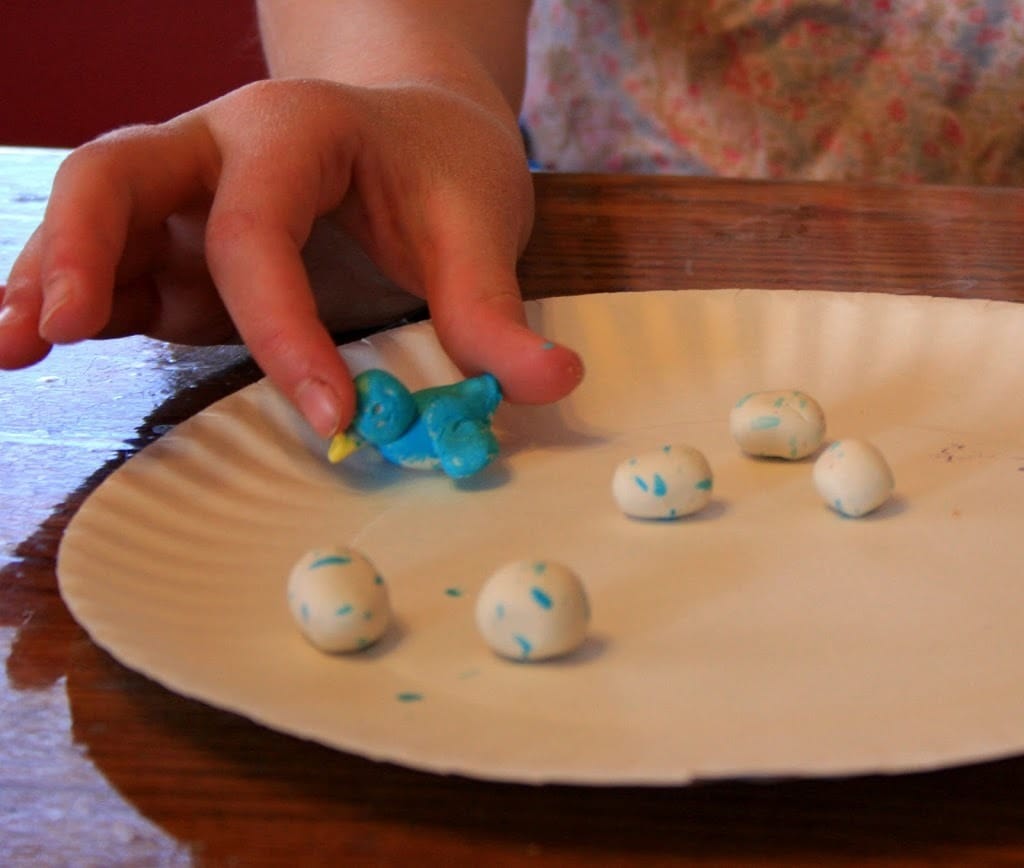
Step 5: Shape oven bake clay into birds and eggs. Bake according to package directions.

Step 6: Once the oven bake clay is cooled down, paint away!
Step 7: When the nests are dry carefully lift the plastic wrap from around the bowl to remove the nests. Flip the nests over and remove the plastic wrap.
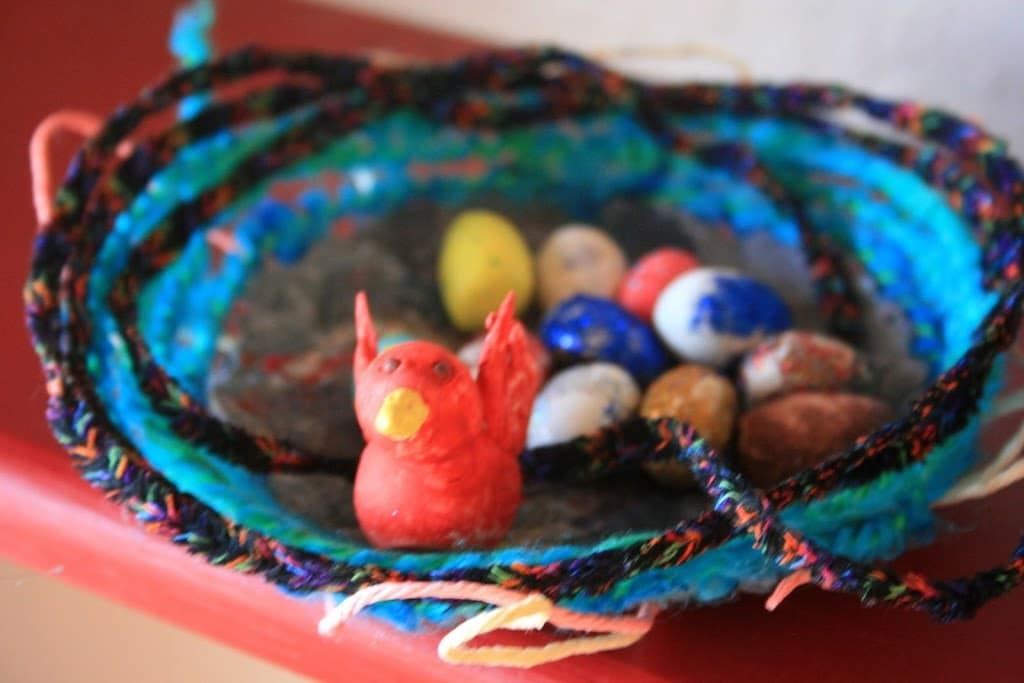
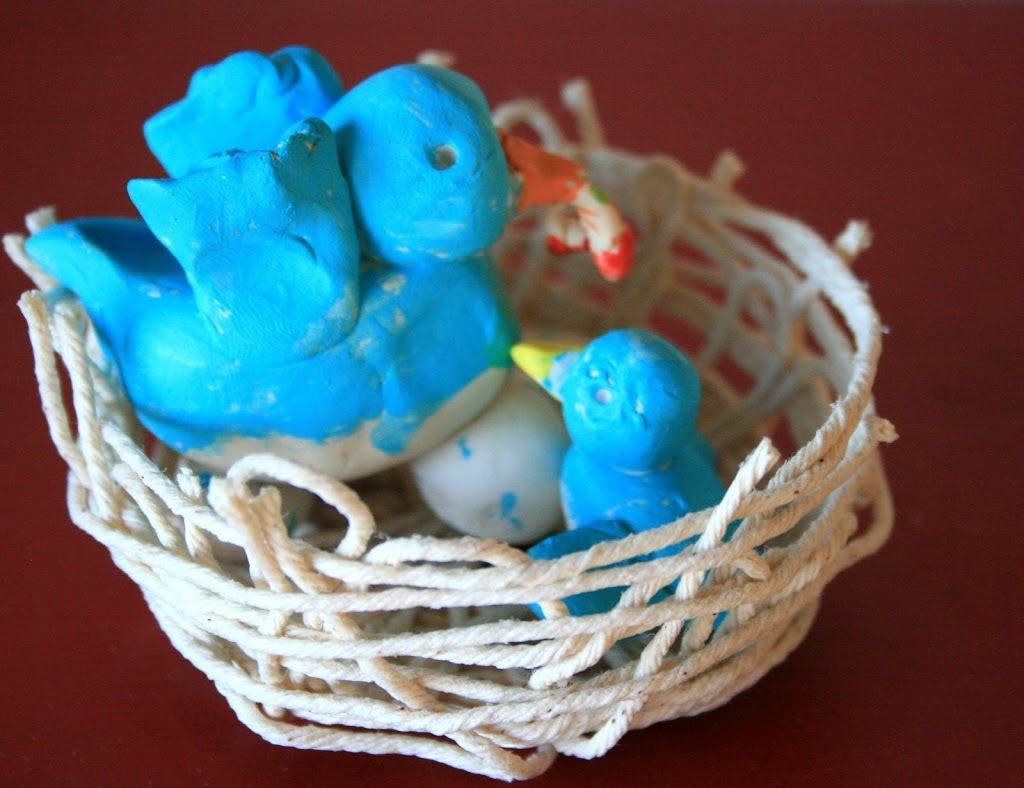
Step 8: Place birds and eggs in nests to decorate your house for spring.
Edible Birds’ Nests
Ingredients:
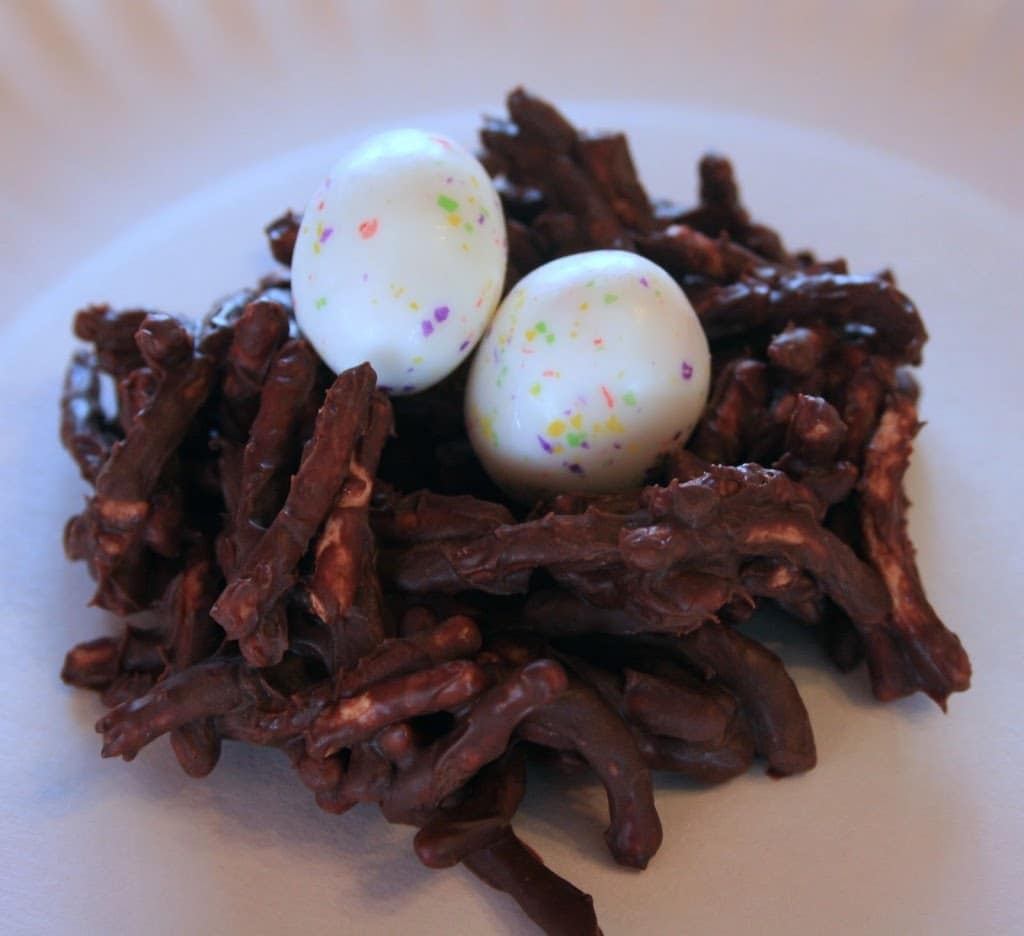
Dry Chow Mein Noodles
1 Cup semisweet chocolate chips
1 Tbsp. shortening
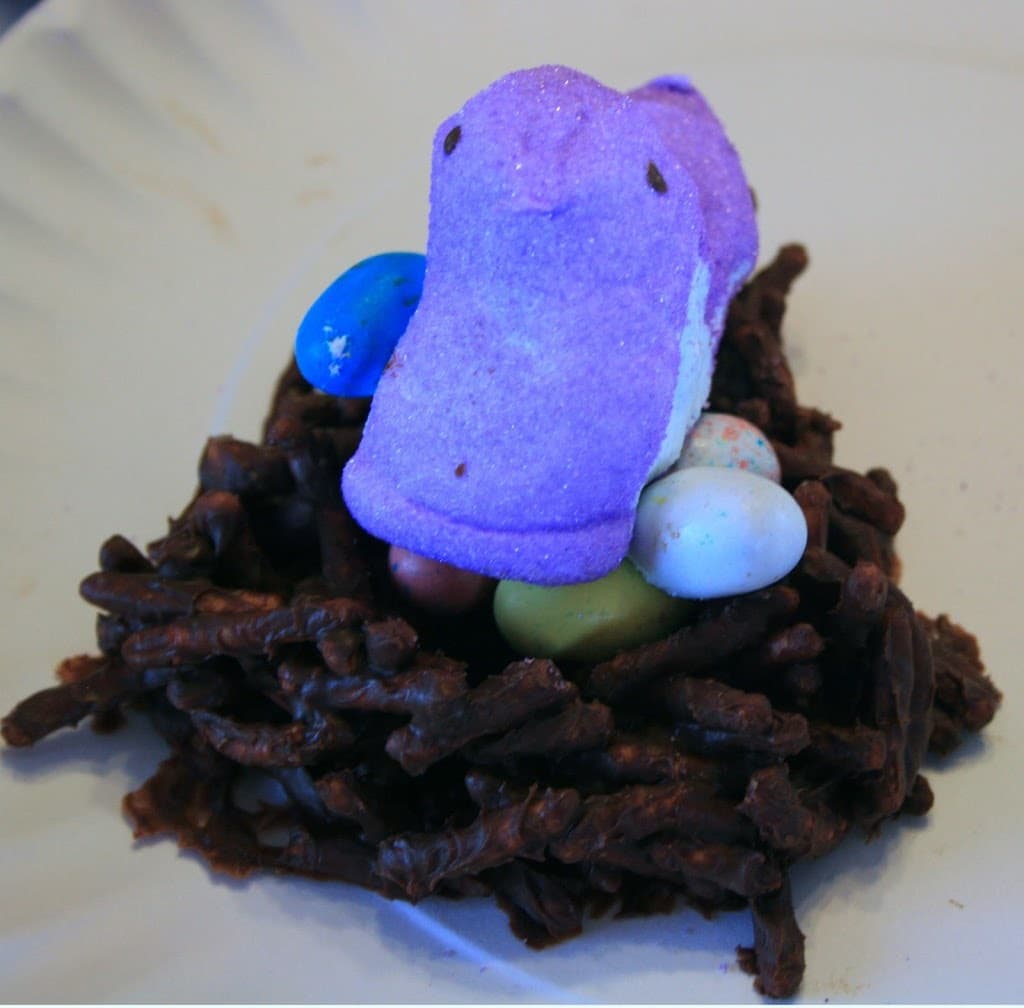
Candy eggs and marshmallow birds
Step 1: Melt the chocolate chips and shortening in a microwave safe bowl. Only cook for 30 seconds at a time stirring after each 30 seconds. It only took us about 1 minute to melt all the chocolate chips.
Step 2: Stir in LOTS of dry chow mein noodles. I didn’t measure how much we put in. Stir to coat them all with the melted chocolate.
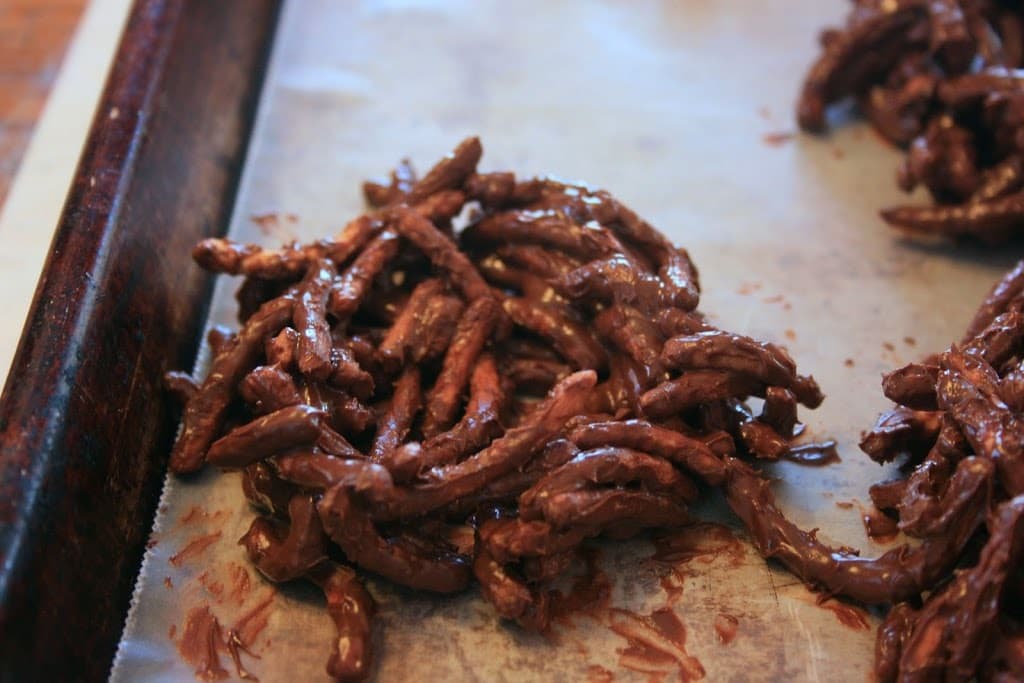
Step 3: Drop big spoonfuls onto a waxed paper lined baking sheet or plate. Shape each glob into a little nest.
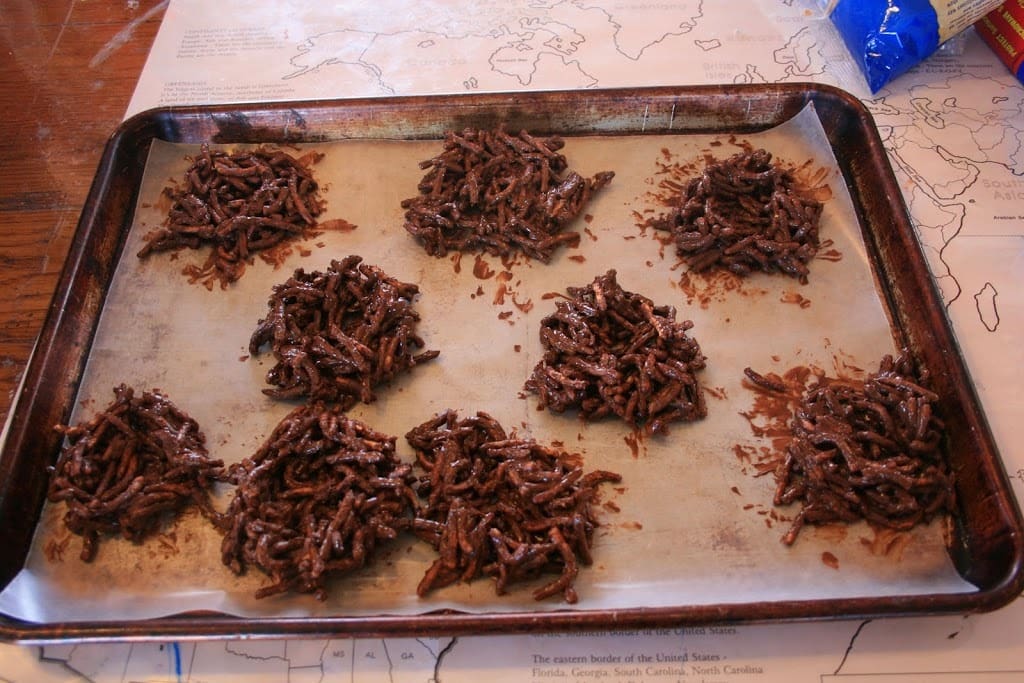
Step 4: Put them into the refrigerator to harden.
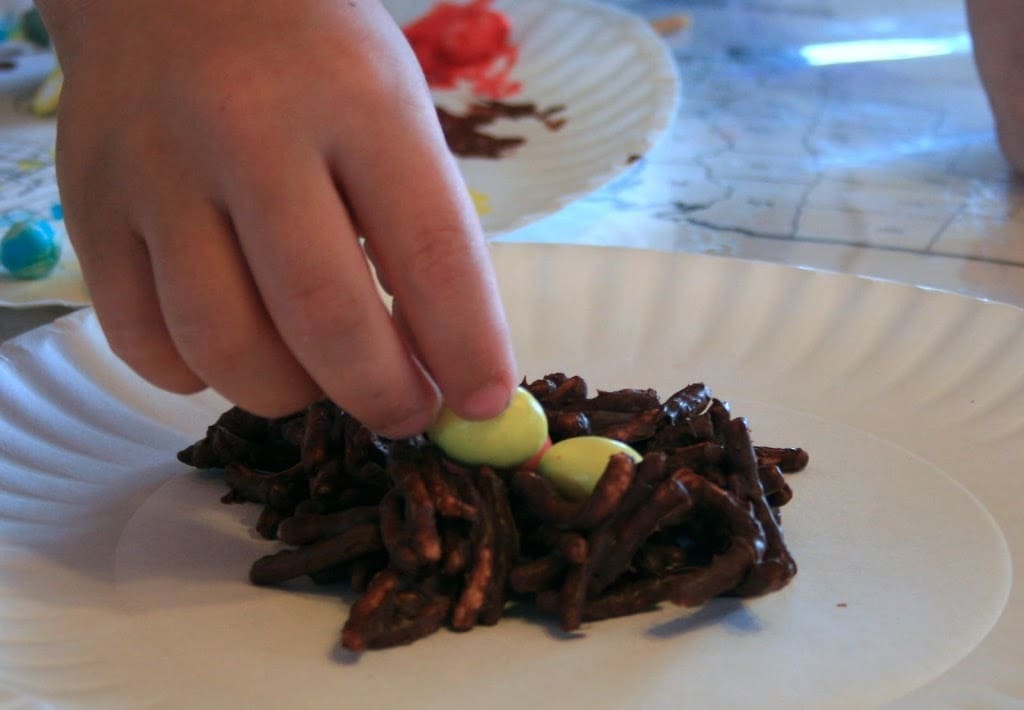
Step 5: Place candy eggs and marshmallow birds in your nest and gobble them all up!
 © 2007-2011 Chocolate on my Cranium, LLC all rights reserved
Oh, I love these ideas. I think the girls would totally love making nests and eggs. Great thing to do for a family night.
Such a cute idea! I ran across your blog a couple of weeks ago & loved it right away! I have been running all weekend and just sat down to see what fun new things you had on and started to go thru some of your old posts – when I saw your apron one with your daughter holding the cookbook it clicked in my head! Oh my goodness I know this family! I am Terry Bleaks daughter-in-law!! You have such a beautiful family & I only wish I could be as organized and amazing as you!!
we will definately be giving those yarn nests a try. I tried to make them around balloons once and it didnt work.(slid off the balloon) We’ve done the chocolate ones several times.
thanks for the idea to add to our easter activities for april
I have never made the yarn nests, but you makeit look so easy I might just try it!
My preschool kids love the edible nests- we have also made them using marshmallows (rice crispy treat style) and jelly beans. Just press into greased muffin tins to shape and pop them out when cooled.
@Judy, WOW! How fun to have that connection with you! Someday we plan on taking the kids down south to Panaca to see where Don and Sylvia lived and are buried. We’ve been wanting to go for years but we never seem to get it together enough to just go.
Where do you buy liquid starch? I can’t find it in the obvious places (grocery store laundry aisle).
Wow! They all turned out GREAT!
FUN!
Those are so cute! I was already planning in making the edible ones with the kiddos sometime this spring, but we’ll definitely make some of those string ones now, too. Thanks for sharing the idea!
p.s. I’ve visited your blog a few times before, but I think this is the first time I’ve commented. Great blog!
What a great project! I love that it works for all ages
I remember when I was little making a big basket out of string like that nest. I loved it. And I make those yummy nests sometimes too. I love birdies so these are so cute to me.