• Home
  • Create
    • Cookbook
      • Recipes
    • Crafts
    • Grateful Hearts Giving Hands
    • Holidays
      • Christmas
      • Easter
      • Independence Day
      • Thanksgiving
      • Valentine’s Day
    • Ingenious Ideas
    • Printables
    • Sewing
  • Family Life
    • Farming
    • Genealogy
  • Homeschool
    • Art
    • History
    • Homeschool Encouragement
    • Language Arts
    • Learning Styles
    • Library
    • Math
    • Science
    • Unit Studies
  • Motherhood
    • Home Making
      • Establish a House
    • Me
  • My Faith
    • Celebrate the Family Proclamation
      • Family Proclamation Articles
    • Family Home Evening Lessons
    • Flannel Board Stories
    • General Conference
    • Memorize the Family Proclamation
    • The Living Christ: An Easter Countdown
      • Living Christ Lessons
    • Young Women
  • Contact
  • About Me

Cranial Hiccups

Every once in a while and totally unintentionally my brain spews out a good idea.

You are here: Home / Motherhood / Home Making / Sewing Basics: Sewing Along Lines

Sewing Basics: Sewing Along Lines

April 25, 2011 by Montserrat {Cranial Hiccups} 6 Comments

After having fun sewing all the different stitches our sewing machine can do we take a step back and learn to follow lines drawn on paper using the basic straight stitch on our machine. Do this with an old needle (or change the needle after doing this as paper will dull it) and NO THREAD.

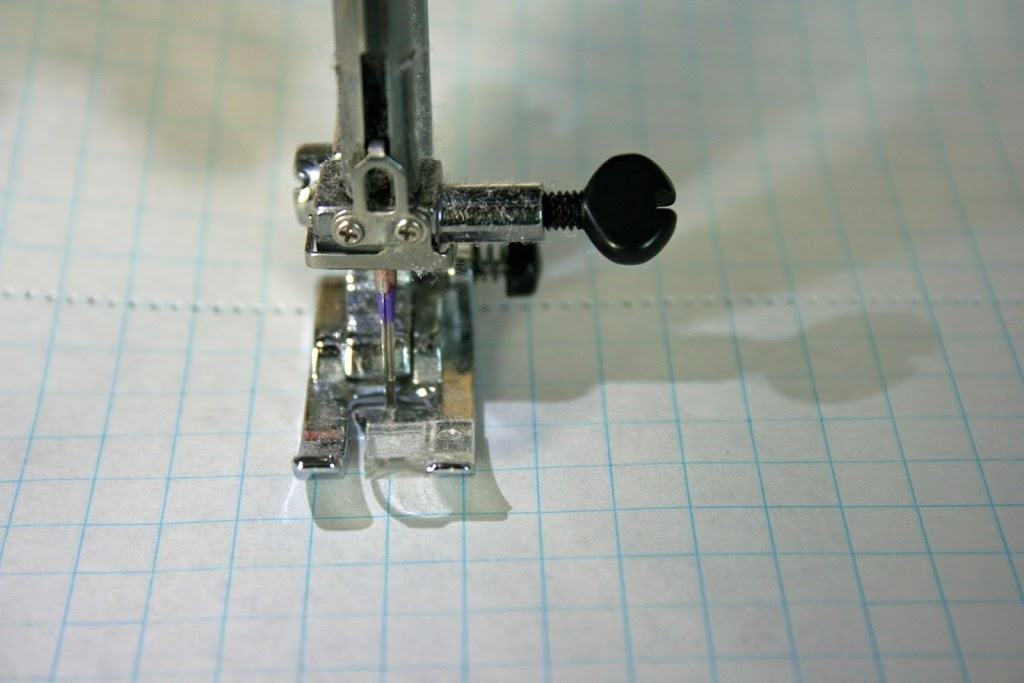
Start by using graph paper and just follow lines going down. Once your child (or you!) gets the hang of sewing straight lines teach them how to pivot and do corners.


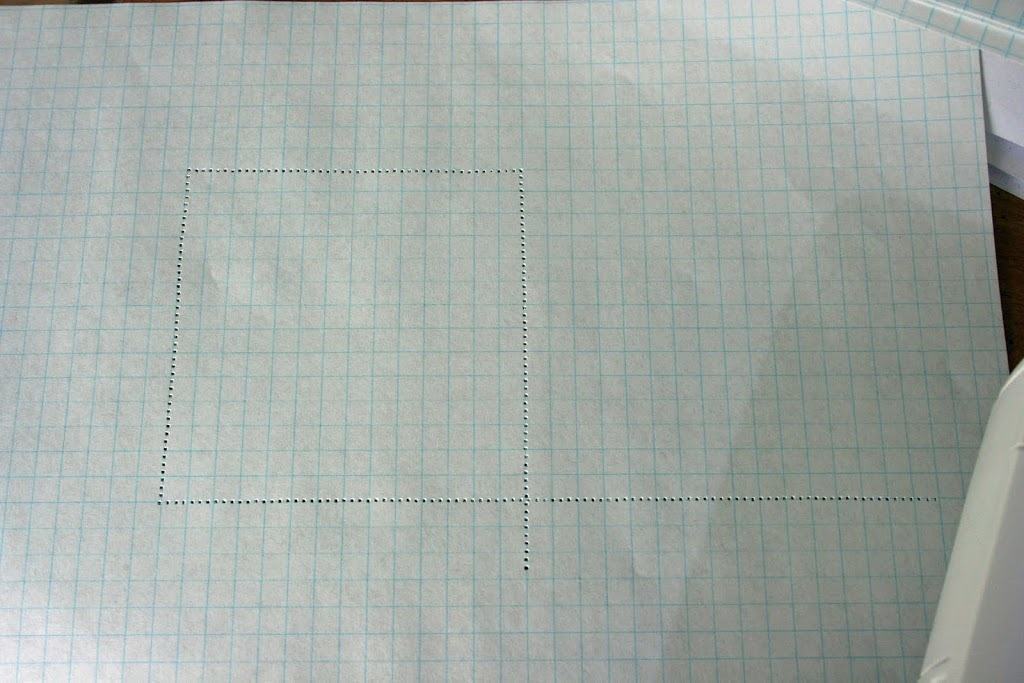
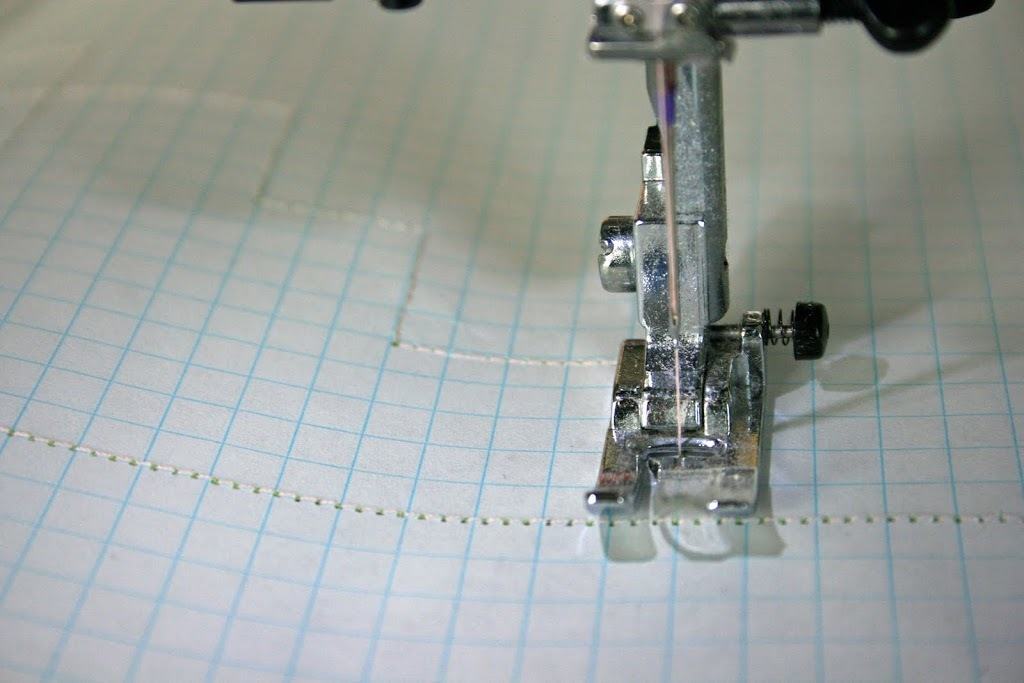
Stitch down a line on the graph paper and stop when you get to any point where another line crosses it. Leave the needle down in the paper. If your machine is like ours and automatically puts the needle up when you stop, turn the flywheel toward you by hand to put the needle down. Lift the presser foot. Turn the paper around to the line you will now follow and lower the presser foot. Stitch to another corner and do it all over again!

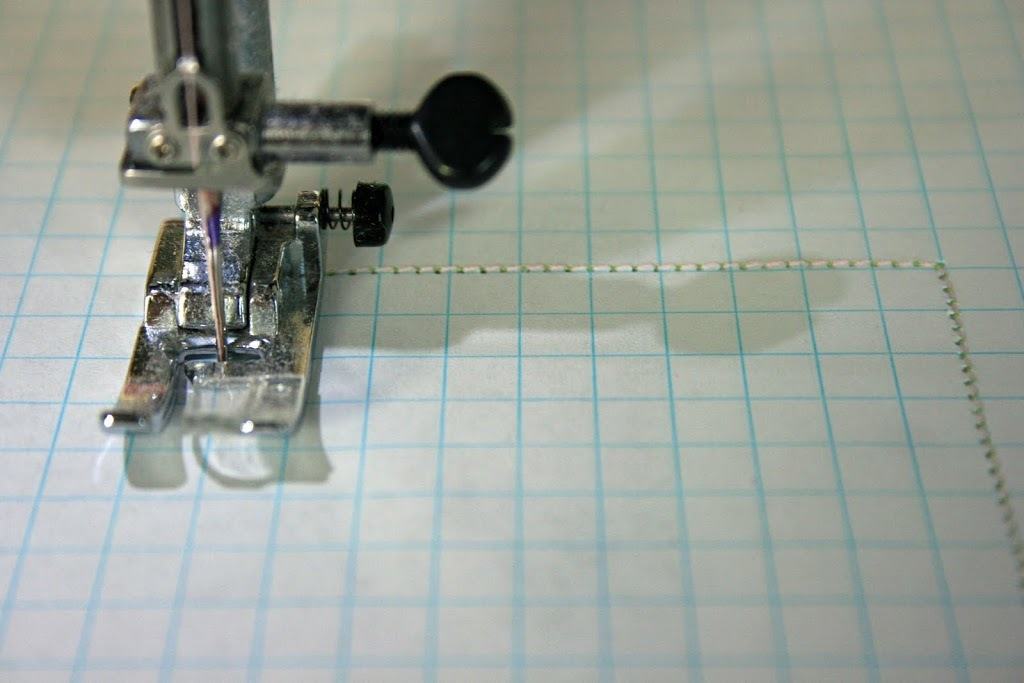
Once you get comfortable doing this then thread your machine with two different colors (one on the spool and a different color in the bobbin) and begin the whole process over again, sewing straight lines, then pivoting.

After this lesson with straight lines my child is usually ready for a break. The next several sewing lessons cover the same process but this time they follow curved lines and zigzag lines.

Here is a pdf file I created with various sewing lines to follow. Just print it off as many times as you need to get the hang of sewing on your machine.

Practice Sewing Lines for a Sewing Machine

After sewing on paper for several lessons, change your needle to a new one, thread your sewing machine, draw lines on fabric and practice sewing on fabric.

Cocoa Signature with Candy 2 © 2007-2011 Chocolate on my Cranium, LLC all rights reserved

© 2007-2013 Chocolate on my Cranium, LLC all rights reserved

Share this:

  • Click to email a link to a friend (Opens in new window) Email
  • Click to print (Opens in new window) Print
  • Click to share on Facebook (Opens in new window) Facebook
  • Click to share on X (Opens in new window) X
  • Click to share on Pinterest (Opens in new window) Pinterest
  • More
  • Click to share on LinkedIn (Opens in new window) LinkedIn
  • Click to share on Reddit (Opens in new window) Reddit
  • Click to share on Tumblr (Opens in new window) Tumblr
  • Click to share on Pocket (Opens in new window) Pocket

Related

Filed Under: Home Making, Sewing

Comments

  1. Jocelyn Christensen says

    April 25, 2011 at 6:55 pm

    Ooh, how helpful!! I sew, but I swear I don’t know how to sew straight…learning these basics will be helpful!

    Reply
  2. Kodelle says

    April 25, 2011 at 7:59 pm

    I love this idea. I am so doing this. I can’t sew a straight line to save my life.

    Reply
  3. Sharron says

    April 25, 2011 at 9:11 pm

    Great idea to share these tips. I did this when I was a little girl to make play “checks”. I loved to tear perforated paper!

    I had to do it in 7th grade as well. I was the only one who knew how to sew in my class, but still had to do all the practice exercises. Great review for me!!

    Reply
  4. Ginger says

    April 26, 2011 at 6:18 am

    I had a sewing school for years in my home and did this with all my students. We not only did straight lines, they sewed around flowers and curvy lines, too.

    Reply
  5. Kimberly says

    April 26, 2011 at 12:17 pm

    oh thank you!

    Reply
  6. Amber says

    April 27, 2011 at 3:35 am

    this is will be so helpful for my girls- I love to sew but never took a formal class and have had a hard time teaching them. I never would have thought of this. I look forward to the future sewing lesson posts!

    Reply

Leave a ReplyCancel reply

This site uses Akismet to reduce spam. Learn how your comment data is processed.

Hello, I'm Montserrat. I'm a farmer's wife, mother of eleven, homeschooler, chocoholic, music lover, and like to play a good game of Scrabble. You can read more about me here. . .

You'll find a little bit of everything on this blog. It's my place to share all the ideas, activities, crafts, and resources that I have gathered and tried over a number of years. Feel free to browse around using the menu up top or doing a search in the box below.

Enter your email address to subscribe to this blog and receive notifications of new posts by email.

Archives

April 2011
S M T W T F S
 12
3456789
10111213141516
17181920212223
24252627282930
« Mar   May »

Return to top of page

COPYRIGHT © 2025 Montserrat Wadsworth at Cranial Hiccups • Lifestyle Pro Theme on Genesis Framework

[ Placeholder content for popup link ] WordPress Download Manager - Best Download Management Plugin