• Home
  • Create
    • Cookbook
      • Recipes
    • Crafts
    • Grateful Hearts Giving Hands
    • Holidays
      • Christmas
      • Easter
      • Independence Day
      • Thanksgiving
      • Valentine’s Day
    • Ingenious Ideas
    • Printables
    • Sewing
  • Family Life
    • Farming
    • Genealogy
  • Homeschool
    • Art
    • History
    • Homeschool Encouragement
    • Language Arts
    • Learning Styles
    • Library
    • Math
    • Science
    • Unit Studies
  • Motherhood
    • Home Making
      • Establish a House
    • Me
  • My Faith
    • Celebrate the Family Proclamation
      • Family Proclamation Articles
    • Family Home Evening Lessons
    • Flannel Board Stories
    • General Conference
    • Memorize the Family Proclamation
    • The Living Christ: An Easter Countdown
      • Living Christ Lessons
    • Young Women
  • Contact
  • About Me

Cranial Hiccups

Every once in a while and totally unintentionally my brain spews out a good idea.

You are here: Home / Motherhood / Home Making / Sewing Basics: Girls’ Kerchief

Sewing Basics: Girls’ Kerchief

May 31, 2011 by Montserrat {Cranial Hiccups} 5 Comments

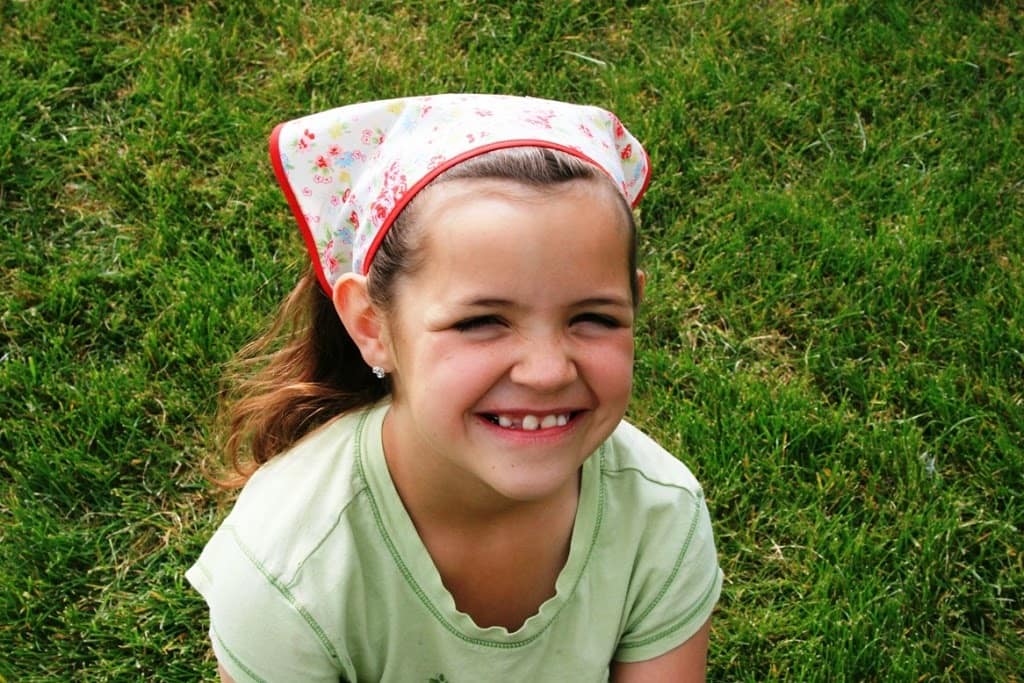
This beginning sewing project is for girls. It is very simple and basic but with cute results. Of course the girls love it!

Materials Needed:

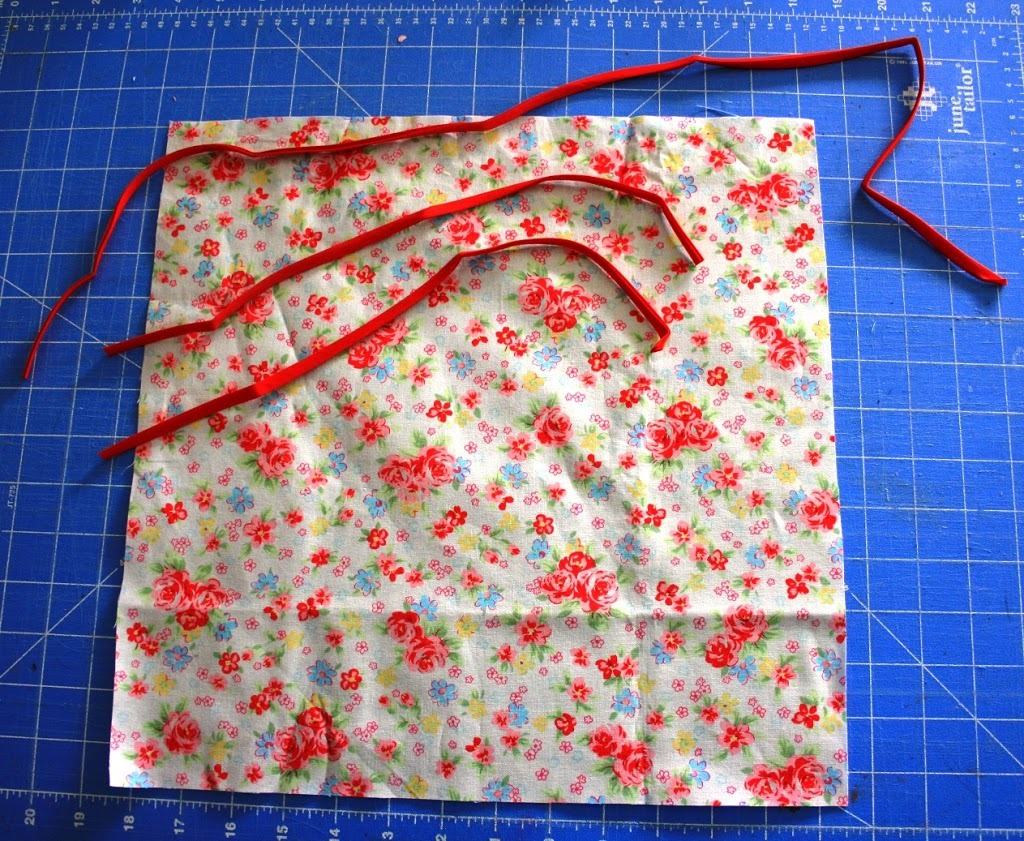
14″ square piece of fabric
Double Fold bias tape cut into the following pieces: 2 – 14.5 inch pieces, 1 – 30 inch piece

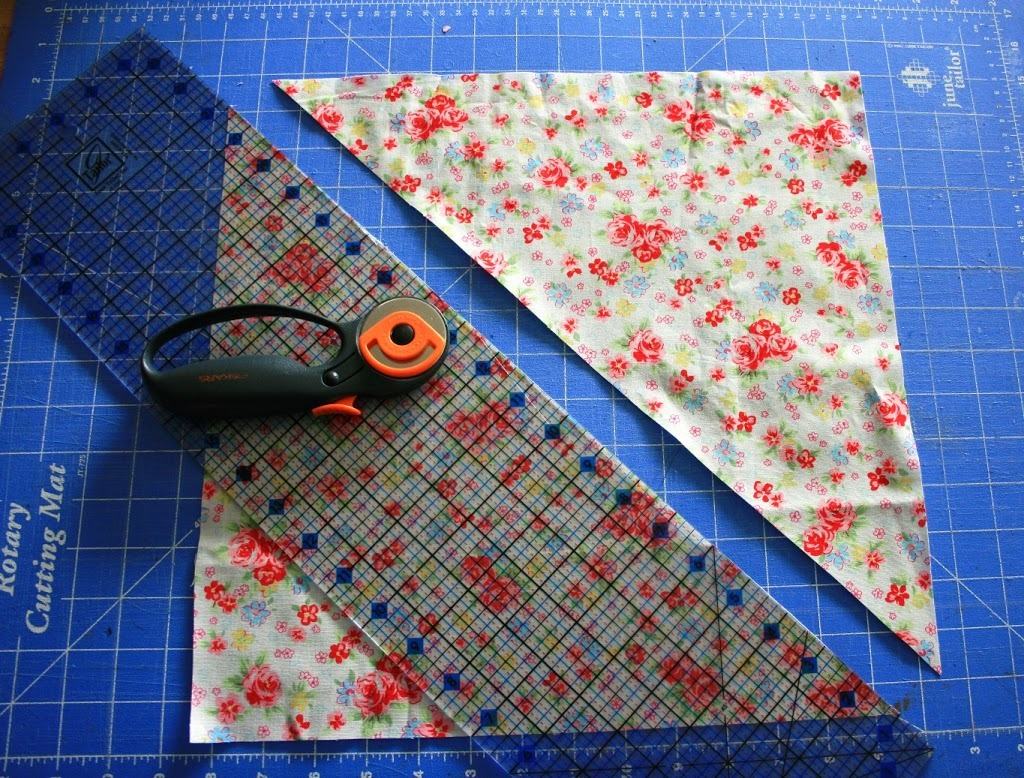
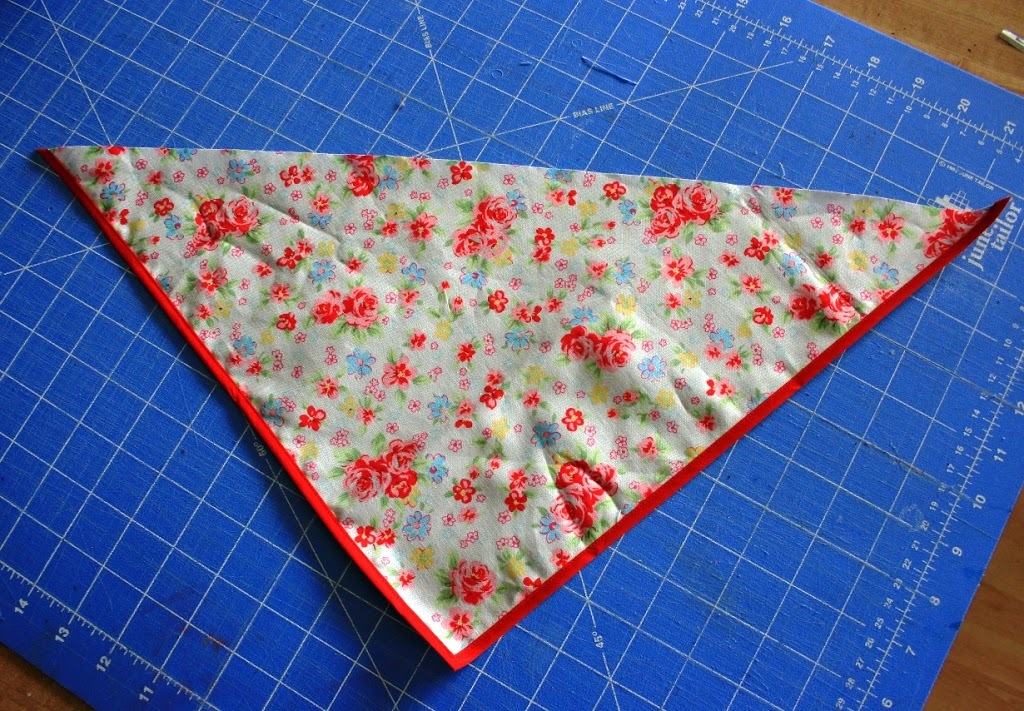
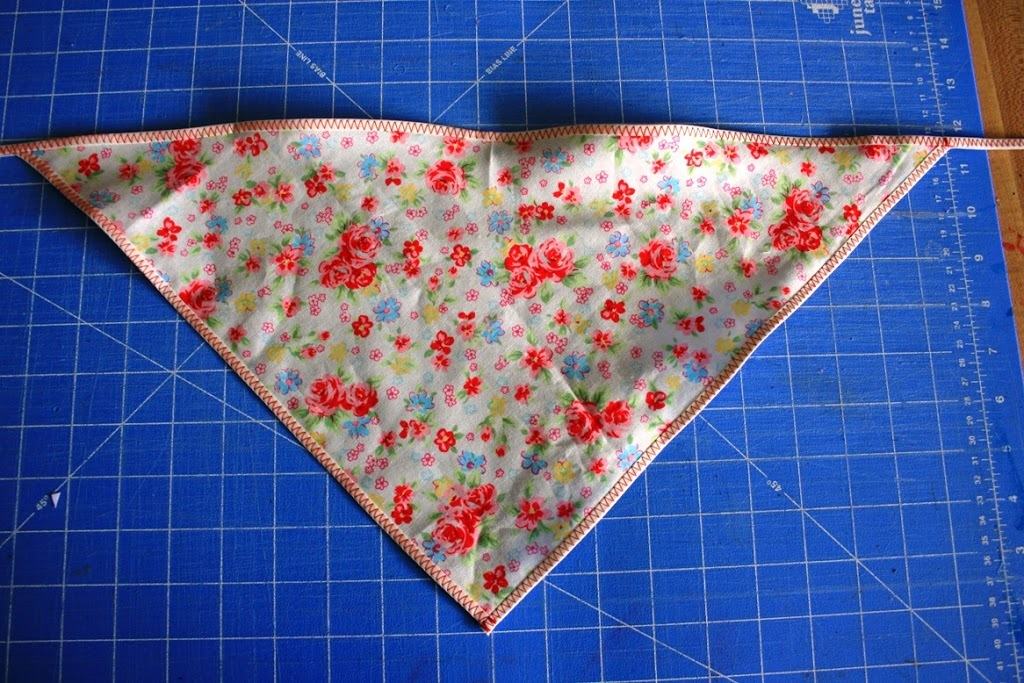
Step 1: Cut the square fabric in half from corner to corner. Now you have created the base for two kerchiefs.

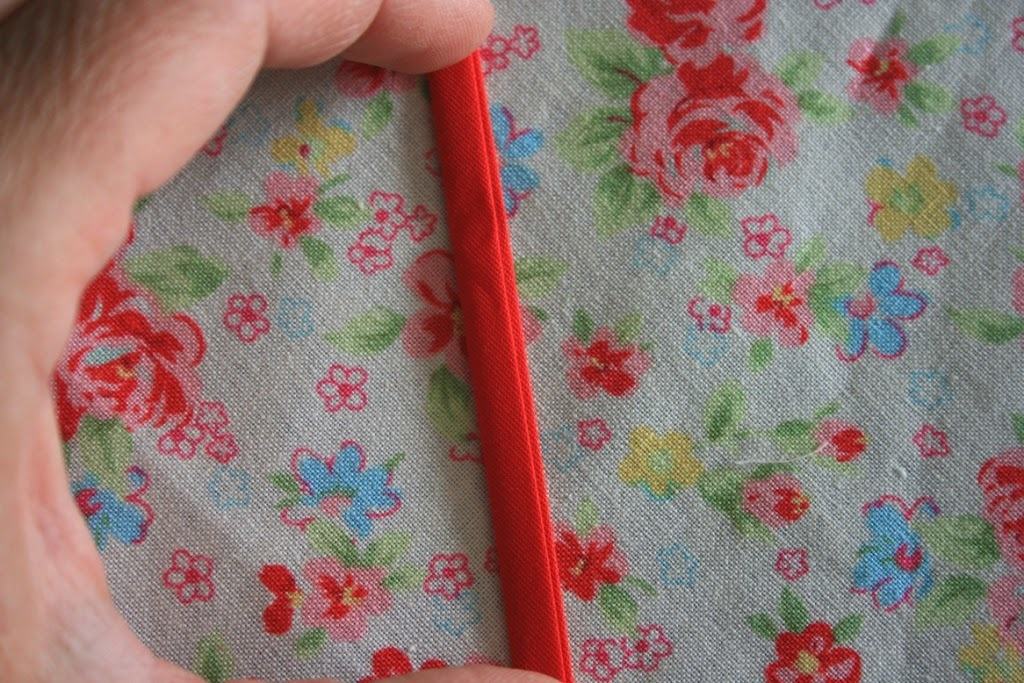
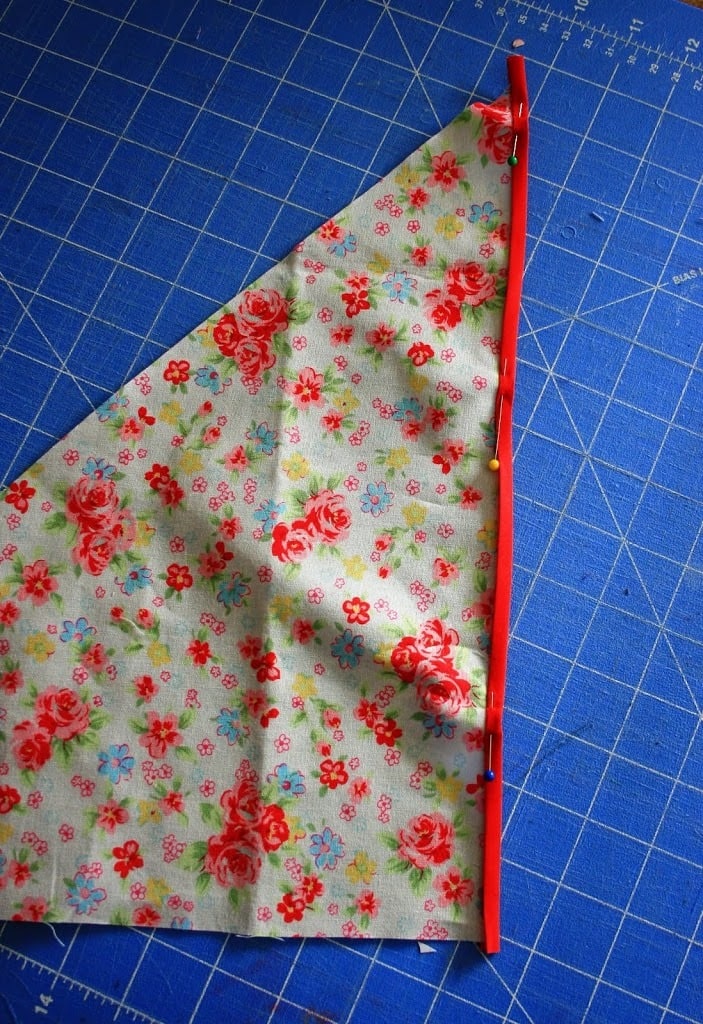
Step 2: Notice that when folded the bias tape has one side that is a tiny bit shorter than the other side. (top photo) Make sure when pinning that this short side is on top. Pin one 14.5 inch piece of bias tape to one short side of the triangle fabric enclosing the fabric edge inside the fold of the bias tape. It will be a bit longer but that is okay, we will trim it after sewing.

Step 3: Using a straight or zigzag stitch sew along the very edge of the bias tape closest to the fabric. (see photo above) Trim edges even. I am showing a straight stitch in my photos.

Step 4: Pin and sew the other 14.5 inch piece of bias tape to the other short side of the triangle fabric piece. Trim edges even.

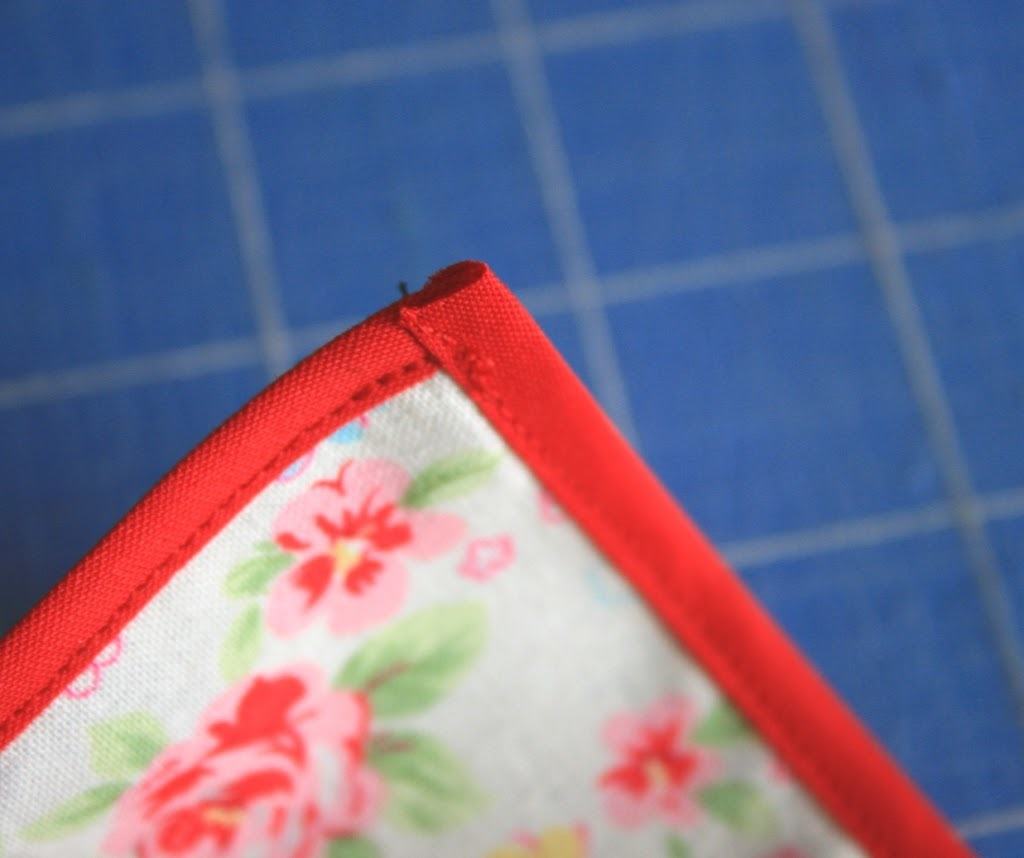
At this point with my beginning sewers I don’t worry about making sure the point of the triangle is totally enclosed. That is a bit too hard for little fingers to manage so we just leave that edge raw. (see photo above)

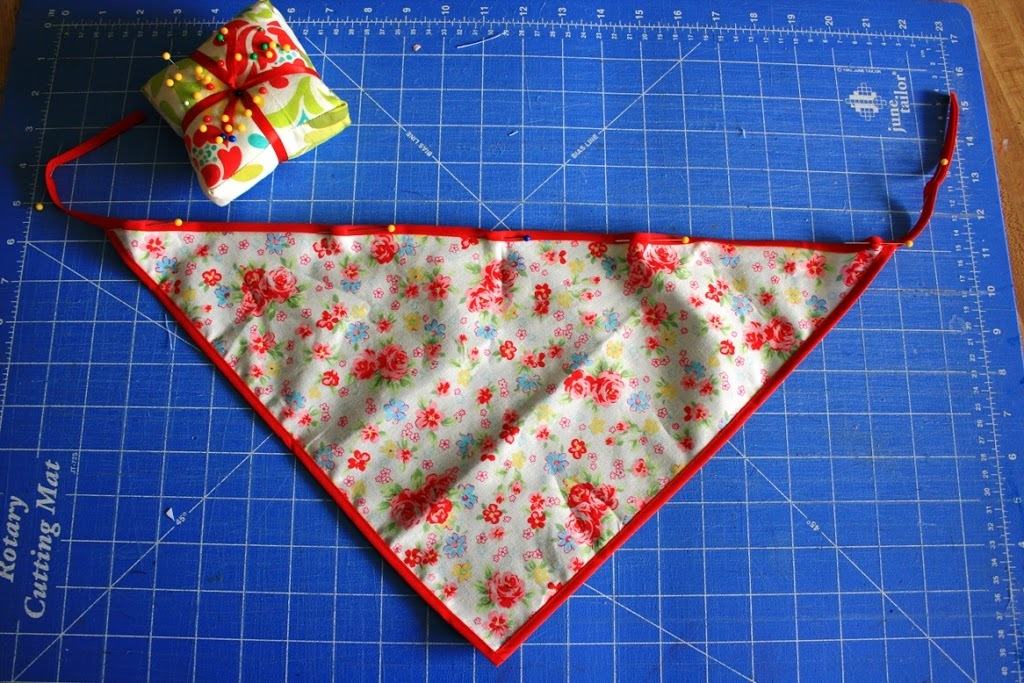
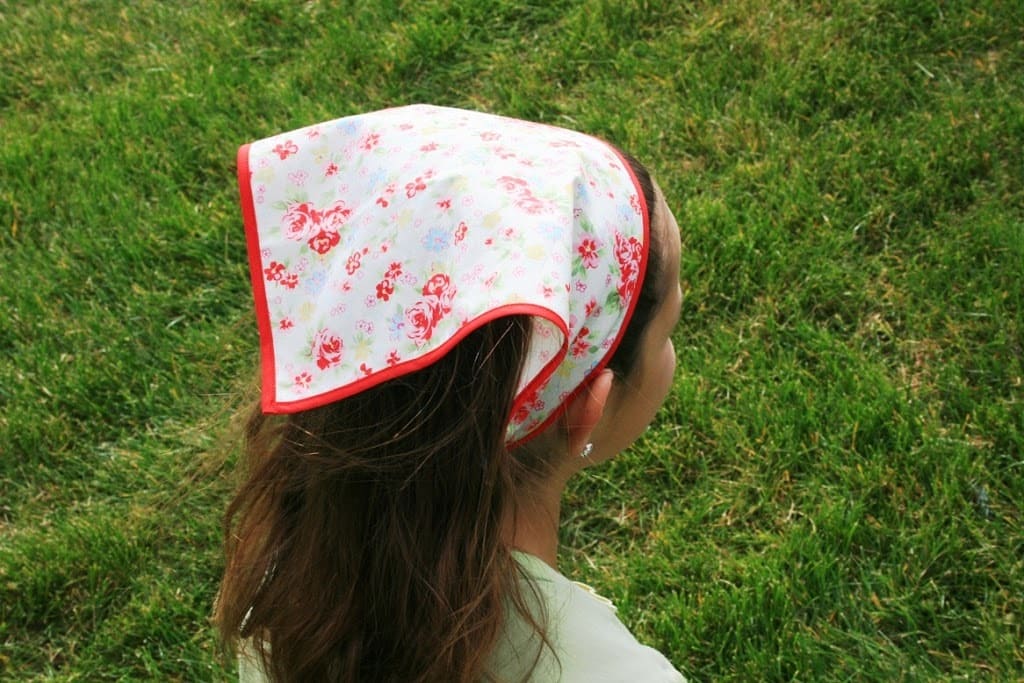
Step 5: Match the center of the 30 inch piece of bias tape to the center of the long edge of fabric. Pin the bias tape along the edge working from the center out. You will have about 3 inches of over hang on edge side. You’ll need those to tie the kerchief. Sew as you did the short edges.

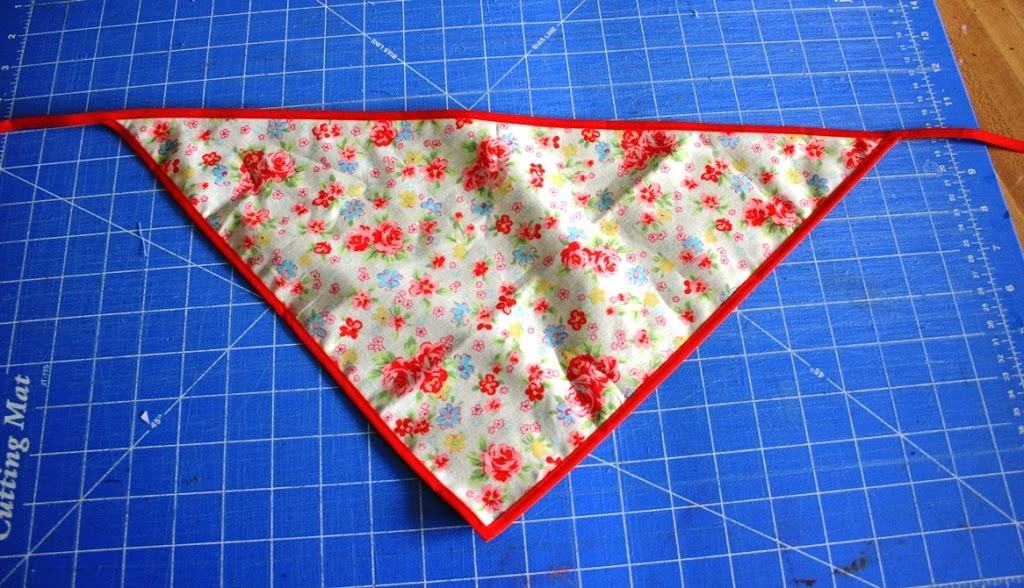
That’s it! You know have a cute kerchief to wear while playing.

The photo below shows one made with the other triangle of fabric for a younger sister using a zigzag stitch with contrasting thread.

Cocoa Signature with Candy 2 © 2007-2011 Chocolate on my Cranium, LLC all rights reserved

© 2007-2013 Chocolate on my Cranium, LLC all rights reserved

Share this:

  • Click to email a link to a friend (Opens in new window) Email
  • Click to print (Opens in new window) Print
  • Click to share on Facebook (Opens in new window) Facebook
  • Click to share on X (Opens in new window) X
  • Click to share on Pinterest (Opens in new window) Pinterest
  • More
  • Click to share on LinkedIn (Opens in new window) LinkedIn
  • Click to share on Reddit (Opens in new window) Reddit
  • Click to share on Tumblr (Opens in new window) Tumblr
  • Click to share on Pocket (Opens in new window) Pocket

Related

Filed Under: Home Making, Sewing

Comments

  1. Yohan says

    May 31, 2011 at 6:59 pm

    These are adorable! I didn’t know the man on the cover of the usu magazine was your uncle! I read the article last week and was very impressed!

    Reply
  2. Ginger says

    May 31, 2011 at 7:40 pm

    I used to wear those in the 70s. Ha It’s funny how things go around again and again.

    Reply
  3. LeAnn says

    June 1, 2011 at 8:59 am

    This is a great tutorial and the girls are adorable.
    Blessing to you!

    Reply
  4. Jocelyn Christensen says

    June 2, 2011 at 5:46 am

    tHIS is so timely…Just yesterday, Scarlett brought a scarf to me and started having me tie it for her! This would be a fun project to do together…if I wasn’t in such a fog from allergies/sickness…we’ll see what we can do! Thanks! (Oh and those printables are awesome!) Thanks!

    Reply
  5. Dana - "Mickey and Grace" says

    April 29, 2012 at 11:24 pm

    Perfect…my girls will love this little project!

    Reply

Leave a ReplyCancel reply

This site uses Akismet to reduce spam. Learn how your comment data is processed.

Hello, I'm Montserrat. I'm a farmer's wife, mother of eleven, homeschooler, chocoholic, music lover, and like to play a good game of Scrabble. You can read more about me here. . .

You'll find a little bit of everything on this blog. It's my place to share all the ideas, activities, crafts, and resources that I have gathered and tried over a number of years. Feel free to browse around using the menu up top or doing a search in the box below.

Enter your email address to subscribe to this blog and receive notifications of new posts by email.

Archives

May 2011
S M T W T F S
1234567
891011121314
15161718192021
22232425262728
293031  
« Apr   Jun »

Return to top of page

COPYRIGHT © 2025 Montserrat Wadsworth at Cranial Hiccups • Lifestyle Pro Theme on Genesis Framework

[ Placeholder content for popup link ] WordPress Download Manager - Best Download Management Plugin