My kids LOVE art. Sometimes it is hard to find good projects that appeal to all of them because their age and skill levels vary. Here’s one art project that everyone enjoyed!
Materials Needed:
white paper
black marker (or black crayon)
3-5 crayons or colored pencils that go well together
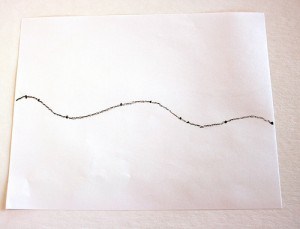
Start by drawing a “hilly” line across your paper with the black crayon. Then place dots on the line at various intervals. The overall finished effect is best when some dots are closer together and others farther apart from each other.
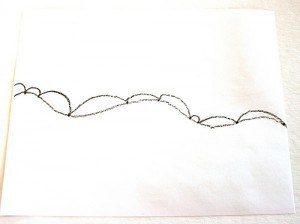
Starting at the edge of the paper above the line, connect the dots going across making ‘bumps’ or ‘frowny mouths’ between the dots. Do not cross the line!
Do the same below the line only make ‘smiley mouths’ or ‘u’s to connect the dots. Don’t you like our technical terms?
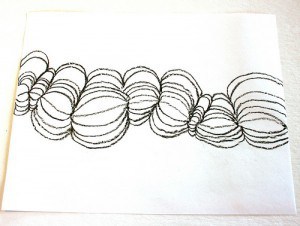
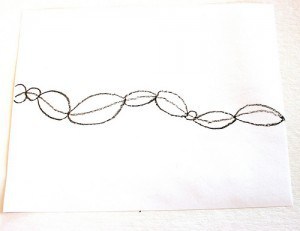
Keep adding more lines until the paper is filled. Do not ever cross any lines. Obviously you won’t be able to connect the dots every time. Just follow the same pattern or series of bumps or U’s varying the spacing between the lines.
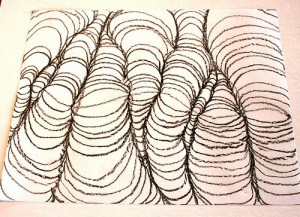
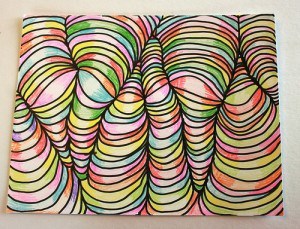
Tada! A really cool looking 3D illusion!
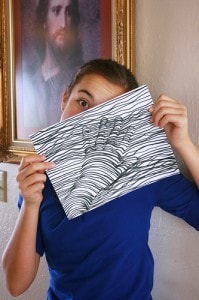
Here’s Cookie with one she created using a black marker.
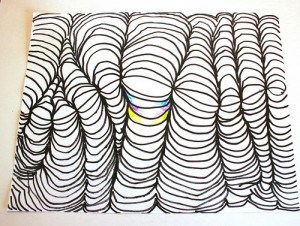
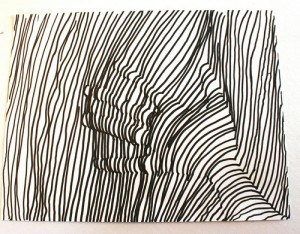
You can leave them like this or go a step further and color them in. To keep the 3D effect we learned about shading. See how the lines appear darker at the pinched edges where the dots were? Using only 3-5 colors total, color in each space by making the color darker at the pinched edges and lighter in the middle.
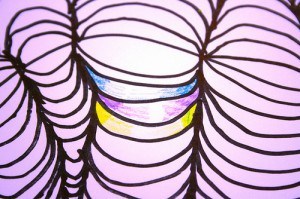
Here’s a close up to get a better idea of what I mean.
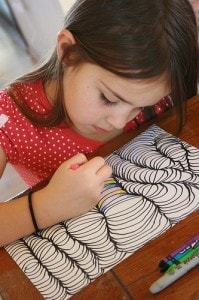
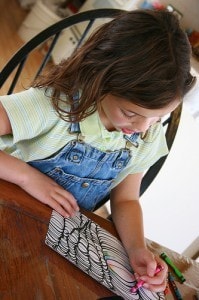
and color some more. This part usually takes several days for the younger ones.
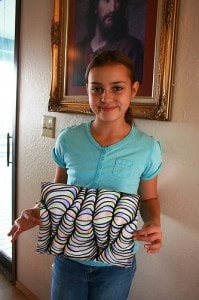
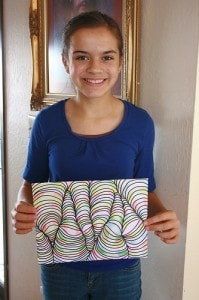
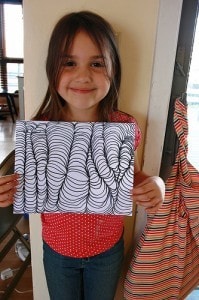
Truffle (top) and Brownie (bottom) with their creations. We originally found the instructions for the 3D line drawings here.
Now how about creating a 3D hand?
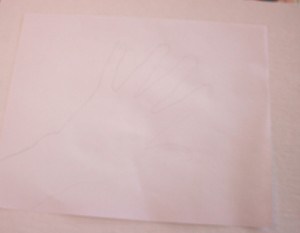
First place your hand on the paper at an angle, then trace lightly with a pencil. (This photo is blurry as the camera couldn’t pick up the light pencil line so it wouldn’t focus!) If you look close there is a hand on there!
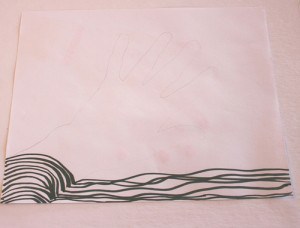
With a black crayon or marker (fine point markers work best) freehand draw straight lines across the paper, except when you get to a pencil line “bump” the line until the next pencil line and then continue going straight.
The closer the lines are the better the illusion. See more 3D hand illusions here.
I’ve also found this is a good “keep the kids quiet during church” activity. 🙂
 © 2007-2011 Chocolate on my Cranium, LLC all rights reserved
That is SUCH a good idea! Thanks for sharing. I’ll have to try that with my kids soon. Wow, Brownie is a gorgeous girl. When someone asks why you keep having more kids have you ever responded with, “Well, we just make such cute kids that we figured we’d keep going!” ( :
That is SUPER cool. I think I know what I’m doodling next time I’m in a meeting…I mean…. 😉
What a cool idea! Thanks for posting it. I think we’ll try this out for art time next week.
We are so doing this!!! Thank you for finding and sharing this with all of us. I checked out his blog a little and they are celebrating “Artober”. How fun is that? Seven days into the month isn’t too late to get on the celebration right? 🙂
Thankyou. I am usually intimidated by art and was thrilled to see a simple project requiring very little in supplies and/or aptitude:)
What a fun idea, thanks for sharing it. We’re going to have to give this a try soon!
I remember making this style of art when I was in third grade. We had just learned to write our names in cursive and so our teacher had us write our name across the paper to get started. I remember how proud we felt that we could write in cursive and make art out of it. She displayed all of our pictures in the hall. 🙂
These are SO COOL! Can’t wait to try one. Thanks for sharing!
Brilliant art project ~ absolutely gorgeous and your son’s hand is really clever. We do art in fortnightly batches (two consecutive Wednesdays, alternating with cookery), so I think this will be a perfect project to stretch over the two weeks and hopefully will work for everyone, from 4-14! Might try some other Bridget Riley techniques with the older ones too…
Hello from Nashville,TN…this is Mr.E from Art With Mr. E! I saw your address on my blog site meter and thought I’d say hey!!! If you ever have art questions about anything from my blog..please contact me!! artwithmre@yahoo.com blessings!!!
We did some! http://frog-photoblog.blogspot.com/2011/10/atw-tuesday-brought-to-you-by-op-art.html