If there is one thing I am not ashamed we have a lot of, it is bags. The more the merrier! When ever we see fabric with cute prints we always say, “That would make a cute bag!” and so we usually make one.
And since we have a lot of girls each of us have various colored bags of different sizes for all types of uses.
Here’s a very basic tote bag that is good for beginning sewers. (I’ve pulled this from my archives.) We call it
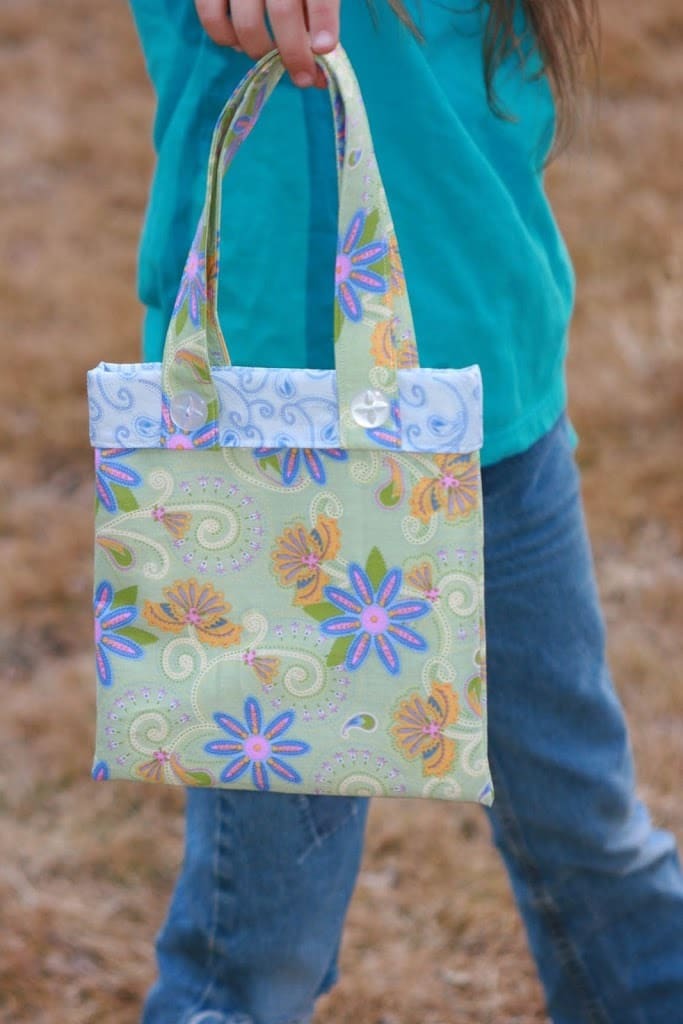 We are love the contrasting fabric at the top and the buttons.
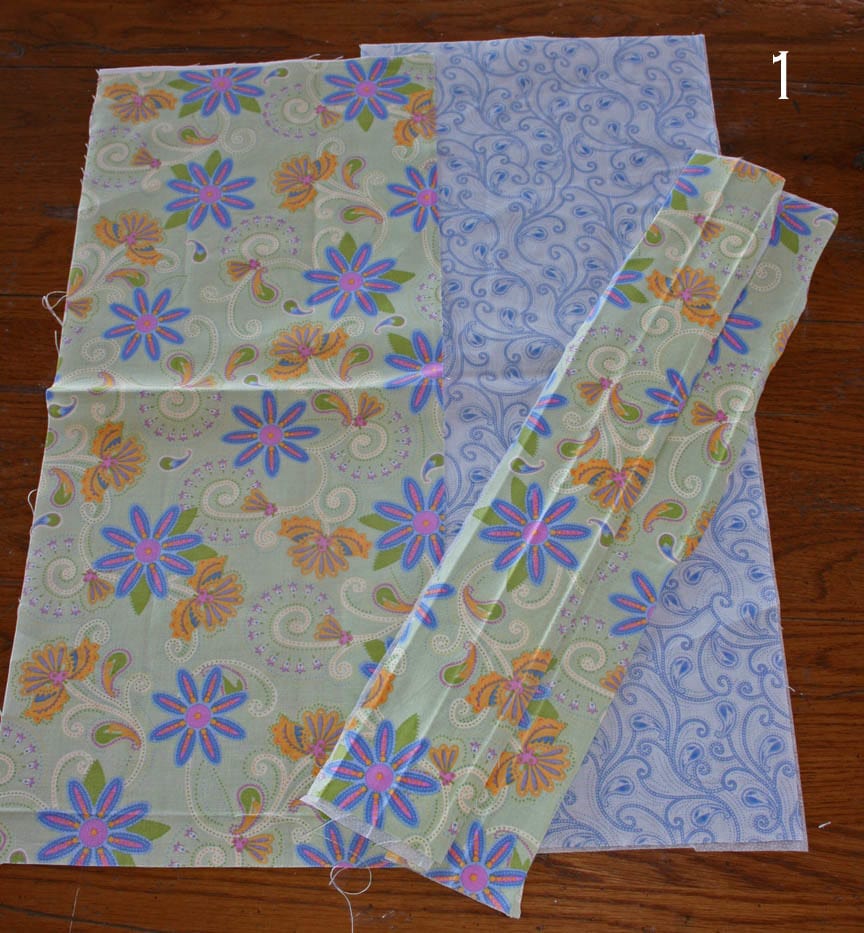
Materials: (see photo 1)
2 pieces coordinating fabric cut 9 x 22-24 inches ( I used the width of the fabric from selvage to selvage). Just make sure they are both the same length.
2 pieces from the main fabric 3 x 18 inches for handles.
2 pieces fusible pellon 3 x 18 inches to line the handles.
1 piece fusible pellon 9 x 22-24 inches to line the bag.
All sewing instructions assume a 1/4 inch seam allowance unless otherwise noted.
Step One: Fuse pellon pieces to back side of handle fabric and lining fabric.
Step Two: Iron each handle in half lengthwise wrong sides together. Fold and iron each long edge in 1/4 inch. (see photo 2)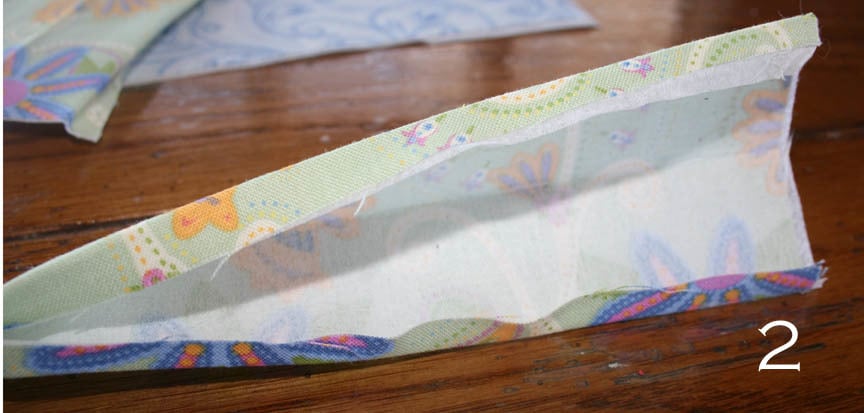 Step Three: Fold the handle in half wrong sides together tucking the 1/4 inch folded edge inside. Sew down 1/8 inch away from edge to create the handle. Top stitch 1/8 from edge on the other long edge. (see photo 3)
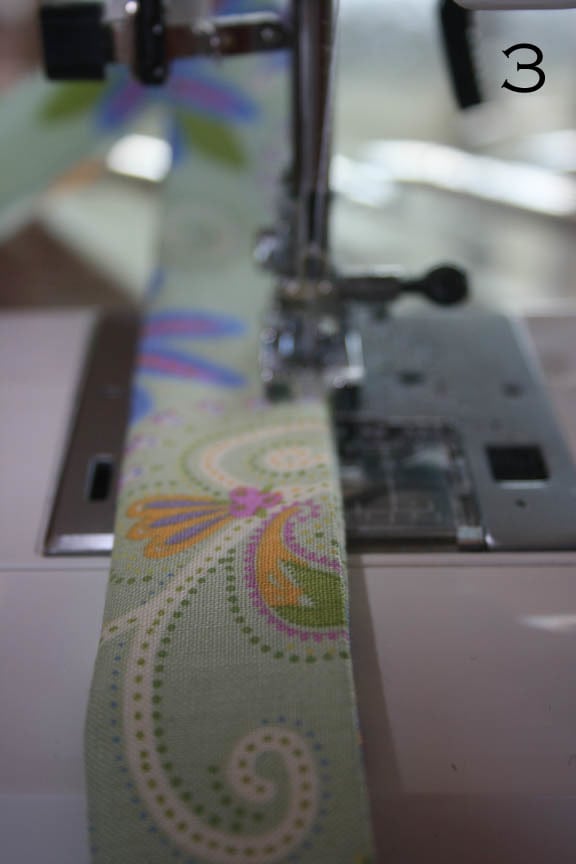 Step Four: Fold the main fabric in half (bring 9 inch edges together at the top) right sides together. Sew down each side. Do the same with the lining fabric. (see photo 4)
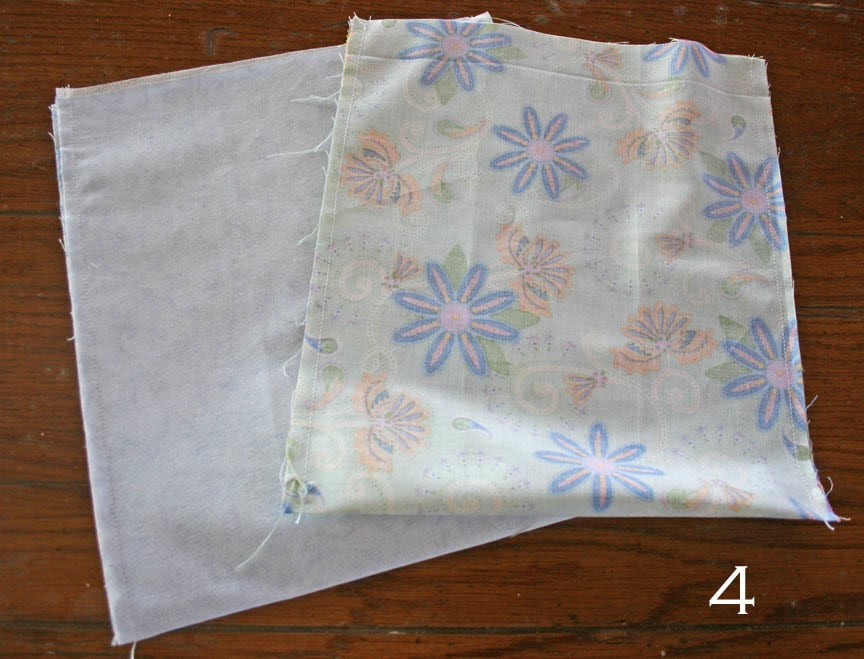 Step Five: Turn lining right side out. Pin handles to each side and sew. No precise measurements here. Just make sure they match up on both sides. (see photo 5)
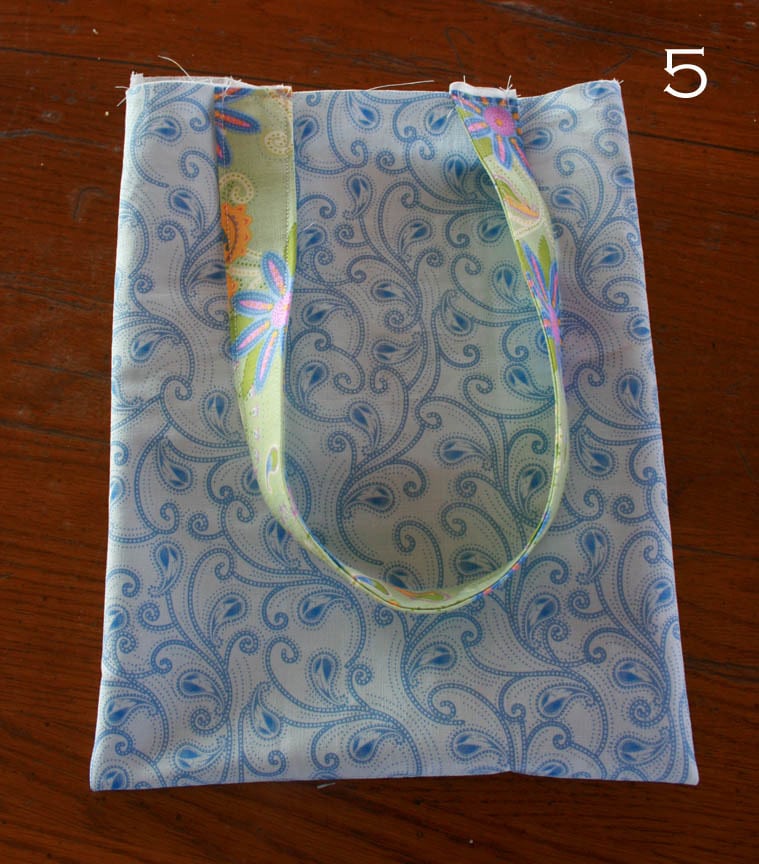 Step Six: Stuff the lining (still right side out) into the main fabric which is inside out. (see photo 6) Match top edges, pin, and sew leaving a three inch opening to turn the bag right side out.
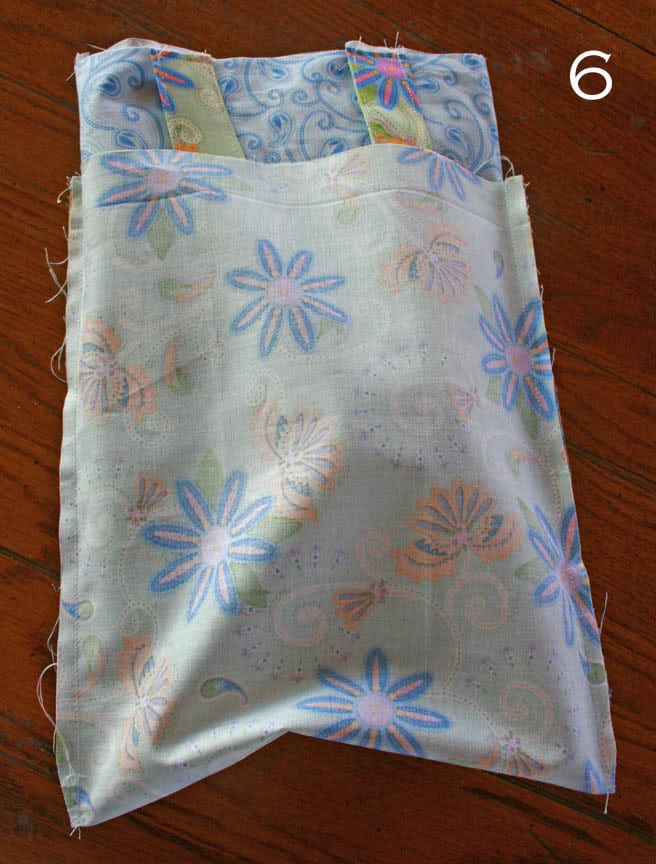 Step Seven: Turn bag right side out by reaching into opening and pulling the fabric out.(see photo 7) When bag is turned right side out stuff lining into main fabric and pull up handles. Press top edge making sure to press the opening edges into inside of bag.
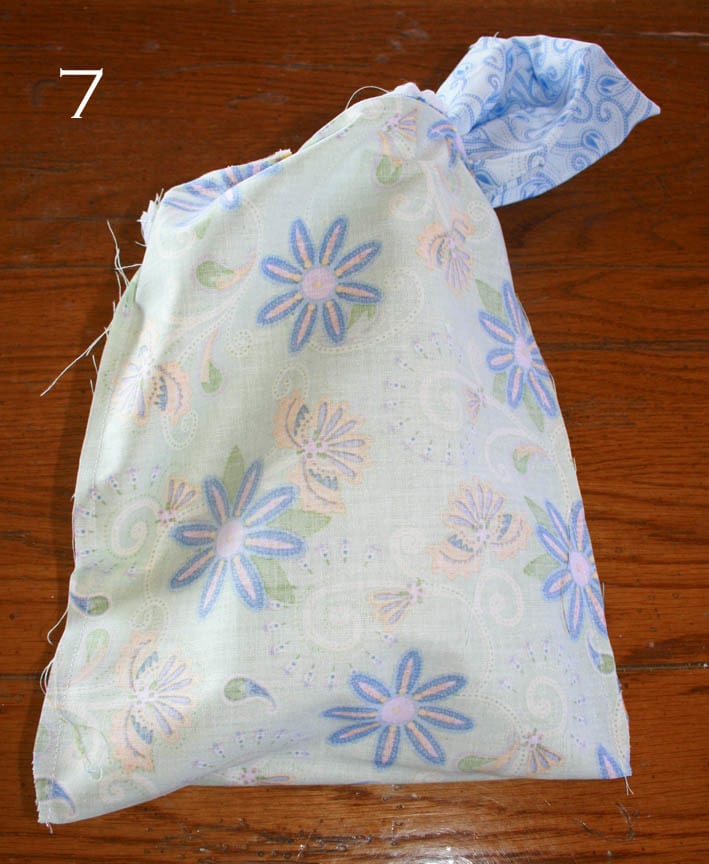 Step Eight: Topstitch 1/8 inch from top edge all around the top of the bag. (see photo 8)
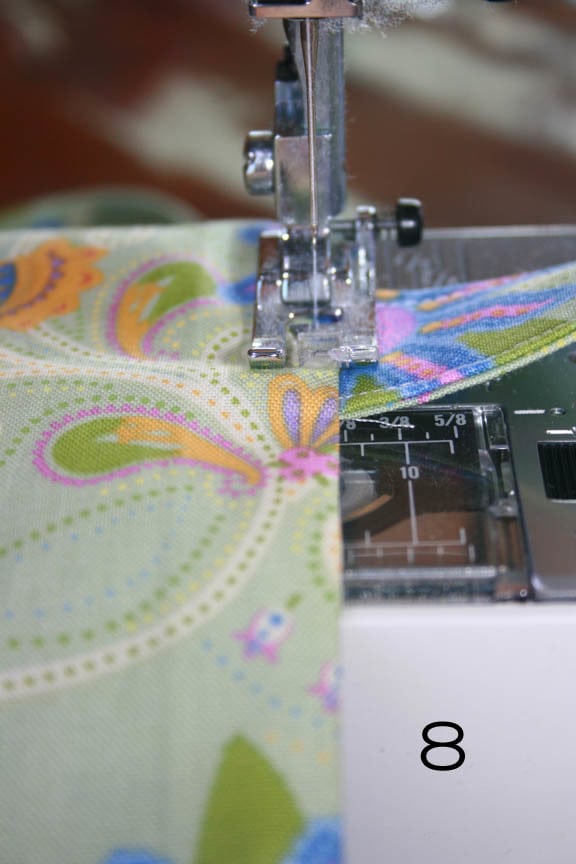 Now you have a simple bag that we are going to embellish to up the cuteness factor.
 Step Nine: Fold the top edge of the bag down about 1 1/2 inches all the way around. Press. (see photo 10) You can top stitch again 1/8 inch around the top edge if you want. I didn’t.
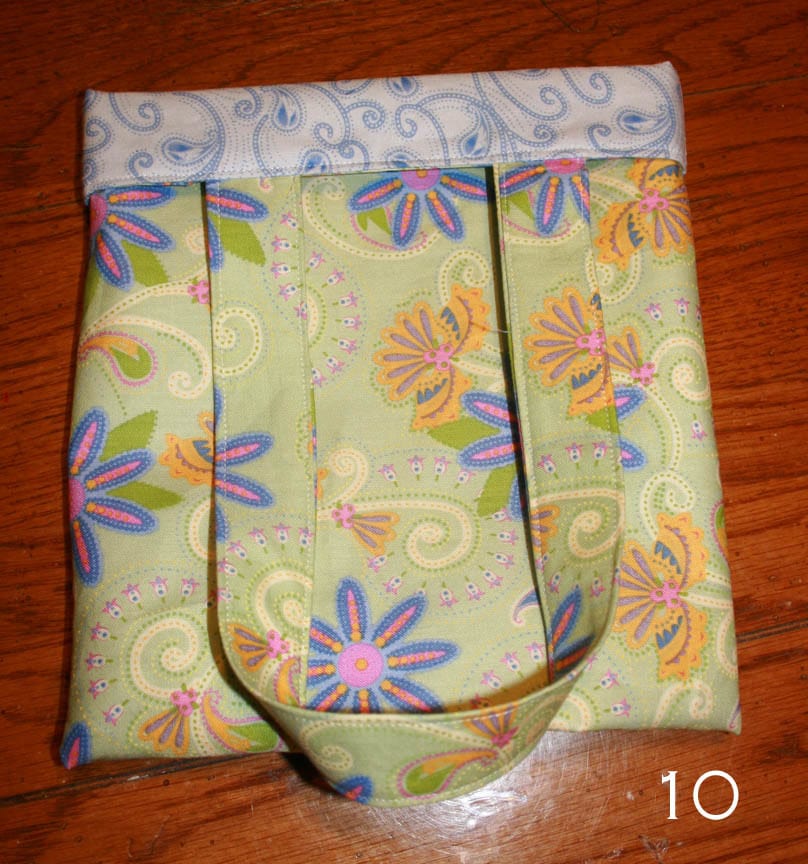
Step Ten: Now fold the handles back up. Tack them down by sewing on a button. (see photo 11) You’re done! Wasn’t that an easy way of creating a coordinating stripe without having to do any extra measuring, cutting, and sewing? The finished measurements are about 8 inches wide by 9 – 10 inches tall.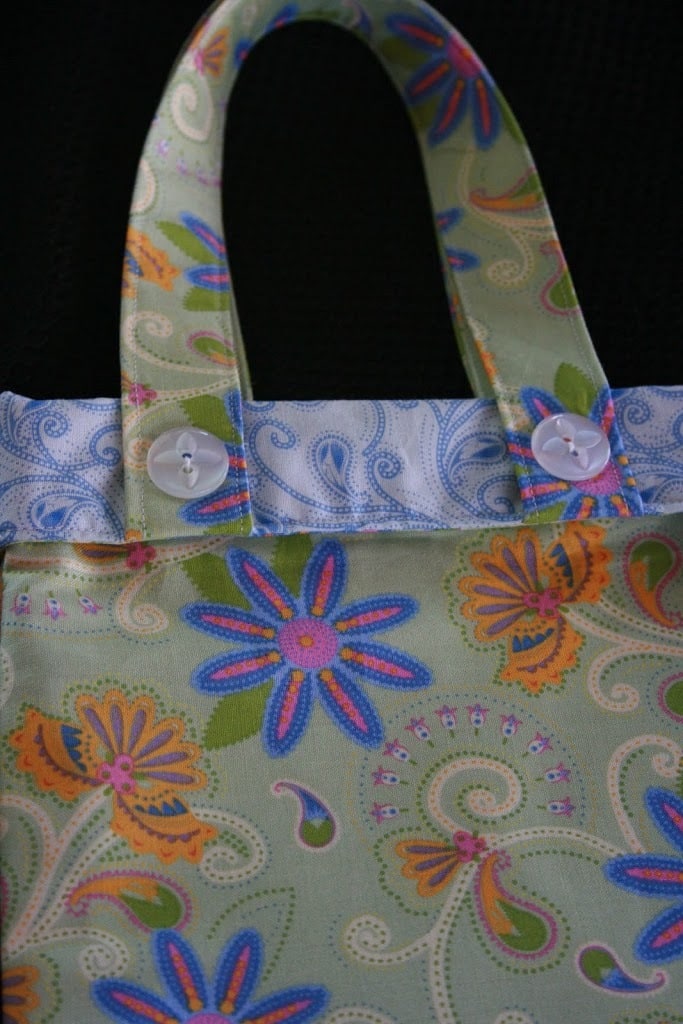
I’d love to know if you make any bags of your own. I continue to get a great response from my Reversible Handbag Tutorial. It’s terrific knowing others are out there adding their own touches to the basic bag.
Have fun creating!
Here’s another tote bag tutorial from several years ago.
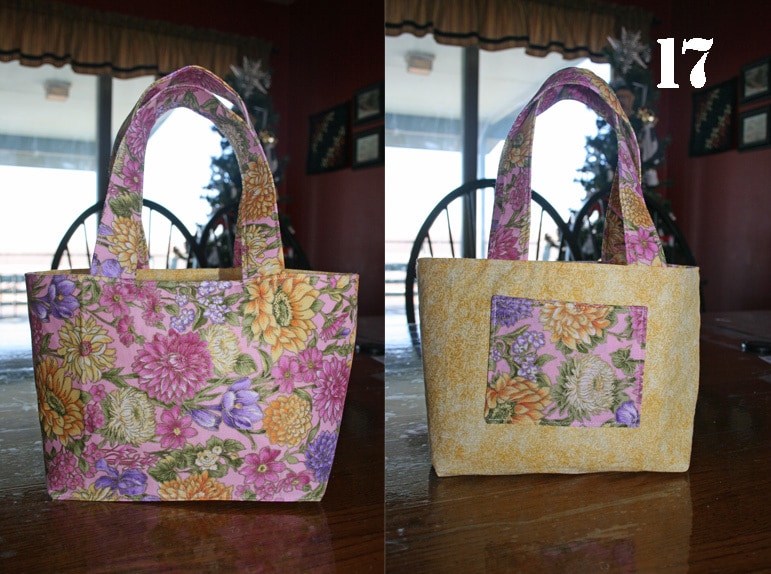
Reversible Handbag or Scripture Tote
 © 2007-2011 Chocolate on my Cranium, LLC all rights reserved
Thanks for the reminder of this cute little style. I might have to make a few for small people Christmas gifts. I am really trying to work hard this month and up until Thanksgiving to have all the Christmas shopping done.
How cute! Thanks for sharing how to do it. 🙂
I can’t figure out how on earth you get any sewing done! And how you keep little ones out of the scissors and pins and such. ( : I appreciate all your little tutorials and the ideas for teaching sewing to beginners. I learned to sew at school first and then my mom helped me later with prom dresses and such but I wish I’d learned it all at home with my mother. I hope to do that with my kids- boys and girls!
My daughters have been asking for new scripture tote bags. Thankyou for posting the bucket bag tutorial. I now have the directions to get these Christmas gifts in the works:)
I am not good at sewing in a straight line, although my mother tried really heard to teach me. But I was able to make one of these for my 2 year old to carry her Book of Mormon, coloring book, crayons and snack to church. She was so excited and has not put it down since I finished it! Thanks for helping me work on my straight lines and for making my little girl’s day. Now my big girl wants one to replace her church tote.