Every year, no matter what we are doing for Christmas school, we always study the names of Christ as we countdown to Christmas. Did you know there are over 200 names that He is known by in the scriptures? 200! If you were to study a different name every day in December it would take you over 8 years to get through them all.
This year we decided to decorate our Christmas tree with simple red and gold balls and homemade white birds (doves). The birds each bear a name of Jesus on them.
We used two different mediums for the white birds. We first tried Crayola’s Model Magic. Have you ever used that stuff? It’s like playing with half melted marshmallows, only it doesn’t stick to your hands. Weird feeling but fun! It is pure white. We also used oven baked clay, which is much faster than waiting three days for the Model Magic to dry but is off white in color. We decided not to paint our birds.
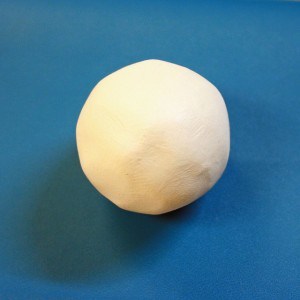
Roll the clay into a ball about the size of a walnut.
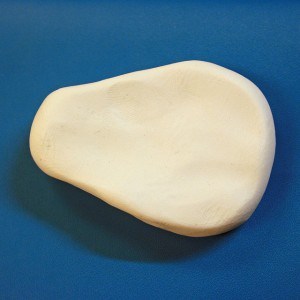
Slightly flatten the ball and make it a tear drop shape by pinching one end.
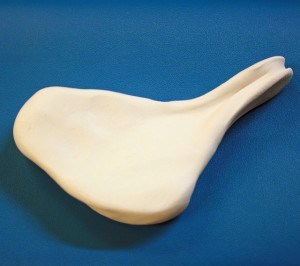
Pinch and pull the side opposite the small part of the tear drop to create the birds tail.
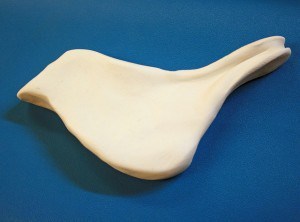
Pinch a small beak from the head.
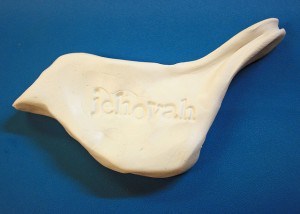
Use small letter stamps to stamp the names of Christ into the clay.
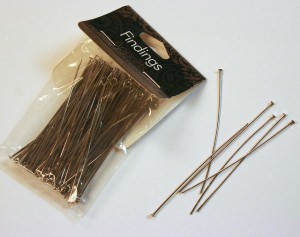
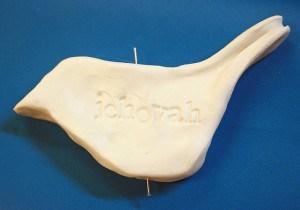
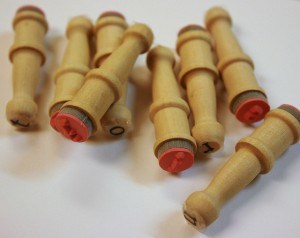
If using oven bake clay insert a metal jewelry finding (straight metal rods about 1 1/2 inches long) before baking. If using Model Magic wait at least a day for it to harden a bit before inserting the metal rod.
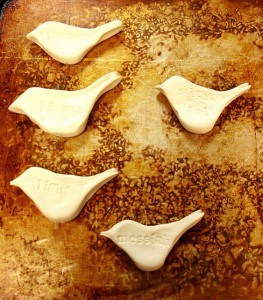
Once you have a pan full bake the oven bake clay at 275 – 15 minutes for each 1/4 inch thickness. We only had to bake ours for 15 minutes. Or if using model magic impatiently wait for three days for it to sufficiently harden. (Don’t laugh at our ramen burnt stained pan! A daughter who wishes to remain nameless was trying to toast some ramen for a salad but left them in a bit too long and they caught on fire. Never a dull moment around here!)

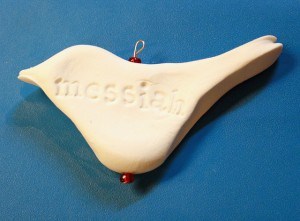
One baked (or dried) Pull the metal rod out and add one or two decorative beads. Push it back in and add another bead to the top before using pliers to make a loop at the end of the metal rod.
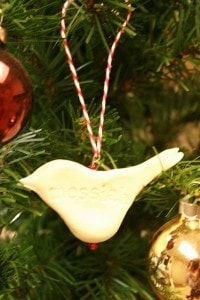
Tie string to the loop and hang!


And by all means please let all of your children help! I think these birds they made are beautiful even if they aren’t “perfect.”
What a great idea! I want to see pictures of your finished tree. Please:)
I love them. I think we’ll have to do that one year.
My recommendation for clay is Sculpey Ultra-light. It’s an oven-bake clay that is very soft and easy to sculpt, and it’s white. We used it to make some ornaments last year, and they turned out really nice.
I love His name “an high priest of good things to come.” I don’t think it will fit on a bird…but I really loved Elder Holland’s talk in ’99 about that one. 🙂
These are so wonderful. Thanks for sharing.
Beautiful!
I love salt dough, possibly because my Mom always made ornaments with it when we were kids and that is what I am used to. 🙂
We are going to make those today I think…I have all the stuff…
What a lovely idea! We didn’t do a tree last year, and we’re not doing one this year either, but these would be a great addition to the greenery we have draped around the house, and the wreaths.
Cinnamon dough clay could also work for this, and it’s very-low-temp bakeable and good smelling. Might need to do something like touch the letters with gold paint to make them stand out after…
Also, Meg, too funny of the “high priest of good things to come”… might need a bigger bird for that one.
Those are so wonderful!
Thanks for the great tutorial. I would love seeing a picture of the tree. Blessings to you for a great idea.
Oh, I love this! Thank you!
I think the burnt pan adds an “old-world” look to the photo. Love the ornaments! What a great way to remember what Christmas is all about.
Wow, this is a really neat craft. I love the way they turned out. I’m thinking I should do this with my kids!
Love it love it! We need more decorations and I wanted to do something like this anyway. I’m saving this idea for later! or sooner…