Pin It
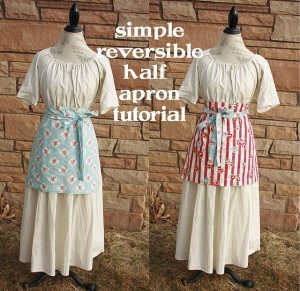
The first apron in our apron tutorial series is a basic half-apron. It is simple to sew even for beginning sewers. It is also reversible but without a waistband. Make sure to read the variation that can also be done with this apron after the basic tutorial.
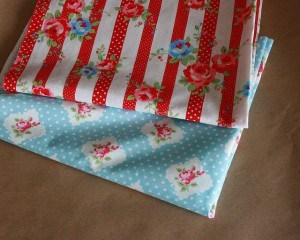
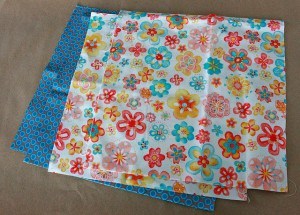
Supplies: {this will actually make two half aprons}
3/4 yd each two coordinating fabrics
*Note: All seams are 1/4 inch
Step 1: Cut six inches off one end of each piece of fabric. Then cut each six inch piece in half so you have two long three inch pieces. These will become the ties. {I forgot to take a picture of this}
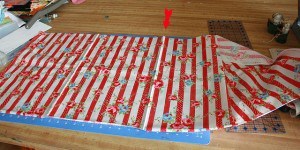
Step 2: Trim the remaining fabric so each piece is 18 inches long. Open up fabric and cut down the fold.
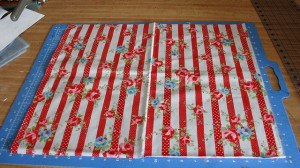
This creates two pieces about 18×22 inches.
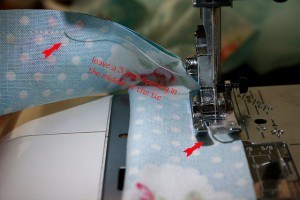
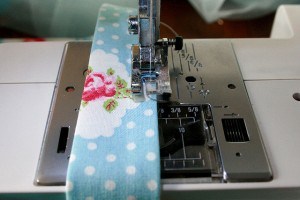
Step 3:Fold the each tie right sides together {they are now 1 1/2 inches wide and about 42 inches long}. Beginning at one end, sew across the bottom and down the side. Somewhere in the middle of the tie leave a 3 inch opening for turning tie right side out. Through all my years of sewing I have found it is way easier to turn a skinny tie right side out when the opening is in the middle rather that at one end. Repeat with other tie.
Step 4: Clip corners and turn tie right side out. Below is how I do it.
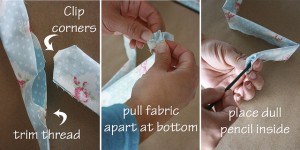
At one end grab fabric on each side and pull apart. Stick a blunt pencil or end of a paintbrush into the end. Starting pulling the fabric down around the brush while pushing the brush into the tube.
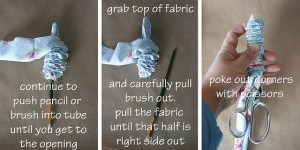
Continue to push the pencil, or in this case paint brush, into the tube until you get to the opening. Grab the fabric and carefully pull the brush out. Keep pulling fabric until that half of the tie is right side out. Repeat with the other side. Using scissors push corners of ties out so they are crisp.
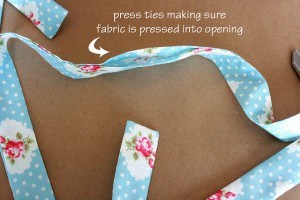
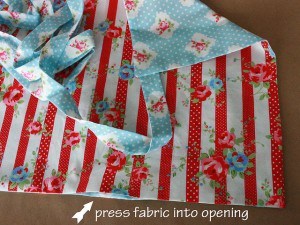
Step 5: Press ties making sure fabric at opening is pressed down into opening.
Sew opening closed by stitching close to the edge.

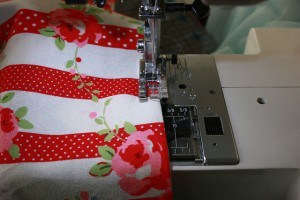
Step 6: Lay one piece of apron fabric right side up with the 18 inch edges at the sides. Pin ties at sides 1/2 inch from top edge. {see photos above} Sew ties to apron piece.
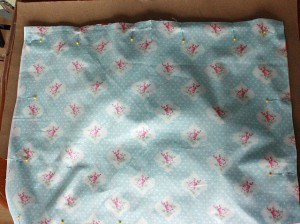
Step 7: Place apron piece with ties right side up. Place other apron piece on top wrong side up so the apron pieces are right sides together. Pin making sure all ties are in the middle. It would be terrible to sew a tie to the bottom edge or something!
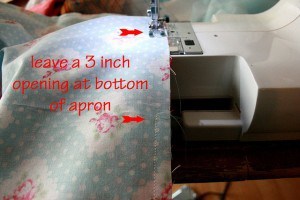
Step 8: Sew all the way around the apron leaving a 3 inch opening at the bottom. {I usually start at the bottom and sew around stopping about 3 inches from where I started}
Step 9: Turn apron right side out through that opening you left.
Step 10: Press apron making sure corners are pointy and fabric at opening is pressed into opening.
Step 11: Topstitch 1/8 inch from the edge all the way around the apron sewing the opening closed in the process.
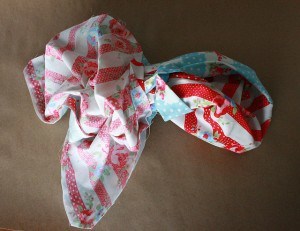
You’re done!
Variation:
Follow step 1.
Instead of steps 2 cut each fabric piece into four 11 inch squares.
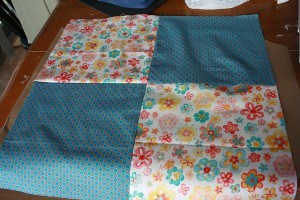
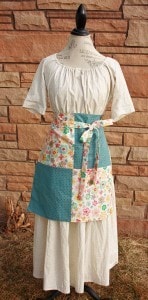
Sew them together to create two panels like that shown above. Follow the rest of the instructions as given.
We have so many aprons already I decided I would give away each apron shown in the tutorials in the coming weeks. Enter to win this week’s aprons through the rafflecopter below. Winner will be announced on next week’s tutorial.
a Rafflecopter giveaway © 2007-2011 Chocolate on my Cranium, LLC all rights reserved
I love the turquoise fabric. Where did you find that?
Isn’t that pretty? It’s from Anna Maria Horner’s Loulouthi line. It’s called Hugs and Kisses and its the ocean color scheme. I buy all my fabric from Marie Madeline Studio online as the nearest fabric store is 3 hours away (Joann’s).
You can buy that turquoise fabric here: Marie Madeline Studios
Very cute and simple! ~Kathy
So cute! Thanks for sharing and for giving me a chance to win one.
I’ve never attempted aprons but I’ve always wanted to try.
You know I love aprons, especially yours!
Clever!!
That is such a cute apron. I bet my 9 year old would like to make one.
Those are so cute! And you did a great job making it look easy.
Love the fabric you chose! I can see myself making one of these.
I LOVE IT! Especially the patchwork one.
super cute, super fun…gonna do this!
You know I love your aprons…! That one with the squares would look lovely on me, just sayin! 😉
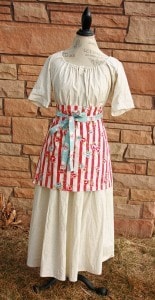
I am also in love with the muslin dress. I would love to dress like that to just be around the house! Sometimes I long for the early pioneer days for the way they would dress.
The dress is my daughter’s Easter dress from last year. It is also her mannequin. She got it for her birthday and LOVES dressing it up!
I know it’s even simple enough for me to do! I just have to decide what fabric I like enough to use, but not enough to stain. The dilemma! Thanks for the give away chance. I promise not to stain it if I win….
So cute!
So cute and fun! Love the tutorial – be fun to make with my girls
Cute apron, I love how easy it would be to make.
Makes me wish I could actually sew.
Such cute aprons! 🙂
I have a sewing machine, but haven’t used one in Years. You and your girls have inspired me to learn how to sew again! 🙂
Cute! I love the colours you chose.
Really cute! what a great bridal shower gift this would be!
I’ve been wanting to make a new apron or two. I’ve also had thoughts of making aprons to have on hand as gifts. Thanks for sharing!
yay!! i’m so glad you are posting sewing tutorials!! these aprons are adorable. hopefully, my baby cooperates and i can whip one up this afternoon.
I love these aprons!
Cute aprons!
These are super cute aprons! Love em!
I like your model too. I’m thinking that gown would be a great, easy, modest nightgown if you ever want to share that tutorial 🙂
My son and daughter asked me to make them each a half apron and I used your pattern and instructions (with a few personal modifications). Your instructions were clear and easy to follow. Both aprons turned out perfectly.